How to Deploy a Vuetify Application with Nginx on Ubuntu 20.04
Firstly, let’s begin with an introduction Vuetify.
Components are an essential aspect of contemporary front-end development. A component typically consists of two sections, making it a crucial element.
- The logic of the component: what the component can do.
- The template: how the user will interact with the web application.
Writing modern and robust web applications becomes easier when you structure your app into components. Developers commonly utilize JavaScript frameworks like React and Vue.js for developing various types of components.
One drawback of these frameworks is that you have to create numerous components, including basic ones like an input text field. To address this issue, a more efficient solution is to utilize a components library that offers pre-made components for you to choose and incorporate. By using a components library, you can disregard concerns about CSS design, colors, sizes, and fonts, allowing you to concentrate solely on the functionality.
Vuetify is a Vue UI library that follows the Material Design approach. It offers extensive customization options, allowing you to tailor the components according to your requirements. Additionally, you can establish a consistent component library consistent with your brand style by configuring your own theme.
You will be learning how to develop a to-do application using Vuetify and deploy it using Nginx as a reverse proxy, as it is necessary for hosting a Vue app.
Note
Requirements
To proceed with this tutorial, you will require the following items:
- One Ubuntu 20.04 server with a sudo non-root user. To get started, follow our Initial Server Setup Guide for Ubuntu 20.04. For this tutorial, the non-root user is sammy.
- Nginx installed, which you can do by following Steps 1-3 of the tutorial, How To Install Nginx on Ubuntu 20.04.
- A fully registered domain name. This tutorial will use your_domain throughout. You can purchase a domain name on Namecheap, get one for free on Freenom, or use the domain registrar of your choice.
- Node.js (at least v14.0.0) installed, which you can do by following the How to Install Node.js and Create a Local Development Environment tutorial for your operating system.
- Familiarity with Vue.js, which you can find in the Vue quick start guide and our series, How To Develop Websites with Vue.js.
First, establish your Vue application.
In this phase, you will set up your Vue.js application. Vue.js offers a client that enables you to generate the initial structure of the project, providing an excellent starting point for your development from scratch.
To start off, you can globally install the Vue.js client using the following command:
- sudo npm install -g @vue/cli
Afterwards, verify the version.
- vue –version
At the time this tutorial was written, the most recent version was 5.0.8.
@vue/cli 5.0.8
Once you have successfully installed @vue/cli, you are able to utilize it for generating the vuejs application. In this guide, the application will be referred to as vuetify-meets-nginx-app, though you have the flexibility to modify the name according to your preference.
To generate the app, execute this command.
- vue create vuetify-meets-nginx-app
For this tutorial on Vue 2, select the Default option as it is interactive and offers multiple choices.
Vue CLI v5.0.8 ? Please pick a preset: (Use arrow keys) Default ([Vue 3] babel, eslint) ❯ Default ([Vue 2] babel, eslint) Manually select features
Warning
After the creation of the application, you will observe that Vue has generated various files and folders.
├── README.md
├── babel.config.js
├── jsconfig.json
├── node_modules
├── package-lock.json
├── package.json
├── public/
      ├── favicon.ico
      └── index.html
├── src
        ...
└── vue.config.js
Here’s a concise summary:
- babel.config.js: Babel is a Javascript compiler, and this file defines its behavior. This is necessary to run, build, and generate the final application.
- jsconfig.json: This file is also necessary to compile the app. For example, this file sets the version of the Javascript code to ECMAScript 2009 (ES5), the default one. For more information, check out this documentation.
- node_modules: Directory containing all installed and configured libraries.
- package.json: The main configuration file of your app. You will see here information about the dependencies and the commands available to run or build your app.
- package-lock.json: This is a dump file of all the dependencies used by your app. This file is especially useful if you want to install your app on another laptop or server with npm.
- public: Here, you have the base code that npm run serve command needs to publish your app. It is generated by the @vue/cli command.
- vue.config.js: Vue configuration file.
You will find the following files and directories in the src folder.
src
├── App.vue
├── assets
│ ├── logo.png
│ └── logo.svg
├── components
│ └── HelloWorld.vue
├── main.js
Here is a concise summary:
- App.vue: The Vue.js application’s top-level component. All other components will be inside the component defined here.
- assets: All assets, such as images, CSS files, and fonts, must be placed here.
- components: This contains all the components you create. The @vue/cli command generated one called HelloWorld.vue.
- main.js: The app main file. If you need to configure a library or plugin, this is the file. It also created the Vue app.
You can now go to the vuetify-meets-nginx-app directory.
- cd vuetify-meets-nginx-app
If you want to initiate the application in development mode, simply execute the given command.
- npm run serve
The appearance of your output will resemble this.
INFO Starting development server… DONE Compiled successfully in 27235ms App running at: – Local: http://localhost:8080/ – Network: unavailable Note that the development build is not optimized. To create a production build, run npm run build.
After initiating the development server, visit localhost:8080 to view the application.
Note
If you are using a remote server for the tutorial, you can use port forwarding to view the application in your browser. Make sure that port 8080 is accessible on your server. While the development server is running, open a separate terminal on your local computer and enter the following command to start port-forwarding:
ssh -L 8080:localhost:8080 your_non_root_user@your_server_ip
Once connected to the server, go to http://localhost:8080 in your local machine’s web browser. Keep the second terminal open for the rest of the tutorial.
After completing this step, you have successfully built your Vue.js application. Following this, you will proceed to incorporate Vuetify into your project.
Step 2 involves the incorporation of Vuetify into the Vue App.
In this stage, you will incorporate Vuetify into your Vue.js application.
If you don’t have a component library like Vuetify, you would need to utilize HTML inputs such as div and button, style the CSS for your web application, and construct your own components if you desired some reusable sections. However, by employing the Vuetify library, you simply have to import the desired components and incorporate them into your template.
Vuetify is highly customizable and offers themes, which are CSS libraries containing color palettes, custom screen sizes, and fonts. By configuring Vuetify with a primary color like blue, every instance of the CSS class primary will use that blue color. You can refer to the Vuetify documentation for detailed information about themes. Similarly, the Vuetify feature guides provide further information about themes and other components.
In order to begin incorporating Vuetify, you can stop the development server that you initiated in the previous step by pressing CTRL+C in the terminal where the server is active.
Afterward, execute the subsequent command in the vuetify-meets-nginx-app directory:
- vue add vuetify
Using the Vue.js client, execute this command to install Vuetify.
Select the preset option list’s default configuration.
📦 Installing vue-cli-plugin-vuetify… added 38 packages, and audited 39 packages in 2s 7 packages are looking for funding run `npm fund` for details found 0 vulnerabilities ✔ Successfully installed plugin: vue-cli-plugin-vuetify ? Choose a preset: (Use arrow keys) Configure (advanced) ❯ Default (recommended) Vite Preview (Vuetify 3 + Vite) Prototype (rapid development) Vuetify 3 Preview (Vuetify 3)
You can relaunch the development server after a couple of minutes.
- npm run serve
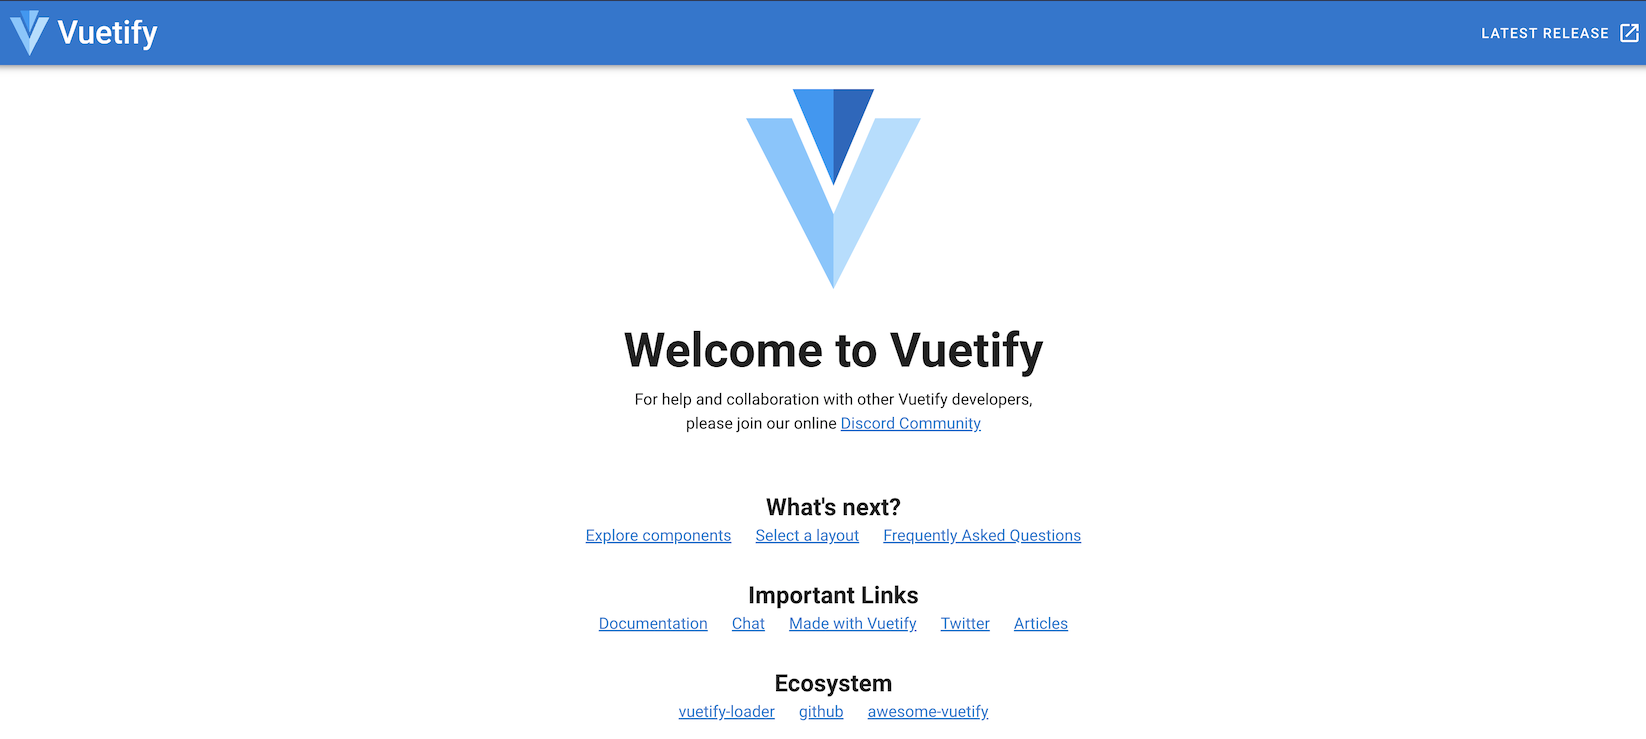
Go to localhost:8080 to view the application with a fresh “vuetified” appearance.
Currently, you have developed a simple application and incorporated Vuetify for its visual design. Now, your next step entails crafting a to-do app with enhanced features.
Step 3 involves the creation of a Vuetify application for managing tasks.
During this stage, you will be generating a to-do application, which comprises a collection of tasks that necessitate certain fundamental features.
- A way to add new tasks.
- A way to mark them as done.
- A method to display them, allowing users to see what is pending.
To incorporate these features into your app, you’ll make alterations to the App.vue file, which acts as the primary component of the application. Here, all other components will be nested within the defined component.
Note
Go to src/App.vue and open it for editing using nano or any text editor you prefer.
- cd src
- nano App.vue
This is the code that is set as the standard one.
One possible paraphrase could be:
“App.vue file within the vuetify-meets-nginx-app source code”
<template>
  <v-app>
    <v-app-bar
      app
      color="primary"
      dark
    >
      <div class="d-flex align-center">
        <v-img
          alt="Vuetify Logo"
          class="shrink mr-2"
          contain
          src="https://cdn.vuetifyjs.com/images/logos/vuetify-logo-dark.png"
          transition="scale-transition"
          width="40"
        />

        <v-img
          alt="Vuetify Name"
          class="shrink mt-1 hidden-sm-and-down"
          contain
          min-width="100"
          src="https://cdn.vuetifyjs.com/images/logos/vuetify-name-dark.png"
          width="100"
        />
      </div>

      <v-spacer></v-spacer>

      <v-btn
        href="https://github.com/vuetifyjs/vuetify/releases/latest"
        target="_blank"
        text
      >
        <span class="mr-2">Latest Release</span>
        <v-icon>mdi-open-in-new</v-icon>
      </v-btn>
    </v-app-bar>

    <v-main>
      <HelloWorld/>
    </v-main>
  </v-app>
</template>

<script>
import HelloWorld from './components/HelloWorld';

export default {
  name: 'App',

  components: {
    HelloWorld,
  },

  data: () => ({
    //
  }),
};
</script>
Each component comprises of two parts: a template (usually HTML code) and a script containing the Javascript code that implements its functionality.
The end user views and interacts with your application through the template displayed in the browser. Usually, you need to import components for the template, but when Vuetify is installed as a plugin, you can access all the components in the template without needing to import them separately.
Within the template block, numerous v- HTML tags can be found. While these tags are not commonly used in HTML, they represent Vuetify components and will consistently commence with v-.
The current content in the template is as follows:
- v-app: the main component, which is attached to the body of the website.
- v-app-bar: the default side bar.
- v-img: a component that loads images.
- v-icon: a component for showing icons.
- v-spacer: a component that aligns the next component to the right.
Within the App.vue file, the Vuetify installation does not inject any code into the script block. Therefore, what remains is the initial code produced by the Vue cli command along with the essential code needed for a Vue component.
After reviewing the initial code in the App.vue file, you can now begin building your to-do app by removing unnecessary default code.
Tidying up the App.vue file
You can eliminate the default HelloWorld component from the App.vue file in your to-do app.
To incorporate a Vue component within another component or view, it is necessary to import the component into the script section of the file. In your App.vue file, you can find the import statement for the HelloWorld component at the beginning.
This is just one option for paraphrasing the given text natively:
“App.vue file within the vuetify-meets-nginx-app/src directory”
...
import HelloWorld from './components/HelloWorld';
...
Delete the import line since you won’t need to utilize this component.
To proceed, you will need to eliminate the component from the list of component dependencies in the App.vue page. Look for the specified lines in the script block.
...
<script>
  ...

  components: {
    HelloWorld,
  },

  ...
</script>
Remove the HelloWorld line from the list of components.
The final action is to eliminate it from the template block.
One possible paraphrase could be:
“App.vue file in the vuetify-meets-nginx-app/src folder”
...
<template>
    ...
    <v-main>
      <HelloWorld/>
    </v-main>
  </v-app>
</template>
...
Please remove the line that says HelloWorld.
After removing the default HelloWorld component, you are now able to begin building your own to-do app.
Including additional data fields for components
In order to construct your to-do application, you will incorporate data fields into your app. The component’s data is a function that retrieves all the data models that can be utilized in the template. These data models consist of Javascript variables enclosed within an object and can also be accessed by the component’s methods.
Find the data field within the script block.
...
<script>
  ...
  data: () => ({
    //
  }),
};
</script>
To store your task list, make modifications to the data function and include the highlighted lines below.
...
<script>
    ...
    data: () => ({
        tasks: ['task 1', 'task 2', 'task 3'],
        newTask: null
    }),
};
</script>
By incorporating this update, you have introduced two data models: a newTask variable to hold the task name and tasks to represent the list of tasks. Both of these data models are now accessible for utilization within the template and methods.
Note
Enhancing the Features of Your App
Afterwards, you will incorporate the desired features. In Vue.js components, the features are contained within a collection of functions referred to as methods. In the data models section of the script block, include the specified lines to introduce three functions:
– The App.vue file in vuetify-meets-nginx-app/src.
...
<script>
export default {
    name: 'App',

    data: () => ({
        tasks: ['task 1', 'task 2', 'task 3'],
        newTask: null
    }),
    methods: {
        addNewTask() {
            this.tasks.push(this.newTask);
            this.clearNewTask();
        },
        clearNewTask() {
            this.newTask = '';
        },
        removeTask(i) {
            this.tasks.splice(i, 1);
        }
    }
};
You included three additional functions.
- addNewTask: To add the new task inside the newTask data model to the tasks list.
- clearNewTask: To clear the data model for newTask.
- removeTask: To remove a task from tasks based on an array index.
Now that you have incorporated the features into your to-do app, your next task is to make adjustments to the template so that it can utilize the methods.
Template updated
You need to modify the template in the final part of your to-do app. Update the template by incorporating the methods and data models you added in the previous sections.
You will have to eliminate unnecessary components from v-app-bar. Remove the v-btn section. Consequently, your code will appear as follows:
This option is a native paraphrase of the given text:
“App.vue in vuetify-meets-nginx-app/src directory.”
<template>
    <v-app>
        <v-app-bar
            app
            color="primary"
            dark
        >
        <div class="d-flex align-center">
            <v-img
                alt="Vuetify Logo"
                class="shrink mr-2"
                contain
                src="https://cdn.vuetifyjs.com/images/logos/vuetify-logo-dark.png"
                transition="scale-transition"
                width="40"
            />

            <v-img
                alt="Vuetify Name"
                class="shrink mt-1 hidden-sm-and-down"
                contain
                min-width="100"
                src="https://cdn.vuetifyjs.com/images/logos/vuetify-name-dark.png"
                width="100"
            />
        </div>

        <v-spacer></v-spacer>

        </v-app-bar>
        ...
    </v-app>
</template>
Afterwards, you will include certain elements to establish the fundamental structure of your application. Initially, there is a v-container, which functions as a component enabling you to both center and apply horizontal padding to the contents of your app. Further details about this component and other containers can be explored in Vuetify’s grid system documentation.
You can include a v-card component within the v-container, which is another container provided by Vuetify. This component is helpful for arranging content on the screen, like a panel or a fixed image. To learn more about the v-card component, refer to the Vuetify documentation on cards.
Find the v-main section in the current template and include the marked lines.
...
<v-main>
    <v-container>
        <v-card elevation="0">
        </v-card>
    </v-container>
</v-main>
...
In the code, you’ll notice the presence of the elevation=”0″ property in the v-card component. Elevation is a frequently used property in Vuetify components that enables adjustment of the relative z-distance between two components. In this scenario, zero is used to eliminate any distance, indicating no elevation. Nonetheless, you can experiment with different values to observe the variations, or refer to the elevation documentation for further details.
Afterward, the utilization of two v-card functional components is necessary. The first one, v-title, bestows a predefined font size and padding for titles within the card. The second component, v-card-text, will encompass the card’s content. Simply append the highlighted lines to your v-card component.
...
<v-main>
    <v-container>
        <v-card elevation="0">
            <v-card-title></v-card-title>
            <v-card-text></v-card-text>
       </v-card>
    </v-container>
</v-main>
...
A functional component in Vue.js is a component that solely renders a template, without any logic. Since it only focuses on the template, it renders at a faster pace. To explore functional components and their creation, refer to the Vue.js guide on functional components.
After creating the container component, you need to include a v-text-field component to manage the names of new tasks. Within the previously added v-card-title component, insert the highlighted lines.
...
<v-main>
    <v-container>
        <v-card elevation="0">
            <v-card-title>
              <v-text-field
                v-model="newTask"
                label="Task Name"
                prepend-icon="mdi-content-save"
                clear-icon="mdi-close-circle"
                clearable
                filled
                type="text"
                @click:prepend="addNewTask"
                @click:clear="clearNewTask"
                ></v-text-field>
            </v-card-title>
           ...
        </v-card>
    </v-container>
</v-main>
...
The new tasks must be named using the v-text-field component.
It possesses the subsequent characteristics.
- v-model=”newTask” attaches the data model to the component. Any text you put in the input will also be added to the data model.
- label=”Task Name” is the text in the input type’s placeholder.
- prepend-icon=”mdi-content-save” will display the Save icon in the text box’s left corner.
- clear-icon=”mdi-close-circle” is the Clear button’s icon.
- clearable shows the Clear icon.
- filled applies an alternate filled input style to the component.
- type=”text” sets the input type of the underlying HTML input field. Other options include email or password.
- @click: prepend=”addNewTask” attaches the Save button’s click event to the addNewTask function.
- @click: clear=”clearNewTask” connects the Save button’s click event to the clearNewTask function.
To display all the tasks in the task list model, the next action is to incorporate the v-timeline component. This component is designed to exhibit time- or order-based data. It should be integrated within the v-card-text component, which serves as the body component of the v-card. Within the existing v-card-text component, please insert the highlighted lines.
...
<v-main>
    <v-container>
        <v-card elevation="0">
            <v-card-title>
            ...
            </v-card-title>
            <v-card-text>
              <v-timeline
                  v-if="tasks.length > 0"
                  dense
              ></v-timeline>
            </v-card-text>
            ...
      </v-card>
   </v-container>
</v-main>
...
The v-timeline exhibits all the tasks listed. The v-if condition ensures that the component is visible only when there is at least one task in the data model. By using the “dense” attribute, the content of the component is condensed by removing certain padding and margins from its CSS style.
To display the name of each task, you will require a v-timeline functional component called v-timeline-item. Insert the following code lines within the v-timeline component.
...
<v-main>
    <v-container>
        <v-card elevation="0">
            <v-card-title>
            ...
            </v-card-title>
            <v-card-text>
              <v-timeline
                  v-if="tasks.length > 0"
                  dense
                >
                    <v-timeline-item
                        v-for="(t, index) in tasks"
                        :key="index"
                    >
                         {{ t }}
                    </v-timeline-item>
              </v-timeline>
            </v-card-text>
        </v-card>
    </v-container>
</v-main>
...
This code utilizes a v-for loop to display a v-timeline-item component for each task in your task list model. Since v-timeline-item is a part of v-timeline, it will be presented as a chronological list.
You include the index as a key in the v-for loop because it is required by the v-for Vue directive. For further information on using distinct keys with v-for, you can refer to the documentation provided by Vue.
By using the {{ t }} directive, you can display the task name within the v-timeline-item element.
To proceed further, you should incorporate a button to delete the task from the list. However, prior to that, you must include extra grid system components to arrange the task names and buttons. Insert the highlighted lines within the v-timeline-item component.
...
<v-main>
    <v-container>
        <v-card elevation="0">
            <v-card-title>
            ...
            </v-card-title>
            <v-card-text>
              <v-timeline
                  v-if="tasks.length > 0"
                  dense
                >
                    <v-timeline-item
                        v-for="(t, index) in tasks"
                        :key="index"
                    >
                        <v-row class="display-1 text-capitalize">
                            <v-col cols="7">
                                {{ t }}
                            </v-col>
                            <v-col
                                class="text-right"
                                cols="5"
                            >
                            </v-col>
                        </v-row>
                     </v-timeline-item>
               </v-timeline>
             </v-card-text>
         </v-card>
     </v-container>
</v-main>
...
Using the aforementioned code, you included:
- A v-row component with two classes to set the size of the text of the task (display-1, similar to H1 in HTML) and with all the characters in capital letters (text-capitalize).
- A v-col component inside the row to show the name of every task that will need 7/12 parts of the space (the cols=”7″ property).
- Another v-col component that places the remove button. It needs 5/12 parts of the space (cols=”5″ property) and has all the components inside aligned to the right, determined by the text-right class.
At last, it’s the right moment to incorporate a v-btn component for associating the removeTask function with a button component. To keep things uncomplicated, you will utilize an icon button, which solely includes an icon and no text. To accomplish this, you’ll require a v-icon component too.
Include the lines that are marked.
...
<v-timeline
    v-if="tasks.length > 0"
    dense
>
    <v-timeline-item
        v-for="(t, index) in tasks"
        :key="index"
    >
        <v-row class="display-1 text-capitalize">
            <v-col cols="7">
                {{ t }}
            </v-col>
            <v-col
                class="text-right"
                cols="5"
            >
                <v-btn
                    icon
                    @click="removeTask(index)"
                >
                    <v-icon color="red lighten-1" large>
                        mdi-sticker-remove
                    </v-icon>
                </v-btn>
            </v-col>
        </v-row>
    ...
    </v-timeline-item>
</v-timeline>
The code you just included indicates that for the v-btn component, the icon property is used to indicate that text is not necessary. It adjusts the component to exclusively style a v-icon component.
The @click component event connects the removeTask method to the button’s click event. Hence, whenever the button is clicked, the method will be executed.
You utilized the index given by the v-for loop as the argument for the removeTask function.
In the end, the v-icon will have a color of red lighten-1, with a large size, and you utilized the mdi-sticker-remove icon from material design.
You have incorporated Vuetify components into the template, configured them to display and utilize the content from your data models, and facilitated user interaction through your page methods.
This is the ultimate code for the App.vue file.
One possible paraphrase of “vuetify-meets-nginx-app/src/App.vue” could be:
“The App.vue file in the vuetify-meets-nginx-app directory.”
<template>
    <v-app>
        <v-app-bar
            app
            color="primary"
            dark
        >
        <div class="d-flex align-center">
            <v-img
                alt="Vuetify Logo"
                class="shrink mr-2"
                contain
                src="https://cdn.vuetifyjs.com/images/logos/vuetify-logo-dark.png"
                transition="scale-transition"
                width="40"
            />

            <v-img
                alt="Vuetify Name"
                class="shrink mt-1 hidden-sm-and-down"
                contain
                min-width="100"
                src="https://cdn.vuetifyjs.com/images/logos/vuetify-name-dark.png"
                width="100"
            />
        </div>

        <v-spacer></v-spacer>

        </v-app-bar>

        <v-main>
            <v-container>
                <v-card elevation="0">
                    <v-card-title>
                        <v-text-field
                            v-model="newTask"
                            label="Task Name"
                            prepend-icon="mdi-content-save"
                            clear-icon="mdi-close-circle"
                            clearable
                            filled
                            type="text"
                            @click:prepend="addNewTask"
                            @click:clear="clearNewTask"
                        ></v-text-field>
                    </v-card-title>
                    <v-card-text>
                        <v-timeline
                            v-if="tasks.length > 0"
                            dense
                        >
                            <v-timeline-item
                                v-for="(t, index) in tasks"
                                :key="index"
                            >
                                <v-row class="display-1 text-capitalize">
                                    <v-col cols="7">
                                        {{ t }}
                                    </v-col>
                                    <v-col
                                        class="text-right"
                                        cols="5"
                                    >
                                        <v-btn
                                            icon
                                            @click="removeTask(index)"
                                        >
                                            <v-icon color="red lighten-1" large>
                                                mdi-sticker-remove
                                            </v-icon>
                                        </v-btn>
                                    </v-col>
                                </v-row>
                            </v-timeline-item>
                        </v-timeline>
                    </v-card-text>
                </v-card>
            </v-container>
        </v-main>
    </v-app>
</template>

<script>

export default {
    name: 'App',

    data: () => ({
        tasks: ['task 1', 'task 2', 'task 3'],
        newTask: null
    }),
    methods: {
        addNewTask() {
            this.tasks.push(this.newTask);
            this.clearNewTask();
        },
        clearNewTask() {
            this.newTask = '';
        },
        removeTask(i) {
            this.tasks.splice(i, 1);
        }
    }
};
</script>
Please save and close your file.
If the development server is not currently running, restart it.
- npm run serve
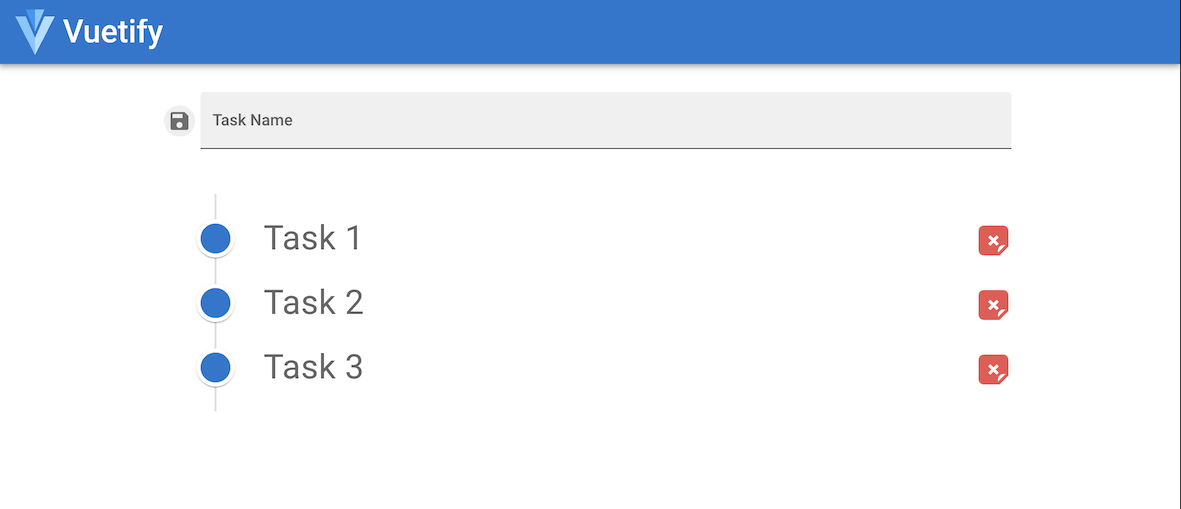
Now you have the ability to access your app at localhost:8080 and observe it in action.

After creating a to-do app, you enhanced its features and made changes to the user interface. Now that you have completed the app development, you can prepare a production-ready version. The subsequent task involves constructing the app for production.
Step 4: Developing Your App for Deployment
After creating your to-do app in the previous stage, you must now make it ready for production before publishing it using Nginx. This phase is referred to as building the app.
In order for the app to be viewed in a browser, it needs to go through the build process. If you attempt to open the source files directly in a browser, they won’t be visible because they are in Vue.js format, which browsers cannot interpret. As a result, before deploying the app using Nginx, it is necessary to build it for production, which is what this step entails.
To accomplish this automatically, the build command can be utilized. The package.json file acts as the primary configuration file for your application, encompassing details about the dependencies and the available commands for running or building the app. One of these commands is the build command, which can be observed in this example.
{
  ...
  "scripts": {
    "serve": "vue-cli-service serve",
    "build": "vue-cli-service build",
    "lint": "vue-cli-service lint"
  },
  ...
}
To learn more about package.json file configuration, refer to the package.json guide.
In order to commence the construction procedure, halt the development server by pressing CTRL+C.
Go to the project directory using the same terminal.
- cd vuetify-meets-nginx-app
Execute the command to build.
- npm run build
Once the construction is complete, a version of your application will be available for production in the dist directory.
Afterwards, you will configure Nginx to function as a reverse proxy for deploying and accessing the application.
Step 5 — Setting up Nginx as a Reverse Proxy
Once your application is functional, you need to set up Nginx as a reverse proxy. This will allow your app’s files to be served and connected to your domain name.
A reverse proxy is a program or service that operates on a server and redirects external requests to a different destination. In your scenario, whenever a user opens your website in a browser, Nginx will manage this request by responding with a file from your application. The response will consist of files generated during app development, such as HTML, JS, and CSS files. Nginx will handle them just like any other static files or websites hosted on your server.
You can find all the configuration files for different websites in /etc/nginx/sites-available, and Nginx operates with these sites. To access this directory, simply navigate to it.
- cd /etc/nginx/sites-available/
Please generate a file named vuetify-meets-nginx-app.
- sudo nano vuetify-meets-nginx-app
Note
Add the provided lines to your vuetify-meets-nginx-app file, ensuring to replace server_name with your own details.
server {
  listen 80;
  listen [::]:80;
  server_name your_domain;
  autoindex on;
  root   /home/sammy/vuetify-meets-nginx-app/dist/;
  index  index.html;
}
In this guide, you will be setting up Nginx to listen on port 80. However, you have the flexibility to choose any port you prefer. Instead of “your_domain,” you can replace it with the name of your own domain. If you are testing this within a local development environment, you can utilize the server’s IP address or simply use localhost.
By using the root directive, you inform Nginx that all the files reside in the directory /home/sammy/vuetify-meets-nginx-app/dist/, which was generated earlier. At last, with the index directive, you specify to Nginx that the primary file is index.html.
Please save and close your file.
Afterwards, you will have to address a permissions problem in the Nginx configuration file.
To examine all active processes associated with Nginx, use the given command on your server.
- ps -fea | grep nginx
The ps command, when used with the -fea flags, presents a comprehensive view of all existing processes. The resulting output is then refined to display only the processes that correspond to nginx.
The resulting output will resemble something like this:
root 39922 1 0 Jul14 ? 00:00:00 nginx: master process /usr/sbin/nginx -g daemon on; master_process on; www-data 39923 39922 0 Jul14 ? 00:00:01 nginx: worker process sammy 117909 117434 0 21:27 pts/0 00:00:00 grep –color=auto nginx
The output demonstrates that the nginx service is operational and running under the user www-data.
Afterwards, examine the permissions of /home/sammy/vuetify-meets-nginx-app/dist/ using this command:
- ls -l /home/sammy/vuetify-meets-nginx-app/dist/
The result will have a resemblance to the subsequent presentation:
total 20 drwxrwxr-x 2 sammy sammy 4096 Jul 14 18:54 css -rw-rw-r– 1 sammy sammy 4286 Jul 14 18:54 favicon.ico -rw-rw-r– 1 sammy sammy 853 Jul 14 18:54 index.html drwxrwxr-x 2 sammy sammy 4096 Jul 14 18:54 js
For the user sammy, all the files and folders are accessible with the assigned permissions. However, Nginx cannot read these files as the user www-data (used by Nginx) lacks execution privileges.
There are several ways to resolve this problem.
- Grant Nginx read, write, and execution permissions to the dist folder. However, granting a service that is accessible from the entire network with permissions to read local user files is not secure. Additionally, Nginx will need permission to access all the parent folders because it needs to navigate to the final folder, which would basically open the /home directory to the world. This is not recommended.
- Run nginx with sudo. This is also not secure, since now you would have a service with access to all the files on your server.
- Move your dist content to a location where only Nginx has access and no one else does. This is the safest option.
For this tutorial, you will utilize the third choice.
In Ubuntu and other Linux distributions, the designated location for sharing files between services is the /var directory. To host websites with Nginx, you will need to place the files in the default /var/www path.
To copy your files to the /var/www path, execute the following command from your project directory.
- sudo cp -r /home/sammy/vuetify-meets-nginx-app/dist /var/www/vuetify-meets-nginx-app
To ensure that all files are copied with the identical permissions as before, which are assigned to the sammy user, you will have to include the sammy user in the same permission group as www-data. This can be achieved by executing the following command:
- sudo usermod -aG www-data sammy
Currently, Nginx is able to securely access the required files. Nonetheless, with every new app version, you have to manually copy the project files, which can cause complications for autodeploys, CI/CD tools, and similar processes. To resolve this issue, a more efficient approach would be to modify the build command so that it directly generates the files in the appropriate path.
In order to accomplish this, access package.json file to edit it and insert the emphasized text.
...
"build": "vue-cli-service build --dest /var/www/vuetify-meets-nginx-app",
...
Please save and close your file.
You can now finalize the Nginx configuration. Access the Nginx config file and modify it by adding the new application path.
One option for paraphrasing the phrase “/etc/nginx/sites-available/vuetify-meets-nginx-app” natively could be:
“The vuetify-meets-nginx-app configuration file is located at /etc/nginx/sites-available.”
server {
  listen 80;
  listen [::]:80;
  server_name your_domain OR your_server_IP;
  autoindex on;
  root   /var/www/vuetify-meets-nginx-app;
  index  index.html;
}
Please save and close the file.
Once your site file is prepared, you must activate it by navigating to the designated path for enabled sites.
- cd /etc/nginx/sites-enabled/
To avoid having two sites enabled and listening on the same port (port 80), it is recommended to deactivate the default site.
- sudo rm default
Lastly, generate a symbolic link file to link your app’s configuration file.
- sudo ln -s /etc/nginx/sites-available/vuetify-meets-nginx-app
Nginx will consider only the site files located in the enabled directory. It is possible to directly copy the configuration file, but it is not advisable to have duplicate files as it may result in inconsistencies. Therefore, using a symlink, which is a shortcut to the available file, is a preferable method.
Conduct a test to ensure that there are no syntax errors present in your Nginx files.
- sudo nginx -t
This is how your output will appear.
nginx: the configuration file /etc/nginx/nginx.conf syntax is ok nginx: configuration file /etc/nginx/nginx.conf test is successful
In order to implement the modifications, you must restart the Nginx service.
- sudo systemctl restart nginx
You now have the option to visit your domain or the IP address of your server to see your to-do app, which is now prepared and publicly accessible.
In this phase, you set up Nginx as a reverse proxy to publicly deploy your application.
One possible paraphrase of “Conclusion” could be “Final thoughts” or “In summary.”
You have built a Vue.js application in this tutorial and installed and set up Vuetify. Afterwards, you have generated a production-ready static version of your app and lastly, configured the Nginx service to make it available for publication.
If you want to examine the project files more closely, take a look at the Github repository.
As a next move, proceed with setting up Nginx to serve your application via HTTPS. To begin, refer to our guide titled “Securing Nginx with Let’s Encrypt on Ubuntu 20.04” for step-by-step instructions.
If you want to know more about Vuetify, take a look at the Vuetify documentation. And if you’re keen on expanding the capabilities of Vuetify components, our tutorial titled “Extending Vuetify Form Field Validation” is worth checking out.
More tutorials
Common errors that occur when using Nginx for connections.(Opens in a new browser tab)
Addition Assignment Operator mean in Java(Opens in a new browser tab)
React Application Component Testing Integrate with Playwright(Opens in a new browser tab)
Comprehending the Structure and Contexts of Nginx Configuration File(Opens in a new browser tab)

