Grafana Tutor Step-by-step Guide to Grafana on Ubuntu 18.04
The author chose /dev/color to be the recipient of a donation within the Write for Donations initiative.
To begin with, let’s start with the opening statement.
Grafana is a tool for visualizing and monitoring data that is open-source. It has the ability to integrate complex data from various sources such as Prometheus, InfluxDB, Graphite, and ElasticSearch. With Grafana, you can easily create alerts, notifications, and ad-hoc filters for your data. Additionally, it offers built-in sharing features that promote collaboration with your teammates.
In this guide, you’ll learn how to set up Grafana and protect it with an SSL certificate and an Nginx reverse proxy. After successfully installing Grafana, you’ll be able to enable user authentication through GitHub, which will help you effectively manage team permissions.
Requirements
To complete this guide, you will require:
- One Ubuntu 18.04 server set up by following the Initial Server Setup Guide for Ubuntu 18.04, including a non-root user with sudo privileges and a firewall configured with ufw.
- A fully registered domain name. This tutorial uses your_domain throughout. You can purchase a domain name on Namecheap, get one for free on Freenom, or use the domain registrar of your choice.
- The following DNS records set up for your server. You can follow How To Set Up a Host Name with Silicon Cloud for details on how to add them.An A record with your_domain pointing to your server’s public IP address.
An A record with www.your_domain pointing to your server’s public IP address. - Nginx set up by following the How To Install Nginx on Ubuntu 18.04 tutorial, including a server block for your domain.
- An Nginx server block with Let’s Encrypt configured, which you can set up by following How To Secure Nginx with Let’s Encrypt on Ubuntu 18.04.
- Optionally, to set up GitHub authentication, you’ll need a GitHub account associated with an organization.
First step: Grafana installation
In the initial phase, you will set up Grafana on your Ubuntu 18.04 server. You have the option to install Grafana by directly downloading it from its official website or by utilizing an APT repository. As the APT repository simplifies the installation and upkeep of Grafana updates, this guide will employ that approach.
Even though you can find Grafana in the official Ubuntu 18.04 packages repository, it may not be the most up-to-date version. Therefore, it is recommended to use Grafana’s official repository.
One possible paraphrase could be:
Use wget to fetch the Grafana GPG key, and then redirect the output to apt-key. By doing so, you will include the key in the list of trusted keys for your APT installation. Consequently, you can securely fetch and authenticate the Grafana package that is GPG-signed.
- wget -q -O – https://packages.grafana.com/gpg.key | sudo apt-key add –
The -q option in the command disables the status update message of wget, while -O displays the downloaded file in the terminal. These two options guarantee that only the file’s content is piped to apt-key.
Afterwards, include the Grafana repository in your APT sources.
- sudo add-apt-repository “deb https://packages.grafana.com/oss/deb stable main”
To update your package lists, simply refresh the APT cache.
- sudo apt update
Afterwards, ensure the installation of Grafana is done using the repository dedicated to Grafana.
- apt-cache policy grafana
The result of the previous command provides information on the Grafana version to be installed and the source of the package. Make sure that the first option in the list corresponds to the official Grafana repository, which can be found at https://packages.grafana.com/oss/deb.
grafana: Installed: (none) Candidate: 9.1.3 Version table: 9.1.3 500 500 https://packages.grafana.com/oss/deb stable/main amd64 Packages …
You can now continue with the installation.
- sudo apt install grafana
After the installation of Grafana, commence the Grafana server by employing systemctl.
- sudo systemctl start grafana-server
Afterwards, confirm the operational status of Grafana by inspecting the service’s condition.
- sudo systemctl status grafana-server
You will get results that look like this.
● grafana-server.service – Grafana instance Loaded: loaded (/usr/lib/systemd/system/grafana-server.service; disabled; vendor preset: enabled) Active: active (running) since Tue 2022-09-06 09:35:00 UTC; 5s ago Docs: http://docs.grafana.org Main PID: 22886 (grafana-server) Tasks: 5 (limit: 546) …
This result provides details regarding Grafana’s operation, including its condition, Main Process Identifier (PID), and other relevant information. If it states “active (running)”, it means the process is functioning correctly.
Finally, make sure to enable the feature that allows Grafana to start automatically during system boot.
- sudo systemctl enable grafana-server
You will get the output as described below.
Synchronizing state of grafana-server.service with SysV service script with /lib/systemd/systemd-sysv-install. Executing: /lib/systemd/systemd-sysv-install enable grafana-server Created symlink /etc/systemd/system/multi-user.target.wants/grafana-server.service → /usr/lib/systemd/system/grafana-server.service.
This confirms that Grafana will automatically start as systemd has successfully created the required symbolic links.
You have successfully installed Grafana and it is now ready to be used. Your next step is to enhance the security of your connection to Grafana by using a reverse proxy and an SSL certificate.
Step 2 involves the configuration of the reverse proxy.
To guarantee the security of your data, employ an SSL certificate to encrypt the communication between Grafana and its users. However, before utilizing this encrypted connection, it is imperative to reconfigure Nginx as a reverse proxy for Grafana.
To access the Nginx configuration file that was created while setting up the Nginx server block with Let’s Encrypt in the Prerequisites, open it using a text editor. Although you can choose any text editor, we will be using nano in this guide.
- sudo nano /etc/nginx/sites-available/your_domain
Find the specified block.
...
	location / {
		try_files $uri $uri/ =404;
	}
...
Since you have already set up SSL communication with Nginx and all web traffic to your server passes through Nginx, you simply have to instruct Nginx to direct all requests to Grafana, which is typically running on port 3000.
Remove the current try_files statement in this location section and substitute it with the subsequent alternatives:
...
	location / {
		proxy_set_header Host $http_host;
		proxy_pass http://localhost:3000;
	}
...
One possible paraphrase could be:
“This action will bind the proxy to the correct port and include the server name in the header.”
To ensure proper functioning of Grafana Live WebSocket connections, incorporate the following section outside the server segment.
map $http_upgrade $connection_upgrade {
	default upgrade;
	'' close;
}

server {
    ...
Now, include the subsequent section regarding location.
...
	location /api/live {
		proxy_http_version 1.1;
		proxy_set_header Upgrade $http_upgrade;
		proxy_set_header Connection $connection_upgrade;
		proxy_set_header Host $http_host;
		proxy_pass http://localhost:3000;
	}
...
The client does not send the Upgrade and Connection headers to the proxied server. Hence, it is necessary to explicitly pass these headers for the proxied server to be aware of the client’s desire to switch to the WebSocket protocol.
The ultimate arrangement ought to resemble this.
map $http_upgrade $connection_upgrade {
	default upgrade;
	'' close;
}

server {
	...

	root /var/www/your_domain/html;
	index index.html index.htm index.nginx-debian.html;

	server_name your_domain www.your_domain;

	location / {
		proxy_set_header Host $http_host;
		proxy_pass http://localhost:3000;
	}

	location /api/live {
		proxy_http_version 1.1;
		proxy_set_header Upgrade $http_upgrade;
		proxy_set_header Connection $connection_upgrade;
		proxy_set_header Host $http_host;
		proxy_pass http://localhost:3000;
	}
}
...
Note
If you are using nano, save and close the file by pressing CTRL+X, then Y, and finally ENTER after you are finished.
Now, verify that the new configurations are set up accurately by conducting a test.
- sudo nginx -t
You will be given the following result.
nginx: the configuration file /etc/nginx/nginx.conf syntax is ok nginx: configuration file /etc/nginx/nginx.conf test is successful
To finalize, reload Nginx to activate the modifications.
- sudo systemctl reload nginx
To access the default login screen of Grafana, simply open your web browser and go to https://your_domain. If you can’t reach Grafana, ensure that your firewall allows traffic on port 443 and then revisit the previous steps.
Now that the connection to Grafana is encrypted, you have the ability to incorporate further security measures, beginning with altering Grafana’s default administrative credentials.
Step 3 — Refreshing Authentication Information
To enhance security, it is recommended to modify your login details promptly as every Grafana installation initially employs the same administrative credentials. Therefore, in this step, you will be updating the credentials.
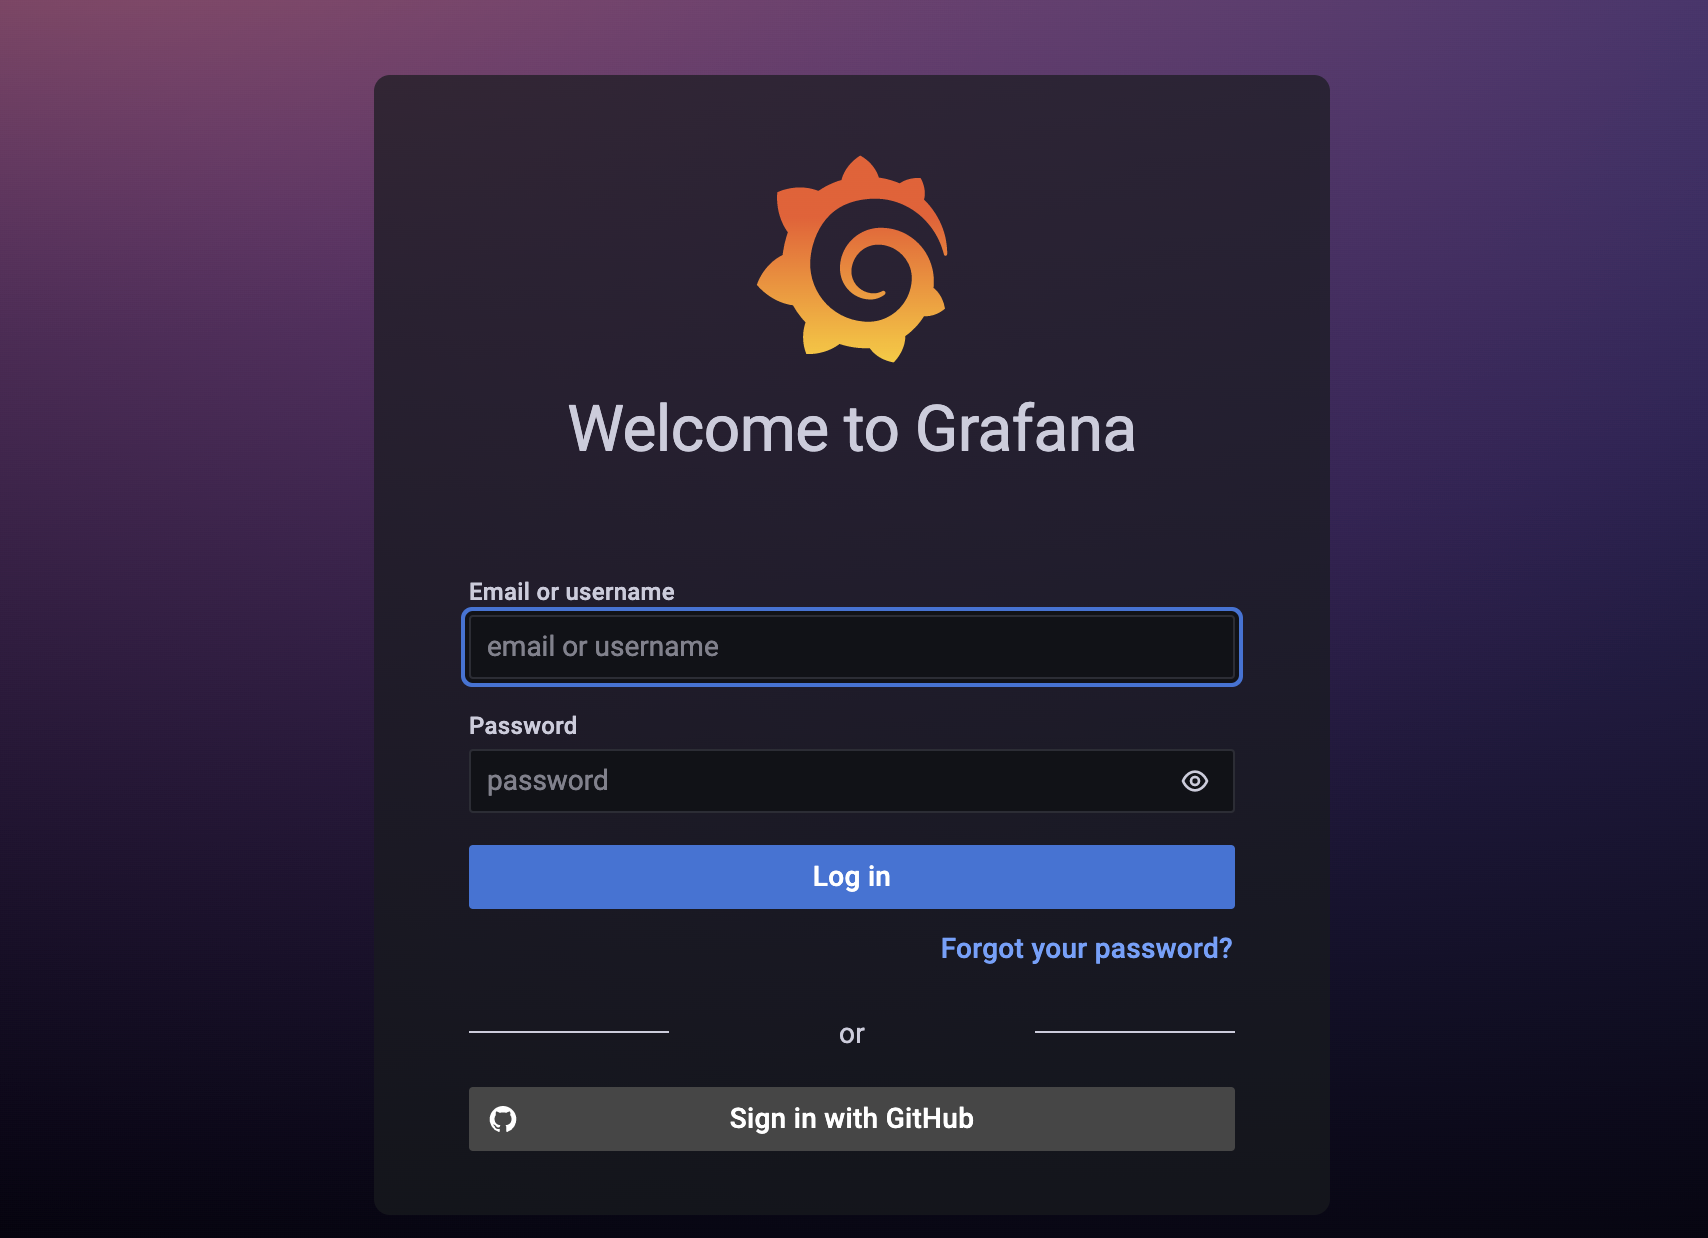
To begin, go to https://your_domain in your web browser. This will display the initial login page showing the Grafana logo, a form requesting your Email or username as well as Password, a Login button, and a link for password recovery labeled “Forgot your password?”.
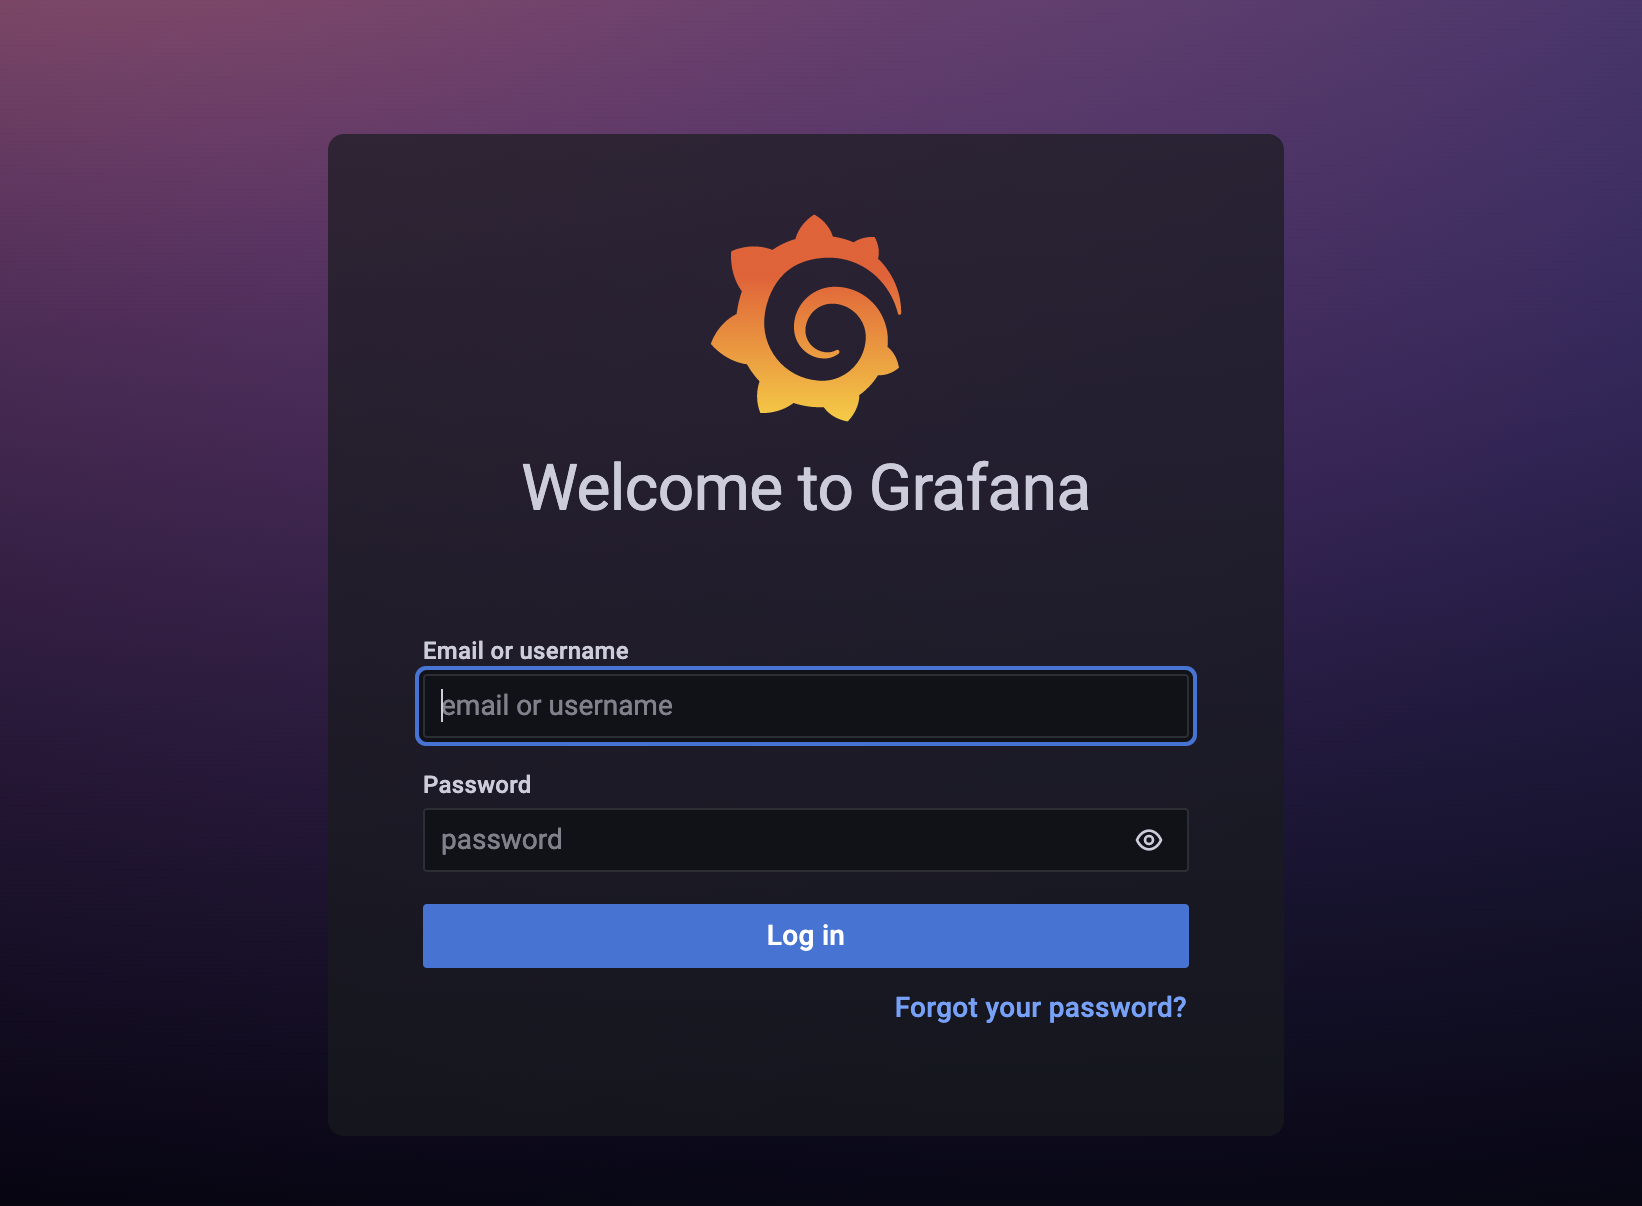
Type “admin” into both the Email/Username and Password sections, and proceed by clicking the Log in button.
You will be prompted to enhance the security of your account by changing the preset password on the subsequent display.
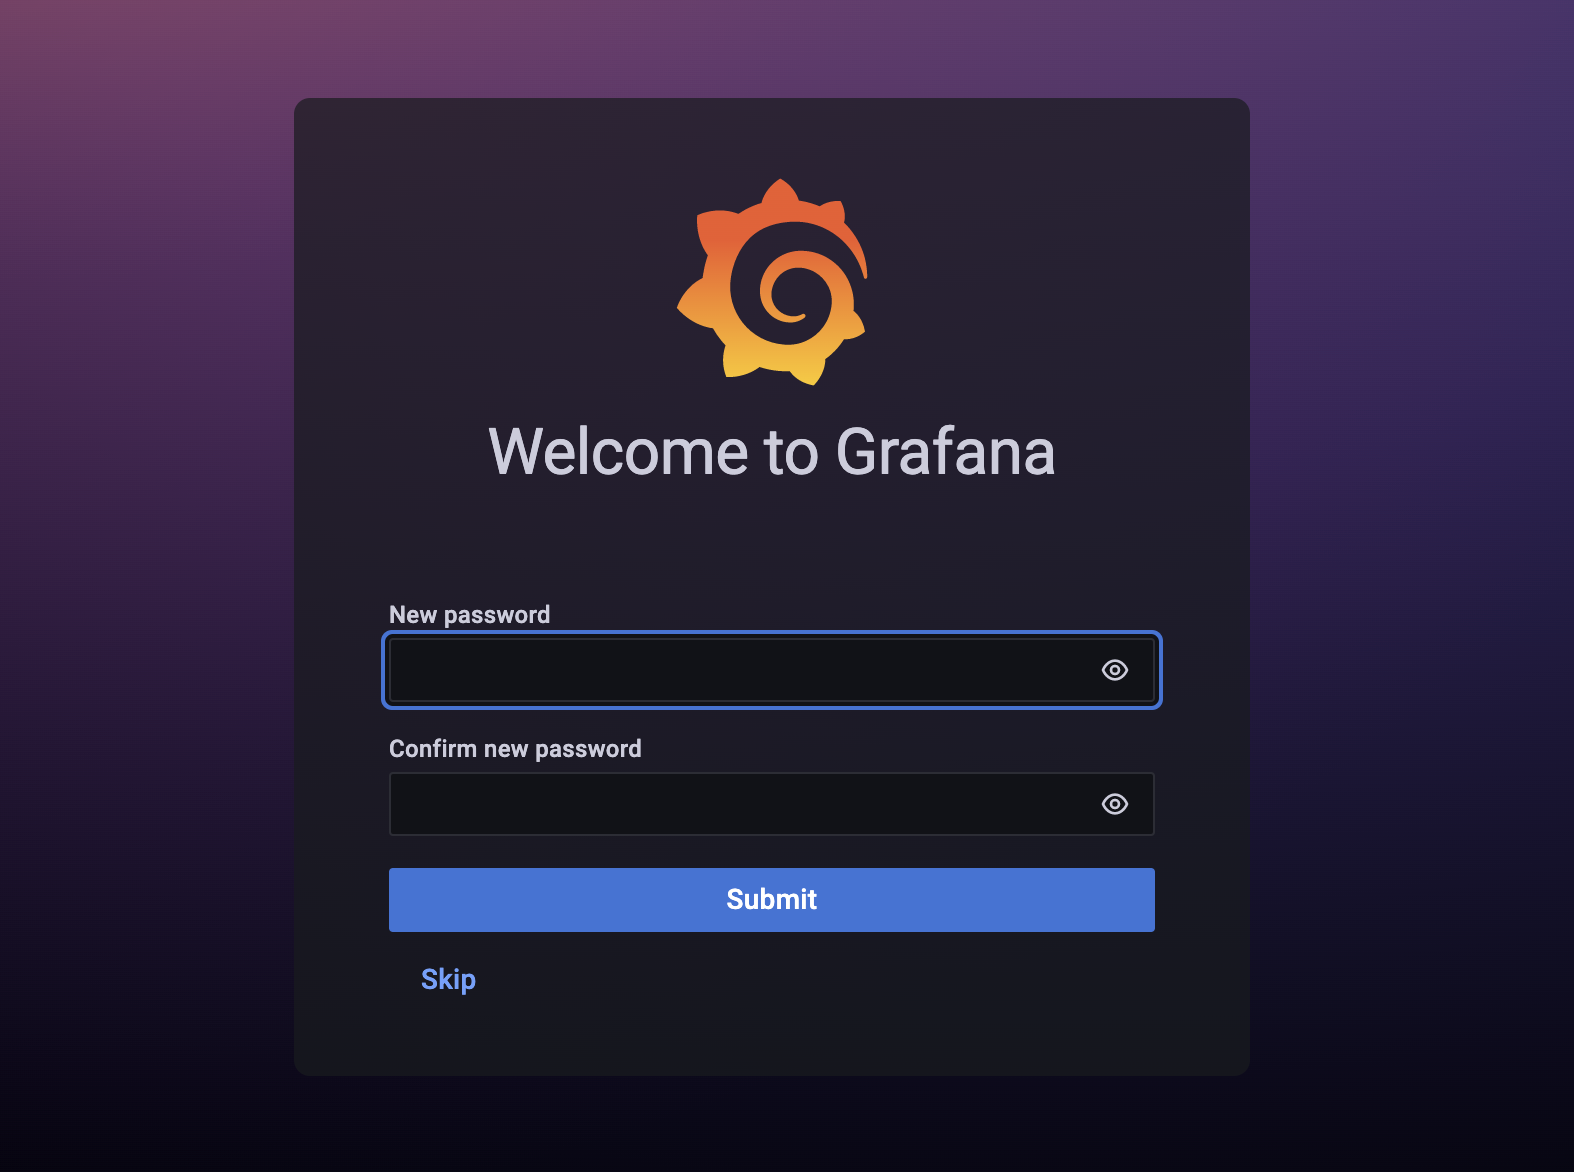
Please input the desired password in both the “New password” and “Confirm new password” sections.
You have the option to either save the new information by clicking Submit or bypass this step by pressing Skip. If you choose to skip, you will be asked to change the password on your next login.
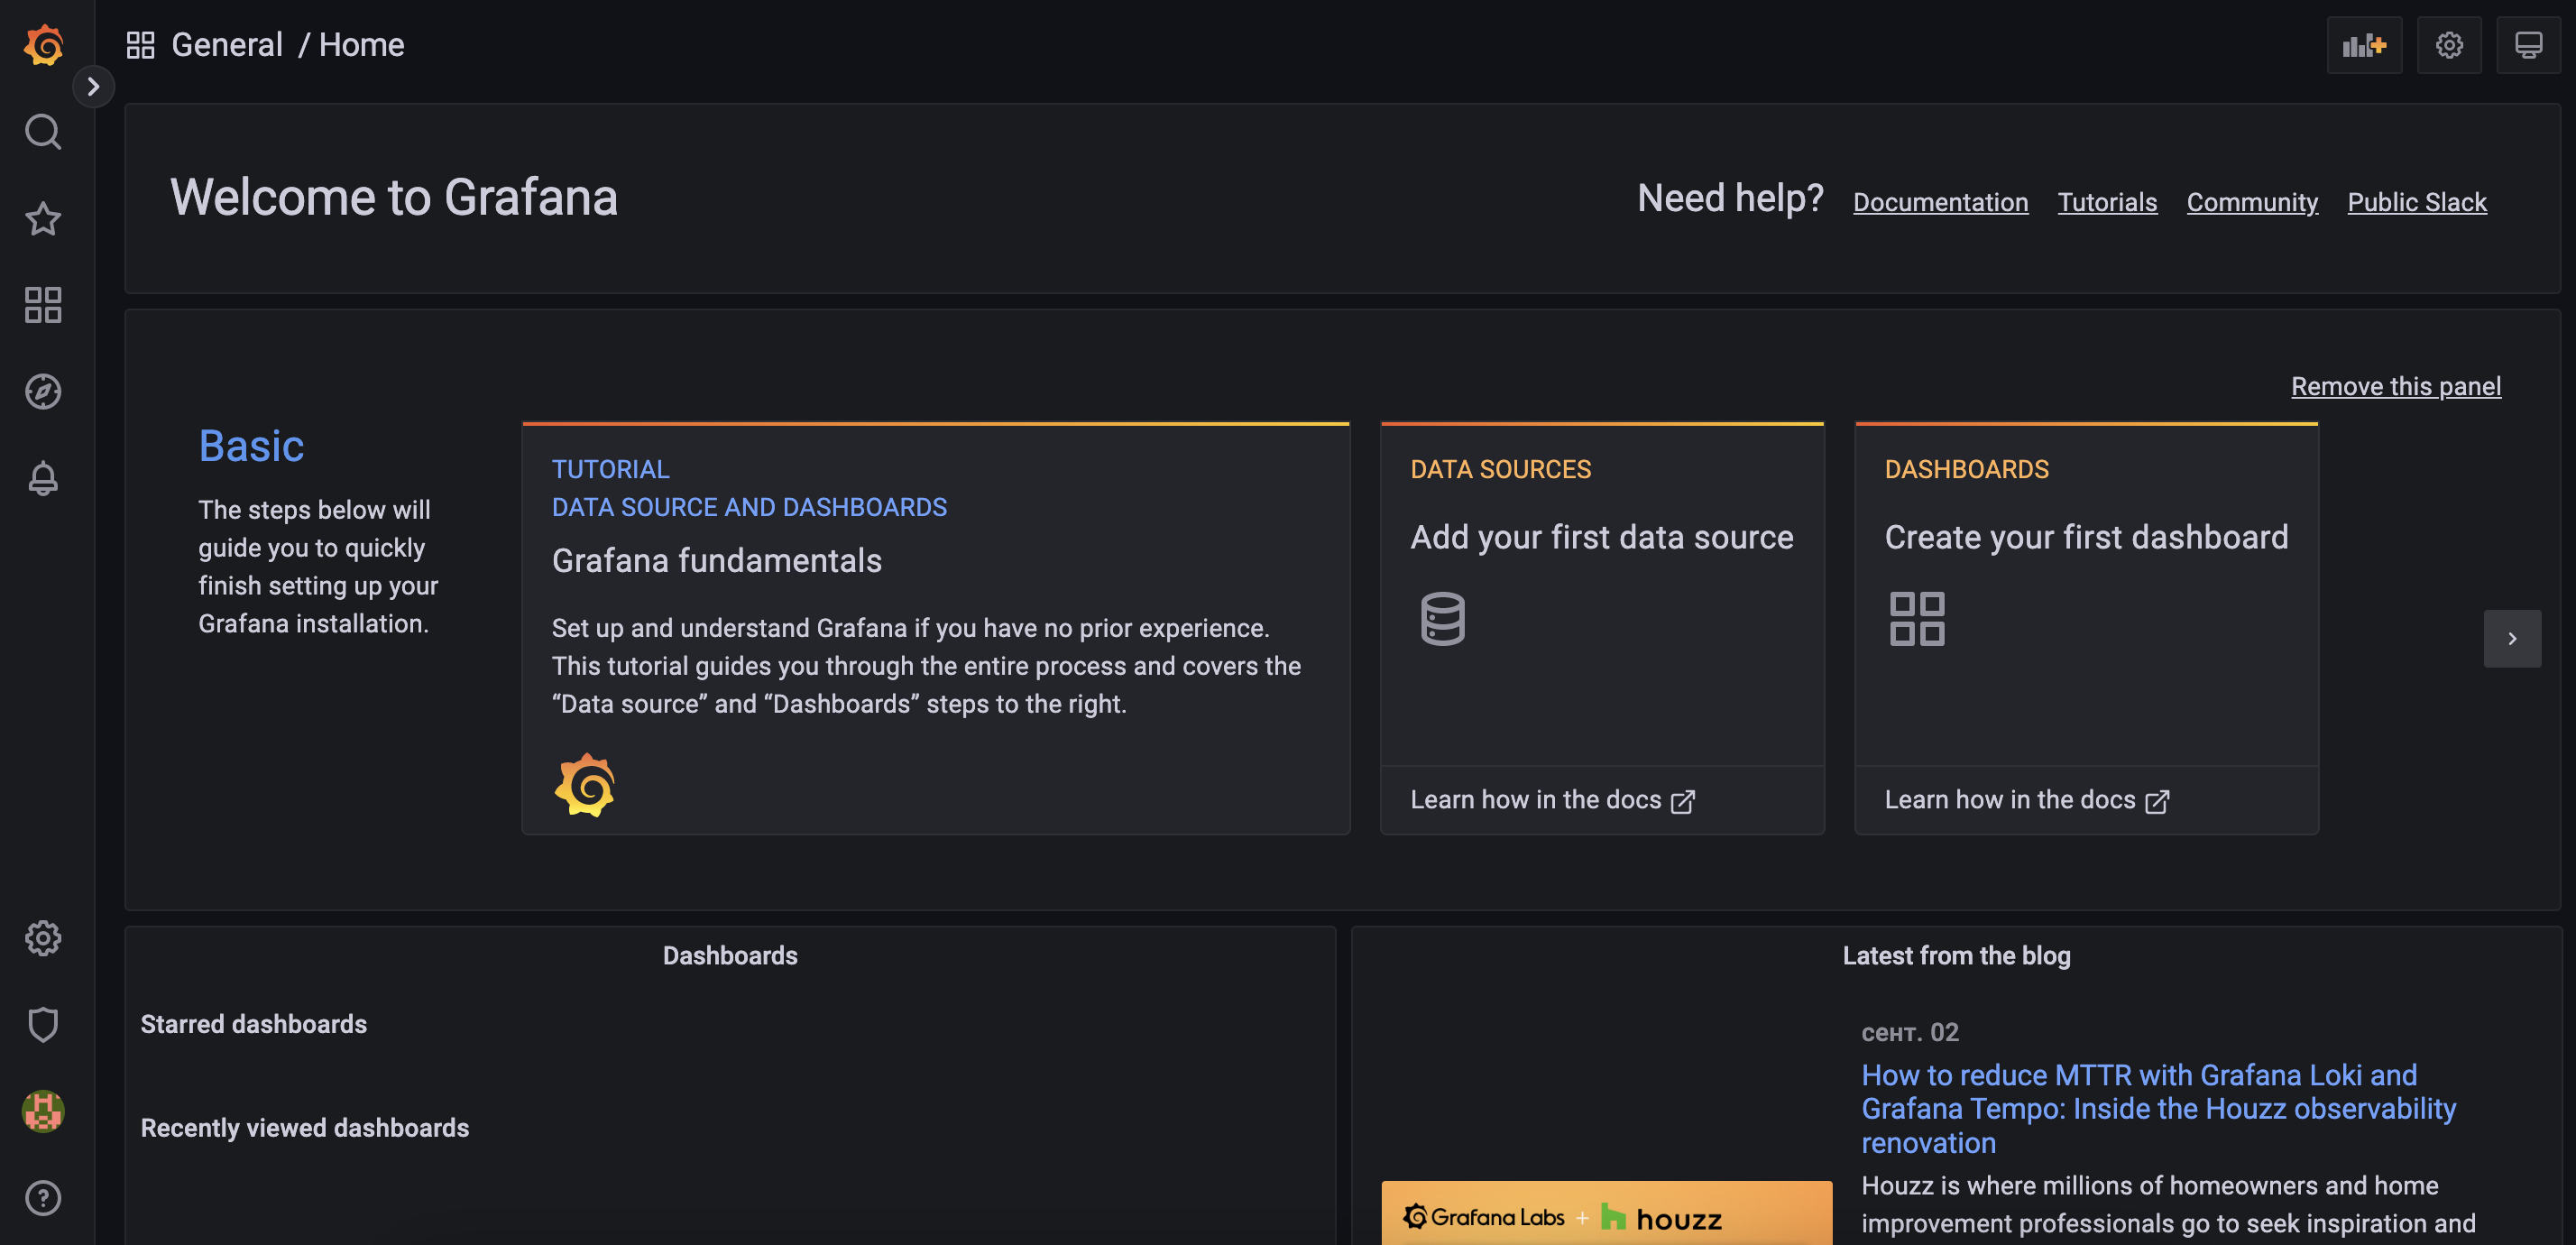
To enhance the security of your Grafana configuration, simply click on the Save button. This will take you back to the Welcome to Grafana page.
After changing the default credentials, your account is now secure. The next step involves modifying your Grafana configuration to ensure that no one can create a new account without obtaining permission from you.
Step 4 – Disabling the capability for users to register on Grafana and removing the option for anonymous access.
Grafana offers the flexibility for visitors to generate their own user accounts and preview dashboards without having to go through the registration process. These features can be useful when Grafana is not available online or when dealing with publicly accessible data such as service statuses. Nevertheless, it is crucial to note that granting anonymous access to Grafana while working with confidential data could pose a security concern. To address this issue, it is necessary to adjust the configuration of your Grafana setup.
To begin, open Grafana’s primary configuration file for editing.
- sudo nano /etc/grafana/grafana.ini
Find the allow_sign_up directive under the [users] section.
...
[users]
# disable user signup / registration
;allow_sign_up = true
...
If you set this directive to true, a Sign Up button will be added to the login screen so that users can register themselves and gain access to Grafana.
By setting this directive to false, the Sign Up button is eliminated, thereby enhancing Grafana’s security and privacy measures.
To enable this directive, delete the ; at the start of the line and change the option to false.
...
[users]
# disable user signup / registration
allow_sign_up = false
...
Afterwards, find the particular enabled directive beneath the [auth.anonymous] section.
...
[auth.anonymous]
# enable anonymous access
;enabled = false
...
Enabling the setting allows unrestricted access to your dashboards for non-registered users, while disabling it restricts dashboard access solely to registered users.
To activate this directive, delete the ; at the beginning of the line and change the option value to false.
...
[auth.anonymous]
# enable anonymous access
enabled = false
...
Save the file and close your text editor.
To implement the modifications, simply restart Grafana.
- sudo systemctl restart grafana-server
Make sure that everything is functioning correctly by verifying the service status of Grafana.
- sudo systemctl status grafana-server
Similar to previous instances, the result will indicate that Grafana is currently operational.
Simply open your web browser and go to https://your_domain. If you want to go back to the Sign Up screen, navigate your cursor to your avatar located at the bottom left of the screen, and select the Sign out option that is displayed.
After logging out, make sure there is no option to register and that you cannot log in without providing your login details.
Now that Grafana is configured and prepared for use, you have the option of streamlining the login process for your organization by authenticating via GitHub.
(Optional) Step 5 — Configuring a GitHub OAuth Application.
To implement a different way of signing in, you have the option to set up Grafana authentication through GitHub. This grants login access to all members of permitted GitHub organizations. This proves highly advantageous when you wish to enable multiple developers to work together and access metrics without the need for individual Grafana login credentials.
Begin by accessing a GitHub account linked to your organization, and subsequently proceed to reach your GitHub profile page.
Navigate to the left side of the screen and select your organization’s name from the Organization settings in the navigation menu.

You will find your Organization profile on the following screen, where you can modify your Organization’s display name, email, and URL settings.
To enable user authentication through GitHub, Grafana utilizes OAuth, which is an open standard allowing external parties to access local resources. To proceed, it is necessary to create a new OAuth application within your GitHub account.
You can find the OAuth Apps link by going to the bottom left corner of the screen and accessing it from Developer settings.
If your organization on GitHub hasn’t established any OAuth applications yet, you will be informed that there are no applications owned by the organization. Alternatively, if there are already OAuth applications linked to your account, you will be presented with a list of those applications.
To proceed, simply click on the button that says “Register an application.”
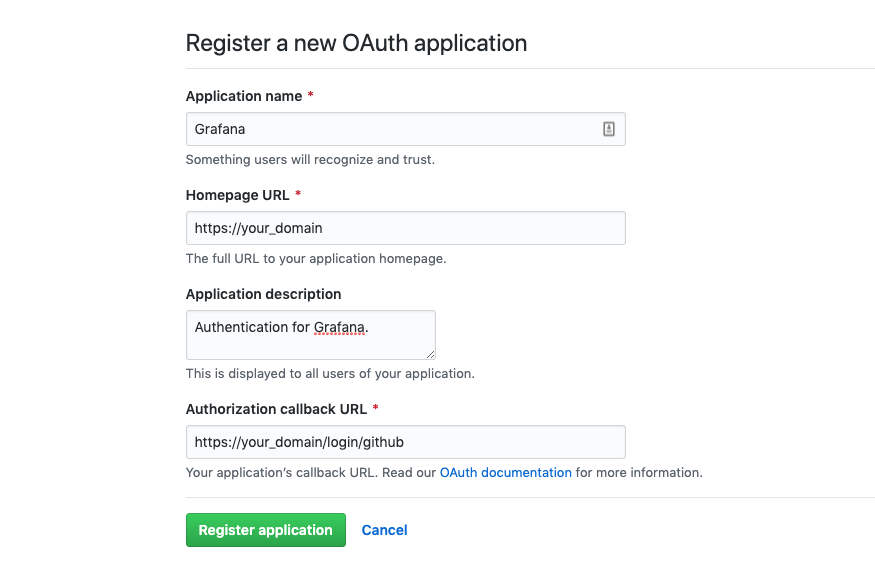
Fill in the below information about your Grafana setup on the subsequent page.
- Application name: This helps you distinguish your different OAuth applications from one another.
- Homepage URL: This tells GitHub where to find Grafana. Type https://your_domain into this field, replacing your_domain with your domain.
- Application Description: This provides a description of your OAuth application’s purpose.
- Application callback URL: This is the address where users will be sent once successfully authenticated. For Grafana, this field must be set to https://your_domain/login/github.
Please remember that when Grafana users log in through GitHub, they will be able to view the information you provided in the first three fields. Therefore, it is essential to enter relevant and suitable values.
Once finished, the form will appear similar to:
Please select the “Register application” button.
You will be directed to a page that contains the Client ID and Client Secret for your new OAuth application. Take note of these values, as they must be added to Grafana’s main configuration file to finish the setup.
Warning
After successfully setting up your GitHub OAuth application, you can now proceed with configuring Grafana to utilize GitHub for authentication.
Step 6 involves setting up Grafana as a GitHub OAuth App.
In order to finalize the GitHub authentication for your Grafana setup, you are required to make certain modifications to your Grafana configuration files.
Start by opening the primary Grafana configuration file.
- sudo nano /etc/grafana/grafana.ini
Find the [auth.github] section and remove the ; from the beginning of each line, except for ;allowed_domains and ;team_ids=, which should remain unchanged according to this tutorial.
Afterwards, set up Grafana to utilize your OAuth application’s client_id and client_secret values for GitHub integration.
- Set enabled and allow_sign_up to true. This will enable GitHub Authentication and permit members of the allowed organization to create accounts themselves. Note that this setting is different than the allow_sign_up property under [users] that you changed in Step 4.
- Set client_id and client_secret to the values you got while creating your GitHub OAuth application.
- Set allowed_organizations to the name of your organization to ensure that only members of your organization can sign up and log into Grafana.
The entire configuration will appear as follows:
...
[auth.github]
enabled = true
allow_sign_up = true
client_id = your_client_id_from_github
client_secret = your_client_secret_from_github
scopes = user:email,read:org
auth_url = https://github.com/login/oauth/authorize
token_url = https://github.com/login/oauth/access_token
api_url = https://api.github.com/user
;allowed_domains =
;team_ids =
allowed_organizations = your_organization_name
...
So, after providing all the necessary information about GitHub, you just need to enable redirects through a reverse proxy to finish the setup. This can be accomplished by specifying a root_url value under the [server] section.
...
[server]
root_url = https://your_domain
...
Please save your settings and exit the file.
Afterwards, restart Grafana in order to apply the modifications:
- sudo systemctl restart grafana-server
Finally, make sure to confirm that the service is operational.
- sudo systemctl status grafana-server
The output will reveal that the service is currently operational.
To evaluate your newly implemented authentication system on Grafana, perform the following steps: Access the website https://your_domain. If you are currently logged in, move your cursor over the profile picture in the bottom-left corner of the screen and select the “Sign out” option from the secondary menu located beside your name.
On the login page, there is a fresh segment below the existing Log in button that contains a button labeled Sign in with GitHub, featuring the GitHub logo.
To proceed, simply click on the button labeled “Sign in with GitHub”. You will then be redirected to GitHub, where you can sign in to your GitHub account and verify your desire to authorize Grafana.
Simply click on the green button stating “Authorize your_github_organization.”
Note
Once logged in, your existing Grafana account will be used. In case the user you logged in as does not have a Grafana account already, a new user account with Viewer privileges will be created by Grafana. This ensures that new users are only able to access and utilize the existing dashboards.
To modify the default permissions for new users, access the primary Grafana configuration file and make the necessary changes.
- sudo nano /etc/grafana/grafana.ini
Find the auto_assign_org_role command within the [users] section, and remove the ; at the start of the line to activate the setting.
Choose one of the following options to set the directive:
- Viewer: can only use existing dashboards.
- Editor: can change use, modify, and add dashboards.
- Admin: has permission to do everything.
This tutorial will assign the auto mode to Viewer:
...
[users]
...
auto_assign_org_role = Viewer
...
After saving your modifications, simply close the file and then proceed to restart Grafana.
- sudo systemctl restart grafana-server
Verify the status of the service.
- sudo systemctl status grafana-server
As previously, the status will indicate active (running).
At this stage, you have successfully set up Grafana to enable registration and usage for members of your GitHub organization on your Grafana installation.
In summary,
To conclude,
In closing,
In summary –
These statements all mean conclusion.
During this tutorial, you successfully completed the installation, configuration, and security setup for Grafana. Additionally, you enabled members from your organization to authenticate via GitHub.
If you want to expand your existing Grafana setup, you can refer to the official and community-generated dashboards. For further understanding of Grafana usage in general, you can explore the official Grafana documentation or explore our additional monitoring tutorials.
More Tutorials
Common errors that occur when using Nginx for connections.(Opens in a new browser tab)
Set in Python(Opens in a new browser tab)
Installation of Arch Linux(Opens in a new browser tab)
React Application Component Testing Integrate with Playwright(Opens in a new browser tab)
Server Configurations Frequently Used for Your Web Application(Opens in a new browser tab)

