Android按钮开发:Kotlin与XML高效实现指南
这是文章《使用Kotlin和XML编写的Android按钮》的第1部分(共1部分)。
内容片段: 在本教程中,我们将学习如何在Android应用中使用Kotlin编程创建一个按钮。
Android按钮概览
安卓的Button类继承自TextView。Button是一种用于获取用户点击交互以触发应用程序操作的UI小部件。您可以在Android Studio项目中的XML布局以及Kotlin Activity类中创建一个按钮。
在XML布局中创建一个按钮
<Button
    android:id="@+id/button"
    android:layout_width="wrap_content"
    android:layout_height="wrap_content"
android:text="Androidly Button"/>android:id用于设置按钮的唯一标识符。android:text用于设置按钮内部的文本。默认情况下,文本会以大写字母显示。android:onClick用于定义当按钮被点击时在Activity中调用的Kotlin函数。它是一个点击监听器。android:background用于设置按钮的背景颜色/可绘制资源。
提示:为了防止所有字母都显示为大写,请使用 android:textAllCaps="false" 属性。
更多关于如何在XML布局中自定义按钮的详细信息,请参阅Android按钮教程。
按钮点击监听器
我们也可以通过编程方式设置按钮监听器。以下是两个主要的监听器:
- 点击监听器 – 在按钮被点击时触发。
- 长按监听器 – 在按钮被长时间按住时触发。
以下代码片段在一个按钮上设置了setOnClickListener:
button.setOnClickListener(object : View.OnClickListener {
            override fun onClick(v: View?) {
                //您的实现代码在此处
            }
        })
以上代码可以转换成一个lambda表达式来简化:
button.setOnClickListener {
      textView.text = "Androidly Buttons"
    }
同样,可以通过以下方式来定义 setOnLongClickListener:
button.setOnLongClickListener {
        textView.text = "Androidly Button Long click"
        true
    }

//或者
button.setOnLongClickListener {
        textView.text = "Androidly Button Long click"
        false
    }
在上面的代码中,每个表达式中的最后一个语句是返回语句。
- 如果
setOnLongClickListener返回true,则表示setOnClickListener不会被触发。 - 如果
setOnLongClickListener返回false,则表示setOnClickListener将会被触发。
这被称为事件消费。第一种情况消费了该事件。
使用 Kotlin 编写的 Android 按钮
我们将开发一个应用程序,在按钮点击时增加TextView上的计数器。我们将使用Kotlin来创建按钮。我们还将学习不同的按钮点击处理程序。
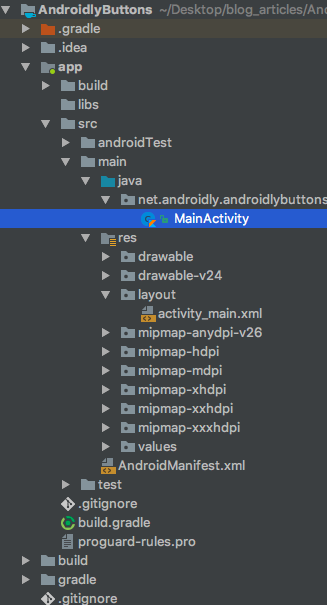
1. 项目结构
2. Kotlin 按钮代码
activity_main.layout文件的样子如下代码所示:
<?xml version="1.0" encoding="utf-8"?>
<LinearLayout xmlns:android="http://schemas.android.com/apk/res/android"
    android:id="@+id/linearLayout"
    android:layout_width="match_parent"
    android:layout_height="match_parent"
    android:gravity="center"
    android:orientation="vertical">

    <TextView
        android:id="@+id/txtCounter"
        android:layout_width="wrap_content"
        android:layout_height="wrap_content"
        android:text="@string/number_zero"
        android:textAppearance="@style/TextAppearance.AppCompat.Display2"
        android:textColor="#000" />


    <Button
        android:id="@+id/btnIncrementByOne"
        android:layout_width="wrap_content"
        android:layout_height="wrap_content"
        android:onClick="addOne"
        android:text="@string/increment_by_one" />

</LinearLayout>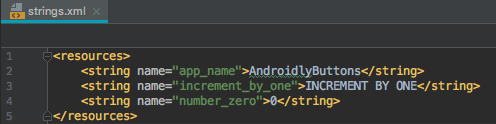
package net.androidly.androidlybuttons

import android.support.v7.app.AppCompatActivity
import android.os.Bundle
import android.support.v4.content.ContextCompat
import android.view.View
import android.view.ViewGroup
import android.widget.Button
import android.widget.LinearLayout
import kotlinx.android.synthetic.main.activity_main.*

class MainActivity : AppCompatActivity(), View.OnClickListener {

    override fun onCreate(savedInstanceState: Bundle?) {
        super.onCreate(savedInstanceState)
        setContentView(R.layout.activity_main)

        var androidlyButton = Button(this)
        androidlyButton.apply {
            layoutParams = LinearLayout.LayoutParams(LinearLayout.LayoutParams.MATCH_PARENT, ViewGroup.LayoutParams.WRAP_CONTENT)
            text = "Double the value"
            setAllCaps(false)
            textSize = 20f
            id = R.id.btnDouble
        }

        androidlyButton.setOnClickListener(this)
        linearLayout.addView(androidlyButton)

        androidlyButton = Button(this)
        androidlyButton.apply {
            layoutParams = LinearLayout.LayoutParams(LinearLayout.LayoutParams.WRAP_CONTENT, ViewGroup.LayoutParams.WRAP_CONTENT)
            text = "RESET"
            textSize = 20f
            setTextColor(ContextCompat.getColor(this@MainActivity, R.color.colorPrimaryDark))
            id = R.id.btnReset
            setOnLongClickListener {
                txtCounter.text = 0.toString()
                true
            }
        }
        androidlyButton.setOnClickListener(this)
        linearLayout.addView(androidlyButton)

    }

    override fun onClick(v: View?) {
        when (v?.id) {
            R.id.btnDouble -> {
                txtCounter.text = (txtCounter.text.toString().toInt() * 2).toString()
            }
            R.id.btnReset -> {
                txtCounter.text = (-100).toString()
            }
            else -> {
            }
        }
    }

    fun addOne(view: View) {
        txtCounter.text = (txtCounter.text.toString().toInt() + 1).toString()
    }
}
重要要点:
- 导入
kotlinx.android.synthetic.main.activity_main.*语句会自动从我们的类中的XML中获取视图的ID,从而省去了使用findViewById的步骤。 - 当
btnIncrementByOne被点击时,会触发fun addOne(view: View)函数。在函数声明中必须定义(view: View)参数。 - 使用以下代码在父视图(此处为
LinearLayout)中以编程方式创建一个按钮并设置它:var androidlyButton = Button(this) linearLayout.addView(androidlyButton) - 我们可以使用
apply{}lambda表达式而不是在Button类上调用成员函数。 layoutParams用于定义按钮的宽度和高度。MATCH_PARENT将宽度/高度设置为与线性布局相等。WRAP_CONTENT将视图包装到内容的大小。- 我们可以在
res | values | ids.xml中以编程方式设置ID。 - 我们在
MainActivity.kt类中定义了View.OnClickListener接口。因此我们需要覆盖它的onClick()函数。 - 在
onClick函数内部,我们使用Kotlin的when语句,其等效于其他语言中的switch语句。 - 要触发
onClick函数,必须在按钮上使用setOnClickListener方法注册接口,并使用上下文(this)。

下载项目:AndroidlyButtons

