如何在Rocky Linux 9上使用Fail2Ban保护Nginx服务器
介绍
在建立一个网页服务器时,通常会有一些你希望限制访问的部分。网页应用程序通常都提供自己的身份验证和授权方法,但如果这些方法不足或无法使用,你也可以通过网页服务器来限制访问。然而,网页服务器身份验证也代表了一个非常可预测的攻击面或攻击向量,攻击者可以试图通过它们获取访问权限。
所有连接到网络的服务都是潜在的目标。如果您查看任何流量较大的网络服务器的日志,通常会看到重复且有系统性的登录尝试,其中包括用户和机器人进行的暴力攻击。
一些大规模生产部署认为这种风险完全无法接受,通常会在任何私有终端的前端实施一种名为WireGuard的VPN,以便在外部互联网上无法直接连接到这些URL,除非使用额外的软件抽象或网关。尽管这些VPN解决方案得到广泛信任,但会增加复杂度,并可能破坏一些自动化流程或其他小型软件挂钩。
在完全设置VPN之前,你可以或者除此之外,可以使用一个叫作Fail2ban的工具。Fail2ban能够通过创建规则来自动改变你的防火墙配置,从而在一定数量的登录尝试失败后禁止特定IP地址,从而显著减轻暴力破解攻击。这将使你的服务器在未经干预的情况下自动加强对这些访问尝试的防御。
在这个指南中,您将学习如何在Rocky Linux 9服务器上安装fail2ban,并配置它来监视您的Nginx日志以侦查入侵企图。
先决条件
Note: This is the translation of “Prerequisites”.
- Access to an Rocky Linux 9 server environment with a non-root user with sudo privileges in order to perform administrative tasks. To learn how to create such a user, follow the Rocky Linux 9 initial server setup guide.
- Nginx installed on your system, following Steps 1 and 2 of this guide on how to install Nginx on Rocky Linux 9.
- Nginx installed and configured with password authentication following How To Set Up Password Authentication with Nginx on Rocky Linux 9.
步骤1 – 安装和配置Fail2ban
Fail2ban在Rocky的默认软件仓库中不可用。然而,在EPEL(Enhanced Packages for Enterprise Linux)仓库中可以找到它,该仓库通常用于Red Hat和Rocky Linux上的第三方软件包。如果您尚未将EPEL添加到系统软件包源中,您可以使用dnf添加该仓库,就像安装其他任何软件包一样。
- sudo dnf install epel-release -y
当安装新软件时,dnf软件包管理器将会检查EPEL仓库以及您默认的软件包源。,请继续安装Fail2ban。
- sudo dnf install fail2ban -y
在安装后,Fail2ban会自动设置一个后台服务。然而,默认情况下它是禁用的,因为它的一些默认设置可能会导致不良效果。您可以通过使用systemctl命令来进行验证。
- systemctl status fail2ban.service
Output○ fail2ban.service - Fail2Ban Service
     Loaded: loaded (/lib/systemd/system/fail2ban.service; disabled; vendor preset: disabled
     Active: inactive (dead)
       Docs: man:fail2ban(1)
你可以立即启用Fail2ban,但首先,你将会审查一些其功能。
The fail2ban服务将其配置文件保存在/etc/fail2ban目录中。有一个名为jail.conf的默认文件。前往该目录并使用head -20打印该文件的前20行。
- cd /etc/fail2ban
- head -20 jail.conf
Output#
# WARNING: heavily refactored in 0.9.0 release.  Please review and
#          customize settings for your setup.
#
# Changes:  in most of the cases you should not modify this
#           file, but provide customizations in jail.local file,
#           or separate .conf files under jail.d/ directory, e.g.:
#
# HOW TO ACTIVATE JAILS:
#
# YOU SHOULD NOT MODIFY THIS FILE.
#
# It will probably be overwritten or improved in a distribution update.
#
# Provide customizations in a jail.local file or a jail.d/customisation.local.
# For example to change the default bantime for all jails and to enable the
# ssh-iptables jail the following (uncommented) would appear in the .local file.
# See man 5 jail.conf for details.
#
# [DEFAULT]
你会发现,这个文件的开头几行都是被注释掉的 – 它们以#字符开头,表示它们是用作文档而不是设置。你也会看到,这些注释指示你不要直接修改此文件。作为替代,你有两个选项:要么在jail.d/目录下创建多个文件的个别配置文件以供Fail2ban使用,要么创建一个jail.local文件来保存所有的本地设置。随着Fail2ban本身的更新,jail.conf文件也会定期更新,并作为没有创建任何覆盖设置的默认设置的来源。
在本教程中,您将创建jail.local文件。您可以通过复制jail.conf文件来完成这一操作。
- sudo cp jail.conf jail.local
现在你可以开始进行配置更改了。Rocky Linux 9默认自带的文本编辑器是vi。vi是一个非常强大的文本编辑器,但对于不熟悉它的用户来说可能有些晦涩。你可能想要安装一个更加用户友好的编辑器,比如nano,在Rocky Linux 9服务器上编辑配置文件。
- sudo dnf install nano -y
现在你可以使用Nano编辑你的Nginx配置文件。
- sudo nano jail.local
调整默认设置
首先,您将评估文件中设置的默认值。这些默认值位于文件中的[DEFAULT]区域下。这些项目设置了通用策略,并可以在每个应用程序基础上进行覆盖。如果您使用nano,您可以按下Ctrl+W进行文件内搜索,输入搜索字符串,然后按回车键。
审查的首要项目之一是不受fail2ban策略限制的客户端列表。这是通过ignoreip指令来设置的。为了避免将自己锁定在外,将自己的IP地址或网络添加到例外列表中有时是个好主意。对于web服务器登录而言,这不是一个大问题,因为如果能够保持shell访问权限,你可以随时撤销封禁。您可以取消注释此行,并添加由空格分隔的其他IP地址或网络,以扩充现有列表。
/etc/fail2ban/jail.local配置文件
[DEFAULT]

. . .
#ignoreip = 127.0.0.1/8 your_home_IP
您可能还需要调整的另一项是禁止时间(bantime),用于控制对违规成员的禁止时长(以秒为单位)。理想情况是将其设置为足够长的时间以阻碍恶意自动行为,同时又要足够短以让用户纠正错误。默认设置为10分钟,您可以增加或减少该数值。
[DEFAULT]

. . .
bantime = 10m
下面两个项目确定用于确定攻击客户机的日志行范围。findtime 指定了一个以秒为单位的时间段,而 maxretry 指令则表示在该时间段内可以容忍的尝试次数。如果在 findtime 设置的时间段内,客户机的尝试次数超过了 maxretry 的设定值,它们将被禁止访问。
[DEFAULT]

. . .
findtime = 10m
maxretry = 5
当Fail2ban想要实施封禁时,动作参数配置了Fail2ban采取的措施。在此参数之前的文件中定义了action_的值。默认的动作是更新防火墙配置,拒绝来自违规主机的流量,直到封禁时间过去为止。
[DEFAULT]
. . .
action = $(action_)s
. . .
默认情况下提供了其他的动作脚本,你可以用上述的$(action_)来替换它们。
/etc/fail2ban/jail.local 路径上的文件
…
# ban & send an e-mail with whois report to the destemail.
action_mw = %(action_)s
            %(mta)s-whois[sender="%(sender)s", dest="%(destemail)s", protocol="%(protocol)s", chain="%(chain)s"]

# ban & send an e-mail with whois report and relevant log lines
# to the destemail.
action_mwl = %(action_)s
             %(mta)s-whois-lines[sender="%(sender)s", dest="%(destemail)s", logpath="%(logpath)s", chain="%(chain)s"]
…
在接下来的步骤中,你将进入Nginx特定的配置。
第二步 – 配置Fail2Ban监控Nginx日志。
现在您已经设置了一些通用的fail2ban设置,您可以启用一些特定于Nginx的监控您的web服务器日志的拦截器,以便检测特定的模式。
配置文件中,每个监狱都以括号内的监狱名称标记为头部 – 除了[DEFAULT]部分以外的每个部分都表示了特定监狱的配置。默认情况下,只有[ssh]监狱是启用的。
要启用对Nginx登录尝试的日志监控,请启用[nginx-http-auth]监狱。在此部分中添加enabled = true指令。
…
[nginx-http-auth]

enabled  = true
port     = http,https
logpath = %(nginx_error_log)s
. . .
当您完成修改后,保存并关闭文件。如果您使用的是nano编辑器,按下Ctrl+X,然后在提示时按下Y,接着按下Enter键。接下来,您将审查nginx-http-auth的过滤器配置。
第三步 – 回顾 Nginx 监狱的过滤器
你可能已经注意到,jail.local中的[nginx-http-auth]块不包含任何针对Nginx的特定规则。这些规则并没有自动硬编码在Fail2ban中 – 实际上,[nginx-http-auth]头部直接对应Fail2ban的filter.d目录中的一个文件名,其中包含预打包的过滤器。如果你列出这个目录的内容,你可以看到其他可用的预打包过滤器,以备将来可能需要使用。
- ls /etc/fail2ban/filter.d
Output3proxy.conf                freeswitch.conf         proftpd.conf
apache-auth.conf           froxlor-auth.conf       pure-ftpd.conf
apache-badbots.conf        gitlab.conf             qmail.conf
apache-botsearch.conf      grafana.conf            recidive.conf
apache-common.conf         groupoffice.conf        roundcube-auth.conf
apache-fakegooglebot.conf  gssftpd.conf            scanlogd.conf
apache-modsecurity.conf    guacamole.conf          screensharingd.conf
apache-nohome.conf         haproxy-http-auth.conf  selinux-common.conf
apache-noscript.conf       horde.conf              selinux-ssh.conf
apache-overflows.conf      ignorecommands          sendmail-auth.conf
apache-pass.conf           kerio.conf              sendmail-reject.conf
apache-shellshock.conf     lighttpd-auth.conf      sieve.conf
assp.conf                  mongodb-auth.conf       slapd.conf
asterisk.conf              monit.conf              softethervpn.conf
bitwarden.conf             murmur.conf             sogo-auth.conf
…
现在,先看一下nginx-http-auth.conf。
- cat /etc/fail2ban/filter.d/nginx-http-auth.conf
Output# fail2ban filter configuration for nginx


[Definition]


failregex = ^ \[error\] \d+#\d+: \*\d+ user "(?:[^"]+|.*?)":? (?:password mismatch|was not found in "[^\"]*"), client: <HOST>, server: \S*, request: "\S+ \S+ HTTP/\d+\.\d+", host: "\S+"(?:, referrer: "\S+")?\s*$

ignoreregex =

datepattern = {^LN-BEG}
…
这些文件包含正则表达式(文本解析的常用简写方式),用于判断日志中的一行是否是认证失败的尝试。根据需求可以直接进行修改。
在接下来的步骤中,您将启用并测试Fail2ban。
第四步 – 激活您的Nginx监狱
此时,您可以启用您的Fail2ban服务,以使其自动运行. 首先,请运行systemctl enable命令。
- sudo systemctl enable fail2ban
然后,使用systemctl start手动启动它的第一次。
- sudo systemctl start fail2ban
你可以使用systemctl status命令来验证它是否在运行。
- sudo systemctl status fail2ban
Output● fail2ban.service - Fail2Ban Service
     Loaded: loaded (/lib/systemd/system/fail2ban.service; enabled; vendor preset: enabled
     Active: active (running) since Wed 2022-09-14 20:48:40 UTC; 22h ago
       Docs: man:fail2ban(1)
   Main PID: 5962 (fail2ban-server)
      Tasks: 7 (limit: 2327)
     Memory: 12.6M
        CPU: 195ms
     CGroup: /system.slice/fail2ban.service
             └─5962 /usr/bin/python3 /usr/bin/fail2ban-server -xf start
Note
获取关于启用的监狱的信息
您可以使用fail2ban-client命令查看所有已启用的监狱。
- sudo fail2ban-client status
你应该能看到已启用的监狱列表。
OutputStatus
|- Number of jail:      2
`- Jail list:           nginx-http-auth, sshd
如果您想查看任何一家监狱执行的禁令的详细信息,请再次使用fail2ban-client。
- sudo fail2ban-client status nginx-http-auth
OutputStatus for the jail: nginx-http-auth
|- filter
|  |- File list:        /var/log/nginx/error.log
|  |- Currently failed: 0
|  `- Total failed:     0
`- action
   |- Currently banned: 0
   |  `- IP list:
   `- Total banned:     0
在本教程的最后一步中,您将故意进行封禁测试,以验证您的Fail2ban配置是否正常工作。
第五步 – 测试Fail2Ban策略
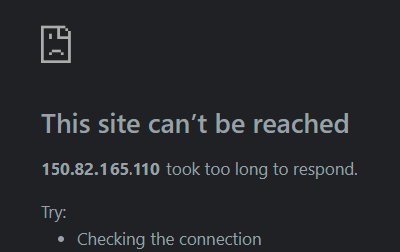
为了确保Fail2ban策略按预期阻止流量,测试它们是非常重要的。为此,请在本地Web浏览器中导航至您的服务器。在Nginx身份验证提示中,反复输入错误的凭据。经过几次尝试后,服务器应该完全停止响应您,就好像您的连接已经中断了一样。

如果你使用 fail2ban-client 查看 nginx-http-auth 配置的状态,你会发现你的 IP 地址被禁止访问该站点。
- sudo fail2ban-client status nginx-http-auth
OutputStatus for the jail: nginx-http-auth
|- Filter
|  |- Currently failed: 0
|  |- Total failed:     5
|  `- File list:        /var/log/nginx/error.log
`- Actions
   |- Currently banned: 1
   |- Total banned:     1
   `- Banned IP list:   108.172.85.62
当你确信你的规则有效时,可以通过输入fail2ban-client来手动解封你的IP地址。
- sudo fail2ban-client set nginx-http-auth unbanip 108.172.85.62
现在你应该可以再次尝试进行身份验证了。
结论
Fail2ban提供了很大的灵活性,可以构建适合您特定安全需求的策略。通过查看/etc/fail2ban/jail.local文件中的变量和模式,以及其依赖的/etc/fail2ban/filter.d和/etc/fail2ban/action.d目录中的文件,您可以找到许多可以调整和更改的部分,以满足您不断变化的需求。使用fail2ban保护您的服务器可以提供一个有用的安全基线。
要探索更多使用 fail2ban 的方法,请参阅《如何使用 fail2ban 保护 Linux 服务器上的服务》以及《如何使用 fail2ban 保护 Rocky Linux 9 上的 SSH》。

