Node.jsアプリケーションをNginx、Let’s Encrypt、およびDocker Composeで安全にコンテナ化の方法
序文
Node.jsアプリケーションの柔軟性とセキュリティを向上させる方法は複数あります。Nginxのようなリバースプロキシを使用することで、リクエストの負荷分散、静的コンテンツのキャッシュ、トランスポート層セキュリティ(TLS)の実装が可能になります。サーバーで暗号化されたHTTPSを有効にすることにより、アプリケーションへの通信は安全に保たれます。
コンテナ上でTLS/SSLを使用したリバースプロキシを実装する場合、ホストオペレーティングシステム上で直接作業する場合とは異なる手順が必要です。例えば、サーバ上で動作しているアプリケーションのためにLet’s Encryptから証明書を取得する場合、必要なソフトウェアをホストに直接インストールします。しかし、コンテナを使用すると異なる方法で進めることができます。Docker Composeを使用して、アプリケーション、ウェブサーバ、およびCertbotクライアントのコンテナを作成し、証明書を取得できます。これらの手順に従うことで、コンテナ化されたワークフローのモジュラリティと移植性を活用することができます。
このチュートリアルでは、Docker Composeを使用してNginxリバースプロキシを使ったNode.jsアプリケーションをデプロイします。アプリケーションに関連するドメインのTLS/SSL証明書を取得し、SSL Labsから高いセキュリティ評価を受けることを確認します。最後に、証明書を更新してドメインを安全な状態に保つために、cronジョブを設定します。
前提条件
このチュートリアルに従うためには、次のものが必要です。
- An Ubuntu 18.04 server, a non-root user with sudo privileges, and an active firewall. For guidance on how to set these up, please read this Initial Server Setup guide.
- Docker and Docker Compose installed on your server. For guidance on installing Docker, follow Steps 1 and 2 of How To Install and Use Docker on Ubuntu 18.04. For guidance on installing Compose, follow Step 1 of How To Install Docker Compose on Ubuntu 18.04.
- A registered domain name. This tutorial will use your_domain throughout. You can get one for free at Freenom, or use the domain registrar of your choice.
- Both of the following DNS records set up for your server. You can follow this introduction to Silicon Cloud DNS for details on how to add them to a Silicon Cloud account, if that’s what you’re using:An A record with your_domain pointing to your server’s public IP address.
An A record with www.your_domain pointing to your server’s public IP address.
すべての準備が整ったら、最初のステップを始める準備ができます。
ステップ1 — ノードアプリケーションの複製とテスト
最初のステップとして、Nodeアプリケーションコードを含むリポジトリをクローンします。この中にはComposeを使ってアプリケーションのイメージをビルドするためのDockerfileも含まれています。次に、リバースプロキシやSSLなしでdocker runコマンドを使用してアプリケーションをビルドおよび実行してテストします。
あなたの非ルートユーザーのホームディレクトリには、Silicon Cloud CommunityのGitHubアカウントからnodejs-image-demoリポジトリをクローニングしてください。このリポジトリには、Dockerを使用してNode.jsアプリケーションを構築する手順で説明されているセットアップのコードが含まれています。
ディレクトリにリポジトリを複製してください。この例では、ディレクトリ名としてnode_projectを使用しています。お好みに合わせて、このディレクトリに適切な名前を付けてください。
- git clone https://github.com/do-community/nodejs-image-demo.git node_project
「node_projectディレクトリに移動してください。」
- cd node_project
このディレクトリには、Docker node:10イメージと現在のプロジェクトディレクトリの内容を使用してNodeアプリケーションをビルドするための指示を含むDockerファイルがあります。次のコマンドでDockerファイルの内容をプレビューできます。
- cat Dockerfile
FROM node:10-alpine RUN mkdir -p /home/node/app/node_modules && chown -R node:node /home/node/app WORKDIR /home/node/app COPY package*.json ./ USER node RUN npm install COPY –chown=node:node . . EXPOSE 8080 CMD [ “node”, “app.js” ]
これらの手順は、現在のディレクトリからプロジェクトのコードをコンテナにコピーし、npm installで依存関係をインストールすることで、Nodeのイメージを構築します。また、Dockerのキャッシュとイメージレイヤーを利用するために、package.jsonとpackage-lock.jsonのコピーを、アプリケーションコードの残りの部分とは別に保持します。最後に、コンテナを非ルートのノードユーザーとして実行し、適切な権限をアプリケーションコードとnode_modulesディレクトリに設定するという指示があります。
このDockerfileとNodeのイメージのベストプラクティスの詳細については、Dockerを使用したNode.jsアプリケーションのビルド方法のステップ3で完全なディスカッションをご覧ください。
SSLなしでアプリケーションをテストするために、docker buildコマンドと-tオプションを使用してイメージをビルドおよびタグ付けすることができます。この例ではイメージ名をnode-demoとしていますが、他の名前を自由に付けることもできます。
- docker build -t node-demo .
ビルドプロセスが完了したら、docker images コマンドを使用してイメージを一覧表示できます。
- docker images
以下の出力は、アプリケーションのイメージビルドが正常に完了したことを確認します。
REPOSITORY TAG IMAGE ID CREATED SIZE node-demo latest 23961524051d 7 seconds ago 73MB node 10-alpine 8a752d5af4ce 3 weeks ago 70.7MB
次に、docker runでコンテナを作成します。このコマンドには3つのフラグが含まれています。
- -p: This publishes the port on the container and maps it to a port on your host. You will use port 80 on the host in this example, but feel free to modify this as necessary if you have another process running on that port. For more information about how this works, review this discussion in the Docker documentation on port binding.
- -d: This runs the container in the background.
- –name: This allows you to give the container a memorable name.
コンテナをビルドするために、以下のコマンドを実行してください。
- docker run –name node-demo -p 80:8080 -d node-demo
Docker psコマンドを使用して、実行中のコンテナを確認してください。
- docker ps
次の出力は、あなたのアプリケーションコンテナが実行されていることを確認します。
CONTAINER ID IMAGE COMMAND CREATED STATUS PORTS NAMES 4133b72391da node-demo “node app.js” 17 seconds ago Up 16 seconds 0.0.0.0:80->8080/tcp node-demo
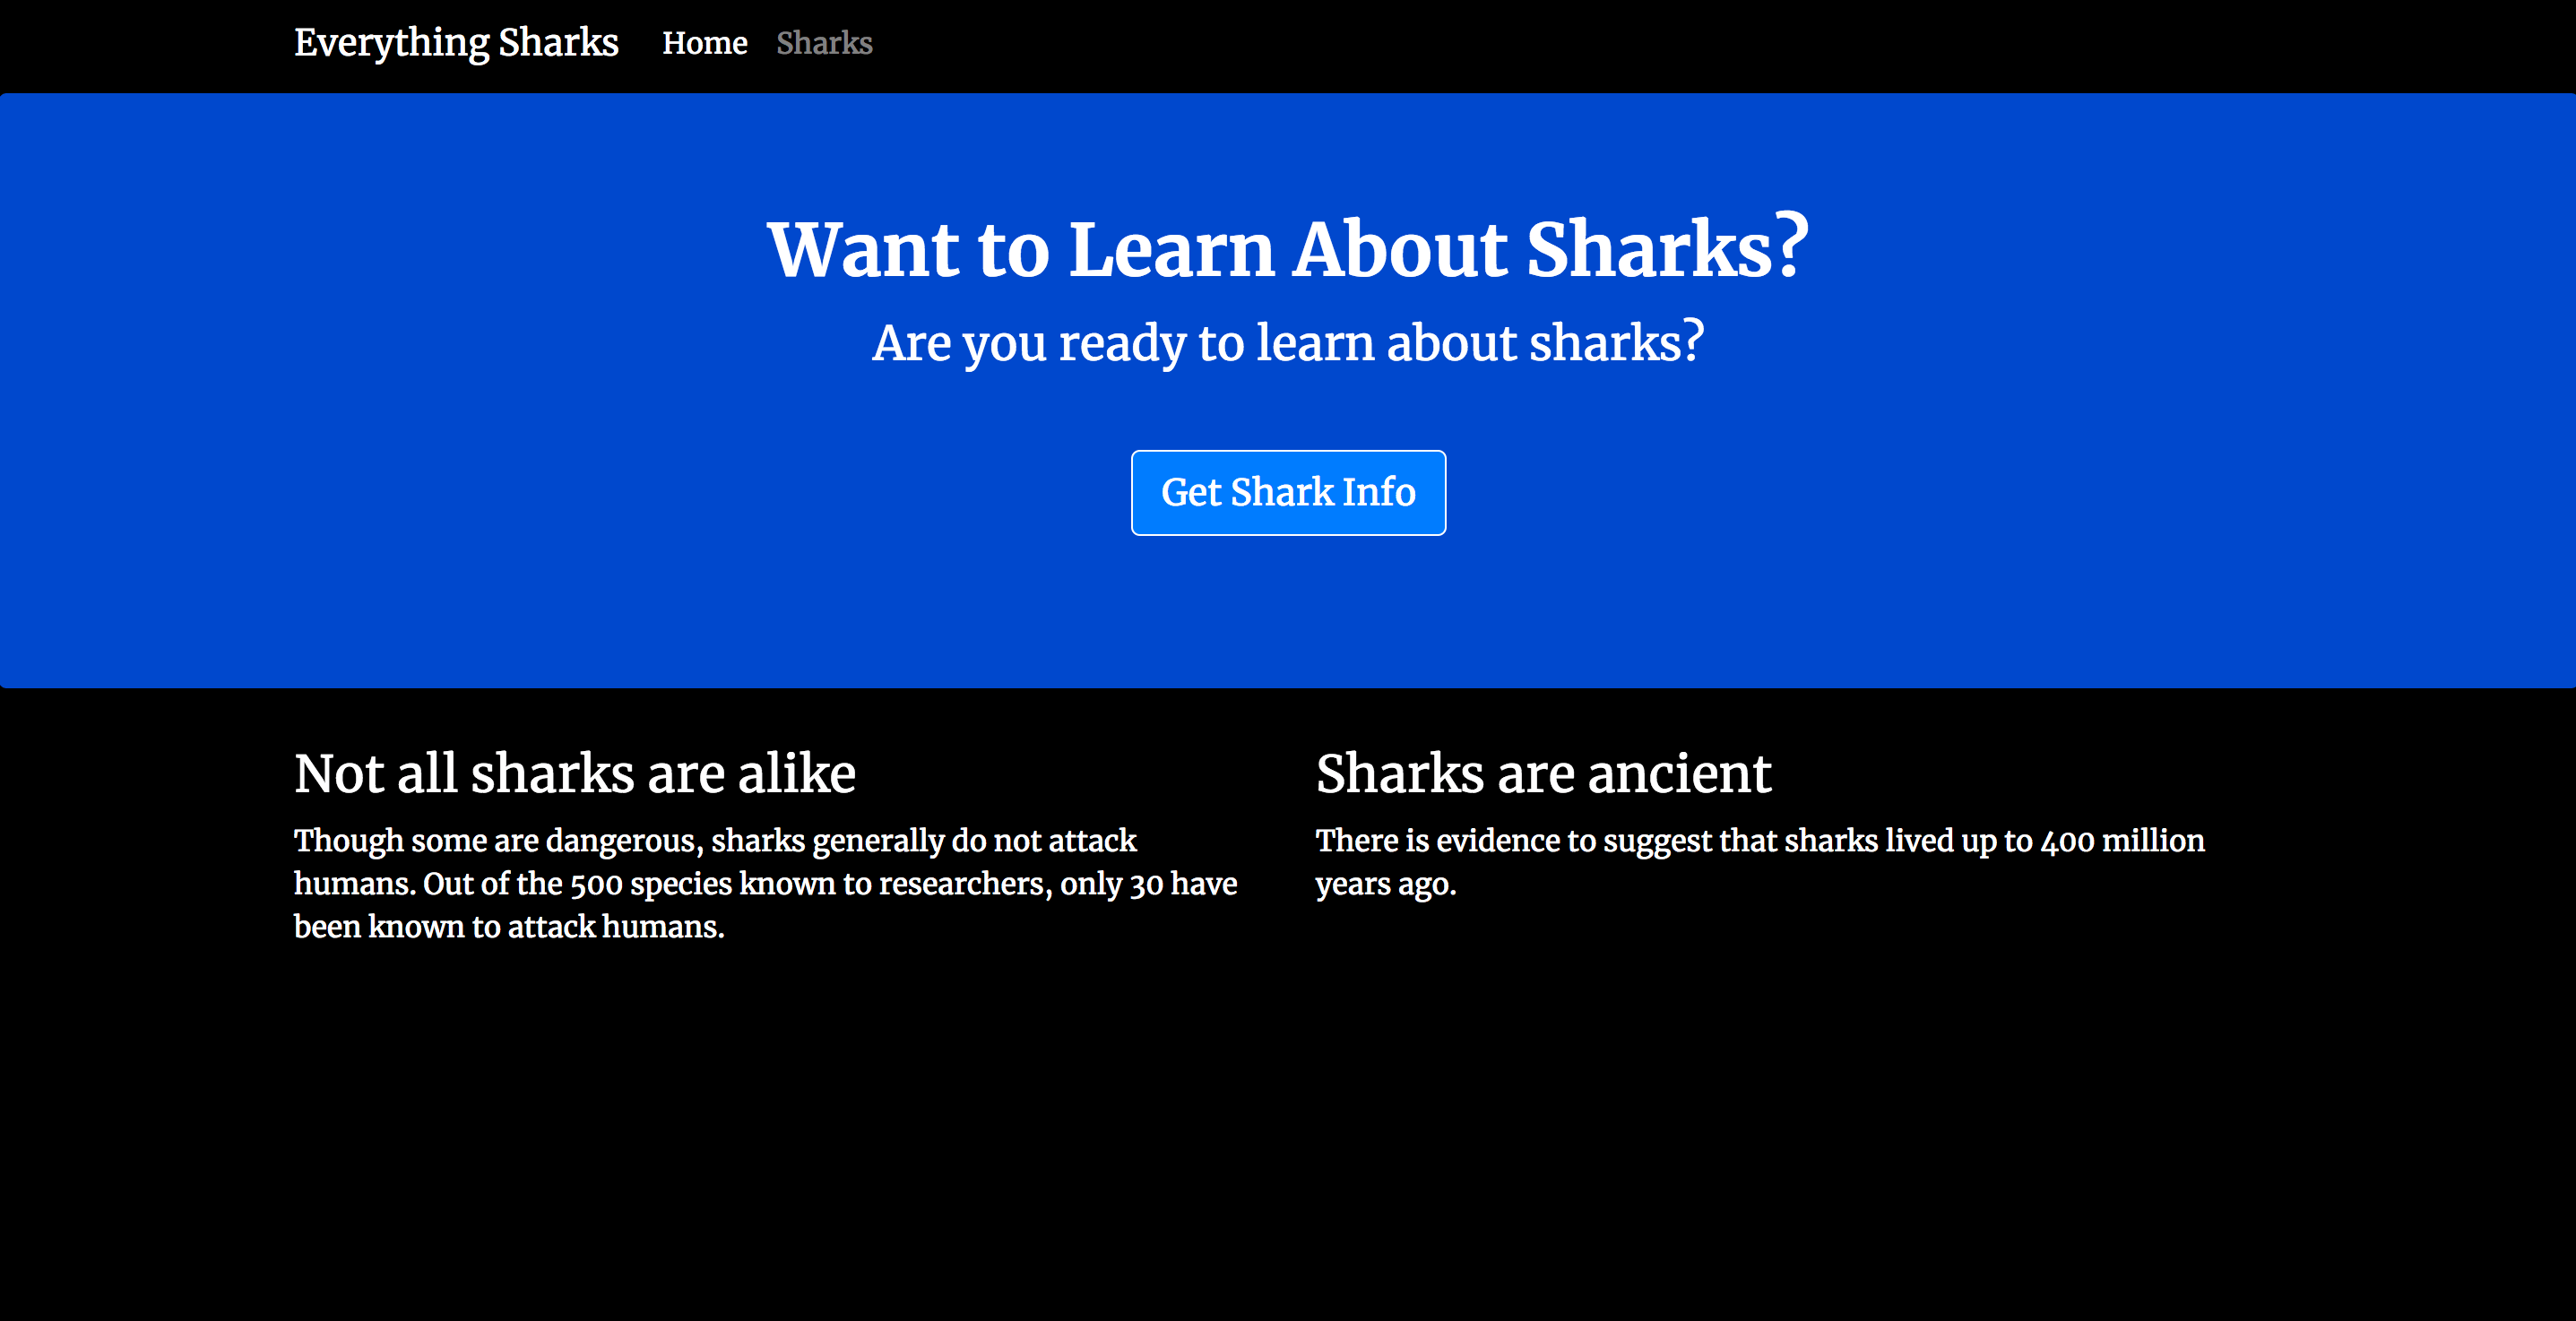
あなたは今、セットアップをテストするためにあなたのドメインを訪れることができます。 http://your_domain を使用して、your_domainをあなた自身のドメイン名で置き換えることを忘れないでください。あなたのアプリケーションは以下のランディングページを表示します。
アプリケーションのテストが完了したので、コンテナを停止し、イメージを削除することができます。CONTAINER IDを取得するために、docker psを使用してください。
- docker ps
CONTAINER ID IMAGE COMMAND CREATED STATUS PORTS NAMES 4133b72391da node-demo “node app.js” 17 seconds ago Up 16 seconds 0.0.0.0:80->8080/tcp node-demo
Docker stopコマンドでコンテナを停止してください。ここで示されているCONTAINER IDは、ご自身のアプリケーションのCONTAINER IDに置き換えるようにしてください。
- docker stop 4133b72391da
docker system pruneと -aフラグを使用して、停止したコンテナと未使用のイメージ、ドングリングイメージを含むすべてのイメージを削除することができます。
- docker system prune -a
出力でプロンプトが表示されたら、「y」を押して、停止したコンテナとイメージを削除することを確認してください。ただし、ビルドキャッシュも削除されますので、ご注意ください。
アプリケーションのイメージがテストされたら、Docker Composeを使って残りのセットアップを構築できます。
ステップ2- ウェブサーバーの設定を定義する
私たちのアプリケーションのDockerfileがある状態で、Nginxコンテナを実行するための設定ファイルを作成します。ドメイン名、ドキュメントルート、プロキシ情報を含む最小限の設定から始めることができます。また、Certbotのリクエストを.well-knownディレクトリにリダイレクトするためのロケーションブロックも含まれます。そのディレクトリには、ドメインのDNSがサーバーに解決されるかを確認するための一時ファイルが配置されます。
最初に、現在のプロジェクトディレクトリ(node_project)に設定ファイルのためのディレクトリを作成してください。
- mkdir nginx-conf
Nanoまたはお気に入りのエディタを使用して、ファイルを作成して開きます。
- nano nginx-conf/nginx.conf
次のサーバーブロックを追加して、ユーザーのリクエストをNodeアプリケーションコンテナにプロキシし、Certbotのリクエストを.well-knownディレクトリにリダイレクトしてください。”your_domain”はご自身のドメイン名で置き換えてください。
~/node_project/nginx-conf/nginx.conf
server {
        listen 80;
        listen [::]:80;

        root /var/www/html;
        index index.html index.htm index.nginx-debian.html;

        server_name your_domain www.your_domain;

        location / {
                proxy_pass http://nodejs:8080;
        }

        location ~ /.well-known/acme-challenge {
                allow all;
                root /var/www/html;
        }
}
このサーバーブロックは、Nginxコンテナをリバースプロキシとして起動させることができ、リクエストをNodeアプリケーションコンテナに転送します。また、Certbotのwebrootプラグインを使用してドメインの証明書を取得することも可能です。このプラグインは、HTTP-01の検証方法に依存しており、与えられたドメイン名に応答するサーバーからリソースにアクセスできることを証明するためのHTTPリクエストを使用します。
編集が終わったら、ファイルを保存して閉じてください。もしnanoを使用している場合、CTRL + X、Y、ENTERを押すことでこれを行うことができます。Nginxサーバーとロケーションブロックのアルゴリズムについて詳しく学びたい場合は、Understanding Nginx Server and Location Block Selection Algorithmsという記事を参照してください。
ウェブサーバーの設定詳細が整ったら、docker-compose.ymlファイルの作成に進むことができます。このファイルでは、アプリケーションサービスと証明書を取得するために使用するCertbotコンテナを作成します。
ステップ3 — Docker Composeファイルの作成
docker-compose.ymlファイルは、Nodeアプリケーションやウェブサーバーなどのサービスを定義します。このファイルでは、ネームドボリュームなどの詳細が指定されます。これらは、コンテナ間でSSL認証情報を共有するために重要です。さらに、ネットワークやポート情報も指定します。また、コンテナが作成される際に実行するコマンドも指定できます。このファイルは、サービスがどのように連携して動作するかを定義する中心的なリソースです。
現在のディレクトリにファイルを作成し、開きます。
- nano docker-compose.yml
最初に、アプリケーションサービスを定義します。
以下の「~/node_project/docker-compose.yml」というファイルの内容を日本語で言い換えると、次のようになります。
「ホームディレクトリのnode_projectフォルダにあるdocker-compose.ymlファイル」
version: '3'

services:
  nodejs:
    build:
      context: .
      dockerfile: Dockerfile
    image: nodejs
    container_name: nodejs
    restart: unless-stopped
以下のものがNode.jsのサービス定義に含まれています。
- build: This defines the configuration options, including the context and dockerfile, that will be applied when Compose builds the application image. If you wanted to use an existing image from a registry like Docker Hub, you could use the image instruction instead, with information about your username, repository, and image tag.
- context: This defines the build context for the application image build. In this case, it’s the current project directory which is represented with the ..
- dockerfile: This specifies the Dockerfile that Compose will use for the build — the Dockerfile reviewed at in Step 1.
- image, container_name: These apply names to the image and container.
- restart: This defines the restart policy. The default is no, but in this example, the container is set to restart unless it is stopped.
このサービスではバインドマウントは含まれていないことに注意してください。セットアップは開発よりもデプロイに焦点を当てているためです。詳細は、バインドマウントとボリュームに関するDockerのドキュメントをご覧ください。
アプリケーションとWebサーバーコンテナ間の通信を可能にするために、再起動の定義後に「app-network」というブリッジネットワークを追加してください。
~/node_project/docker-compose.yml → ホームディレクトリの中にあるnode_projectフォルダ内のdocker-compose.ymlファイル
services:
  nodejs:
...
    networks:
      - app-network
このようなユーザー定義のブリッジネットワークは、同じDockerデーモンホスト上のコンテナ間での通信を可能にします。これにより、同じブリッジネットワーク内のコンテナ間のトラフィックと通信が効率化されます。同時に、外部にポートを公開せずに、同じブリッジネットワーク上のコンテナ間のすべてのポートが開かれます。そのため、フロントエンドサービスを公開するのに必要なポートだけを選択的に開くことができます。
次に、ウェブサーバーサービスを定義してください。 (Tsugi ni, webu sābā sābisu o teigi shite kudasai.)
...
 webserver:
    image: nginx:mainline-alpine
    container_name: webserver
    restart: unless-stopped
    ports:
      - "80:80"
    volumes:
      - web-root:/var/www/html
      - ./nginx-conf:/etc/nginx/conf.d
      - certbot-etc:/etc/letsencrypt
      - certbot-var:/var/lib/letsencrypt
    depends_on:
      - nodejs
    networks:
      - app-network
ここで定義されたNode.jsのサービスの設定の一部は変わりませんが、以下の変更が行われました。
- image: This tells Compose to pull the latest Alpine-based Nginx image from Docker Hub. For more information about alpine images, please read Step 3 of How To Build a Node.js Application with Docker.
- ports: This exposes port 80 to enable the configuration options you’ve defined in your Nginx configuration.
次に、指定される名前付きボリュームとバインドマウントがあります。
- web-root:/var/www/html: This will add your site’s static assets, copied to a volume called web-root, to the the /var/www/html directory on the container.
- ./nginx-conf:/etc/nginx/conf.d: This will bind mount the Nginx configuration directory on the host to the relevant directory on the container, ensuring that any changes you make to files on the host will be reflected in the container.
- certbot-etc:/etc/letsencrypt: This will mount the relevant Let’s Encrypt certificates and keys for your domain to the appropriate directory on the container.
- certbot-var:/var/lib/letsencrypt: This mounts Let’s Encrypt’s default working directory to the appropriate directory on the container.
次に、certbotコンテナの設定オプションを追加してください。ドメインとメール情報をご自身のドメイン名と連絡先のメールアドレスで置き換えてください。
~/node_project/docker-compose.yml を日本語で自然に言い換えてください。1つのオプションだけで構いません。
– 「~/node_project/docker-compose.yml」の日本語表現を以下に示します。
~ / node_project / docker-compose.yml
...
  certbot:
    image: certbot/certbot
    container_name: certbot
    volumes:
      - certbot-etc:/etc/letsencrypt
      - certbot-var:/var/lib/letsencrypt
      - web-root:/var/www/html
    depends_on:
      - webserver
    command: certonly --webroot --webroot-path=/var/www/html --email sammy@your_domain --agree-tos --no-eff-email --staging -d your_domain  -d www.your_domain
この定義では、Composeにcertbot/certbotイメージをDocker Hubから取得するよう指示されています。また、名前付きボリュームを使用して、Nginxコンテナとリソースを共有します。これには、certbot-etc内のドメインの証明書とキー、certbot-var内のLet’s Encrypt作業ディレクトリ、およびweb-root内のアプリケーションコードが含まれます。
再び、webserverサービスが実行されている時にcertbotコンテナを開始するためにdepends_onを使用しました。
コンテナが開始される際に実行するコマンドを指定するコマンドオプションです。次のオプションを使用してcertonlyサブコマンドを含めます。
- –webroot: This tells Certbot to use the webroot plugin to place files in the webroot folder for authentication.
- –webroot-path: This specifies the path of the webroot directory.
- –email: Your preferred email for registration and recovery.
- –agree-tos: This specifies that you agree to ACME’s Subscriber Agreement.
- –no-eff-email: This tells Certbot that you do not wish to share your email with the Electronic Frontier Foundation (EFF). Feel free to omit this if you would prefer.
- –staging: This tells Certbot that you would like to use Let’s Encrypt’s staging environment to obtain test certificates. Using this option allows you to test your configuration options and avoid possible domain request limits. For more information about these limits, please read Let’s Encrypt’s rate limits documentation.
- -d: This allows you to specify domain names you would like to apply to your request. In this case, you’ve included your_domain and www.your_domain. Be sure to replace these with your own domains.
最後の手順として、ボリュームとネットワークの定義を追加してください。ここでのユーザー名を自分の非管理者ユーザーに置き換えることを忘れずに。
~/node_project/docker-compose.yml~/node_project/docker-compose.ymlファイル
...
volumes:
  certbot-etc:
  certbot-var:
  web-root:
    driver: local
    driver_opts:
      type: none
      device: /home/sammy/node_project/views/
      o: bind

networks:
  app-network:
    driver: bridge
名前付きボリュームには、Certbot証明書や作業ディレクトリのボリューム、およびサイトの静的アセットであるweb-rootのボリュームが含まれています。ほとんどの場合、Dockerボリュームのデフォルトドライバはローカルドライバであり、Linuxではマウントコマンドに似たオプションを受け入れます。これにより、driver_optsを使用してホスト上のviewsディレクトリをマウントするドライバオプションのリストを指定することができます。viewsディレクトリには、アプリケーションの静的アセットが含まれています。実行時にこのボリュームと共有することができます。viewsディレクトリの内容についての詳細は、「Dockerを使用したNode.jsアプリケーションの作り方」のステップ2をお読みください。
以下は完全なdocker-compose.ymlファイルです。
~/node_project/docker-compose.ymlを使います。
version: '3'

services:
  nodejs:
    build:
      context: .
      dockerfile: Dockerfile
    image: nodejs
    container_name: nodejs
    restart: unless-stopped
    networks:
      - app-network

  webserver:
    image: nginx:mainline-alpine
    container_name: webserver
    restart: unless-stopped
    ports:
      - "80:80"
    volumes:
      - web-root:/var/www/html
      - ./nginx-conf:/etc/nginx/conf.d
      - certbot-etc:/etc/letsencrypt
      - certbot-var:/var/lib/letsencrypt
    depends_on:
      - nodejs
    networks:
      - app-network

  certbot:
    image: certbot/certbot
    container_name: certbot
    volumes:
      - certbot-etc:/etc/letsencrypt
      - certbot-var:/var/lib/letsencrypt
      - web-root:/var/www/html
    depends_on:
      - webserver
    command: certonly --webroot --webroot-path=/var/www/html --email sammy@your_domain --agree-tos --no-eff-email --staging -d your_domain  -d www.your_domain

volumes:
  certbot-etc:
  certbot-var:
  web-root:
    driver: local
    driver_opts:
      type: none
      device: /home/sammy/node_project/views/
      o: bind

networks:
  app-network:
    driver: bridge
サービスの定義が完了したら、コンテナを起動して証明書のリクエストをテストする準備ができました。
「ステップ4 — SSL証明書およびクレデンシャルの取得」
docker-compose upを使用して、コンテナを起動することができます。これにより、指定した順序でコンテナとサービスが作成および実行されます。ドメインのリクエストが成功したら、証明書はWebサーバーコンテナの/etc/letsencrypt/liveフォルダにマウントされます。
バックグラウンドでnodejsとwebserverのコンテナを実行するために、docker-compose upコマンドを -d フラグとともに使用してサービスを作成してください。
- docker-compose up -d
あなたのアウトプットは、あなたのサービスが作成されたことを確認します。
Creating nodejs … done Creating webserver … done Creating certbot … done
docker-compose psコマンドを使用して、サービスの状態を確認してください。
- docker-compose ps
もし全て成功した場合、あなたのNode.jsとWebサーバーのサービスは起動し、certbotコンテナは0のステータスメッセージで終了します。
Name Command State Ports ———————————————————————— certbot certbot certonly –webroot … Exit 0 nodejs node app.js Up 8080/tcp webserver nginx -g daemon off; Up 0.0.0.0:80->80/tcp
もし、nodejsとwebserverのサービスの状態列にUp以外の状態を確認した場合や、certbotコンテナの終了ステータスが0以外の場合は、docker-compose logsコマンドでサービスログを確認してください。例えば、Certbotのログを確認したい場合は、以下のコマンドを実行してください。
- docker-compose logs certbot
今、docker-compose execを使用して、自分の認証情報がウェブサーバーのコンテナにマウントされていることを確認できます。
- docker-compose exec webserver ls -la /etc/letsencrypt/live
要求が成功した場合、出力結果には以下の情報が明らかになります。
total 16 drwx—— 3 root root 4096 Dec 23 16:48 . drwxr-xr-x 9 root root 4096 Dec 23 16:48 .. -rw-r–r– 1 root root 740 Dec 23 16:48 README drwxr-xr-x 2 root root 4096 Dec 23 16:48 your_domain
あなたがリクエストが成功することを知った今、–stagingフラグを削除するためにcertbotサービスの定義を編集できます。
docker-compose.ymlファイルを開いてください。
- nano docker-compose.yml
ファイルの中で、certbotサービスの定義部分を探し、コマンドオプションの–stagingフラグを–force-renewalフラグに置き換えてください。これにより、既存の証明書と同じドメインで新しい証明書を要求するようCertbotに伝えることができます。certbotサービスの定義には、以下の定義が含まれている必要があります。
「~/ノードプロジェクト/docker-compose.yml」
...
  certbot:
    image: certbot/certbot
    container_name: certbot
    volumes:
      - certbot-etc:/etc/letsencrypt
      - certbot-var:/var/lib/letsencrypt
      - web-root:/var/www/html
    depends_on:
      - webserver
    command: certonly --webroot --webroot-path=/var/www/html --email sammy@your_domain --agree-tos --no-eff-email --force-renewal -d your_domain -d www.your_domain
...
編集が終わったら、ファイルを保存して終了してください。その後、docker-compose upを実行して、certbotコンテナと関連するボリュームを再作成できます。–no-depsオプションを含めることで、既に実行中のWebサーバーサービスの起動をComposeにスキップさせることができます。
- docker-compose up –force-recreate –no-deps certbot
次の出力は、証明書のリクエストが成功したことを示しています。
Recreating certbot … done Attaching to certbot certbot | Account registered. certbot | Renewing an existing certificate for your_domain and www.your_domain certbot | certbot | Successfully received certificate. certbot | Certificate is saved at: /etc/letsencrypt/live/your_domain/fullchain.pem certbot | Key is saved at: /etc/letsencrypt/live/your_domain phd.com/privkey.pem certbot | This certificate expires on 2022-11-03. certbot | These files will be updated when the certificate renews. certbot | NEXT STEPS: certbot | – The certificate will need to be renewed before it expires. Cert bot can automatically renew the certificate in the background, but you may need to take steps to enable that functionality. See https://certbot.org/renewal-setu p for instructions. certbot | Saving debug log to /var/log/letsencrypt/letsencrypt.log certbot | certbot | – – – – – – – – – – – – – – – – – – – – – – – – – – – – – – – – – – – – – – – – certbot | If you like Certbot, please consider supporting our work by: certbot | * Donating to ISRG / Let’s Encrypt: https://letsencrypt.org/do nate certbot | * Donating to EFF: https://eff.org/donate-le certbot | – – – – – – – – – – – – – – – – – – – – – – – – – – – – – – – – – – – – – – – – certbot exited with code 0
証明書を準備できたら、Nginxの設定を修正してSSLを組み込むことができます。
ステップ5 – ウェブサーバーの設定とサービス定義の修正
Nginxの設定でSSLを有効にするには、HTTPからHTTPSへのリダイレクトを追加し、SSL証明書とキーの場所を指定する必要があります。また、完全な転送秘匿性のために使用するDiffie-Hellmanグループも指定する必要があります。
これらの追加を含めたウェブサーバーサービスを再作成する予定ですので、今停止しても構いません。
- docker-compose stop webserver
次に、現在のプロジェクトディレクトリにDiffie-Hellman鍵のためのディレクトリを作成してください。
- mkdir dhparam
opensslコマンドを使用して鍵を生成してください。
- sudo openssl dhparam -out /home/sammy/node_project/dhparam/dhparam-2048.pem 2048
鍵を生成するには、数秒かかります。
Nginxの設定に関連するDiffie-HellmanとSSLの情報を追加するために、最初に前に作成したNginxの設定ファイルを削除してください。
- rm nginx-conf/nginx.conf
ファイルの別のバージョンを開く。
- nano nginx-conf/nginx.conf
以下のコードをファイルに追加して、HTTPをHTTPSにリダイレクトし、SSLの認証情報、プロトコル、およびセキュリティヘッダーを追加します。your_domainをご自分のドメインに置き換えることを忘れないでください。
~/node_project/nginx-conf/nginx.conf~/node_project/nginx-conf/nginx.conf
server {
        listen 80;
        listen [::]:80;
        server_name your_domain www.your_domain;

        location ~ /.well-known/acme-challenge {
          allow all;
          root /var/www/html;
        }

        location / {
                rewrite ^ https://$host$request_uri? permanent;
        }
}

server {
        listen 443 ssl http2;
        listen [::]:443 ssl http2;
        server_name your_domain www.your_domain;

        server_tokens off;

        ssl_certificate /etc/letsencrypt/live/your_domain/fullchain.pem;
        ssl_certificate_key /etc/letsencrypt/live/your_domain/privkey.pem;

        ssl_buffer_size 8k;

        ssl_dhparam /etc/ssl/certs/dhparam-2048.pem;

        ssl_protocols TLSv1.2;
        ssl_prefer_server_ciphers on;

        ssl_ciphers ECDH+AESGCM:ECDH+AES256:ECDH+AES128:DH+3DES:!ADH:!AECDH:!MD5;

        ssl_ecdh_curve secp384r1;
        ssl_session_tickets off;

        ssl_stapling on;
        ssl_stapling_verify on;
        resolver 8.8.8.8;

        location / {
                try_files $uri @nodejs;
        }

        location @nodejs {
                proxy_pass http://nodejs:8080;
                add_header X-Frame-Options "SAMEORIGIN" always;
                add_header X-XSS-Protection "1; mode=block" always;
                add_header X-Content-Type-Options "nosniff" always;
                add_header Referrer-Policy "no-referrer-when-downgrade" always;
                add_header Content-Security-Policy "default-src * data: 'unsafe-eval' 'unsafe-inline'" always;
                #add_header Strict-Transport-Security "max-age=31536000; includeSubDomains; preload" always;
                # enable strict transport security only if you understand the implications
        }

        root /var/www/html;
        index index.html index.htm index.nginx-debian.html;
}
以下の文を日本語にネイティブな表現に言い換えます。複数のオプションは必要ありません:
HTTPサーバーブロックでは、Certbotの更新リクエストのwebrootを.well-known/acme-challengeディレクトリとして指定します。また、HTTPのリクエストをルートディレクトリからHTTPSにリライトするためのリライト指示も含まれています。
HTTPSサーバーブロックは、SSLとHTTP2を有効にします。HTTP/2がHTTPプロトコルを改善し、ウェブサイトのパフォーマンスにどのような利点があるかについては、Ubuntu 18.04でのNginxのHTTP/2サポートの設定方法の紹介を読んでください。このブロックには、最新のSSLプロトコルと暗号化方式を使用しており、またOSCPステープリングも有効になっています。OSCPステープリングは、初期のTLSハンドシェイク中に証明書の認証情報を提供することで、認証プロセスの高速化を可能にします。
このブロックは、SSLとDiffie-Hellmanの資格情報とキーの場所も指定しています。
最終的に、プロキシパス情報はこのブロックに移動しました。これには、リクエストをエイリアスされたNode.jsアプリケーションコンテナにポイントするtry_filesディレクティブを含むlocationブロック、およびそのエイリアスのためのlocationブロックが含まれています。また、これらのエイリアスには、SSL LabsやSecurity HeadersサーバーテストサイトなどでAの評価を取得するためのセキュリティヘッダーも含まれています。これらのヘッダーには、X-Frame-Options、X-Content-Type-Options、Referrer Policy、Content-Security-Policy、およびX-XSS-Protectionが含まれています。HTTP Strict Transport Security(HSTS)ヘッダーはコメントアウトされていますが、適切な理解と「preload」機能の評価がある場合にのみ、有効にしてください。
編集が終わったら、ファイルを保存して閉じてください。
webサーバーサービスを再作成する前に、docker-compose.ymlファイルのサービス定義にいくつかの項目を追加する必要があります。これにはHTTPSの関連するポート情報とDiffie-Hellmanボリュームの定義が含まれます。
ファイルを開けてください。
- nano docker-compose.yml
ウェブサーバーサービスの定義に、次のポートマッピングとdhparamという名前のボリュームを追加してください。
~/node_project/docker-compose.yml → ~/ノードプロジェクト/ドッカーコンポーズ.yml
...
 webserver:
    image: nginx:latest
    container_name: webserver
    restart: unless-stopped
    ports:
      - "80:80"
      - "443:443"
    volumes:
      - web-root:/var/www/html
      - ./nginx-conf:/etc/nginx/conf.d
      - certbot-etc:/etc/letsencrypt
      - certbot-var:/var/lib/letsencrypt
      - dhparam:/etc/ssl/certs
    depends_on:
      - nodejs
    networks:
      - app-network
次に、volumesの定義にdhparamボリュームを追加します。sammyとnode_projectディレクトリを自分のものに置き換えることを忘れないでください。
以下の~/node_project/docker-compose.ymlの内容を日本語で言い換えます(一つのオプションのみ):
ユーザー/ノード_プロジェクト/ドッカー_コンポーズ.yml
...
volumes:
  ...
  webroot:
  ...
  dhparam:
    driver: local
    driver_opts:
      type: none
      device: /home/sammy/node_project/dhparam/
      o: bind
ウェブルートのボリュームと同様に、dhparamのボリュームはホストに保存されたDiffie-Hellman鍵をウェブサーバーのコンテナにマウントします。
編集が終わったら、ファイルを保存して閉じてください。
ウェブサーバーサービスを再作成してください。
- docker-compose up -d –force-recreate –no-deps webserver
Docker-compose psでサービスをチェックしてください。
- docker-compose ps
次の出力は、お使いのNode.jsとウェブサーバーサービスが実行されていることを示しています。
Name Command State Ports ———————————————————————————————- certbot certbot certonly –webroot … Exit 0 nodejs node app.js Up 8080/tcp webserver nginx -g daemon off; Up 0.0.0.0:443->443/tcp, 0.0.0.0:80->80/tcp
最後に、すべてが予想通りに動作しているかを確認するために、ご自身のドメインにアクセスできます。ブラウザでhttps://your_domainに移動し、your_domainをご自身のドメイン名に置き換えてください。

ブラウザのセキュリティ指示には、ロックアイコンが表示されます。ご希望であれば、SSL Labs Server Test ランディングページまたは Security Headers server test ランディングページに移動することができます。構成オプションには、SSL Labs Server Test で A 評価を獲得するための設定が含まれています。Security Headers server test で A 評価を獲得するには、nginx-conf/nginx.conf ファイルで Strict Transport Security (HSTS) ヘッダーのコメントアウトを解除する必要があります。
~/node_project/nginx-conf/nginx.conf
…
location @nodejs {
                proxy_pass http://nodejs:8080;
                add_header X-Frame-Options "SAMEORIGIN" always;
                add_header X-XSS-Protection "1; mode=block" always;
                add_header X-Content-Type-Options "nosniff" always;
                add_header Referrer-Policy "no-referrer-when-downgrade" always;
                add_header Content-Security-Policy "default-src * data: 'unsafe-eval' 'unsafe-inline'" always;
                add_header Strict-Transport-Security "max-age=31536000; includeSubDomains; preload" always;
                # enable strict transport security only if you understand the implications
        }
…
もし意味を理解し、その”プリロード”機能を評価した上でのみ、このオプションを有効にしてください。
ステップ6 — 証明書の更新
Let’s Encryptの証明書は90日間有効です。それが切れないように、自動更新プロセスを設定することができます。これを行う方法の一つは、cronスケジューリングユーティリティでジョブを作成することです。証明書を更新してNginxの設定をリロードするスクリプトを使用して、cronジョブをスケジュールすることができます。
プロジェクトディレクトリ内で、ssl_renew.shというスクリプトを開いてください。
- nano ssl_renew.sh
証明書を更新し、Webサーバーの設定を再読み込みするために、以下のコードをスクリプトに追加してください。
~/node_project/ssl_renew.sh~/node_project/ssl_renew.sh
#!/bin/bash

COMPOSE="/usr/local/bin/docker-compose --ansi never"
DOCKER="/usr/bin/docker"

cd /home/sammy/node_project/
$COMPOSE run certbot renew --dry-run && $COMPOSE kill -s SIGHUP webserver
$DOCKER system prune -af
このスクリプトはまず、docker-composeバイナリをCOMPOSEという変数に割り当て、–no-ansiオプションを指定します。これにより、docker-composeコマンドをANSI制御文字なしで実行します。次に、同じようにdockerバイナリも同様に設定します。最後に、~/node_projectディレクトリに移動し、以下のdocker-composeコマンドを実行します。
- docker-compose run: This will start a certbot container and override the command provided in the certbot service definition. Instead of using the certonly subcommand use the renew subcommand, which will renew certificates that are close to expiring. Also included is the –dry-run option to test the script.
- docker-compose kill: This will send a SIGHUP signal to the webserver container to reload the Nginx configuration.
それから、使用されていないすべてのコンテナとイメージを削除するために、docker system pruneを実行します。
編集が終わったらファイルを閉じてから、実行可能にしてください。
- chmod +x ssl_renew.sh
次に、指定された間隔で更新スクリプトを実行するために、ルートのクーロンタブファイルを開きます。
sudo crontab -e
もし初めてこのファイルを編集する場合、エディタを選択するように求められます。
no crontab for root - using an empty one
Select an editor.  To change later, run 'select-editor'.
  1. /bin/ed
  2. /bin/nano        <---- easiest
  3. /usr/bin/vim.basic
  4. /usr/bin/vim.tiny
Choose 1-4 [2]:
...
ファイルの最後に、以下の行を追加してください。
...
*/5 * * * * /home/sammy/node_project/ssl_renew.sh >> /var/log/cron.log 2>&1
次の文を日本語で言い換えると:「これにより、ジョブの間隔を5分ごとに設定し、更新リクエストが意図した通りに機能しているかどうかをテストすることができます。また、cron.logというログファイルも作成され、ジョブからの関連する出力を記録します。」
5分後に、cron.logを確認して更新要求が成功したかを確認してください。
- tail -f /var/log/cron.log
数秒後、次の出力によって成功した更新が示されます。
– – – – – – – – – – – – – – – – – – – – – – – – – – – – – – – – – – – – – – – – ** DRY RUN: simulating ‘certbot renew’ close to cert expiry ** (The test certificates below have not been saved.) Congratulations, all renewals succeeded. The following certs have been renewed: /etc/letsencrypt/live/your_domain/fullchain.pem (success) ** DRY RUN: simulating ‘certbot renew’ close to cert expiry ** (The test certificates above have not been saved.) – – – – – – – – – – – – – – – – – – – – – – – – – – – – – – – – – – – – – – – – Killing webserver … done
… Congratulations, all simulated renewals succeeded: /etc/letsencrypt/live/your_domain/fullchain.pem (success) – – – – – – – – – – – – – – – – – – – – – – – – – – – – – – – – – – – – – – – – Saving debug log to /var/log/letsencrypt/letsencrypt.log Killing webserver … Killing webserver … done Deleted Containers: 00cad94050985261e5b377de43e314b30ad0a6a724189753a9a23ec76488fd78 Total reclaimed space: 824.5kB
端末でCTRL + C を入力して終了してください。
以下のように、cronタブファイルを編集して毎日の間隔を設定することができます。例えば、スクリプトを毎日正午に実行する場合、ファイルの最後の行を以下のように変更することができます。
...
0 12 * * * /home/sammy/node_project/ssl_renew.sh >> /var/log/cron.log 2>&1
あなたは、ssl_renew.shスクリプトから–dry-runオプションを削除することもできます。
~/node_project/ssl_renew.sh → ホームディレクトリ内のnode_projectディレクトリにあるssl_renew.shファイルです。
#!/bin/bash

COMPOSE="/usr/local/bin/docker-compose --no-ansi"
DOCKER="/usr/bin/docker"

cd /home/sammy/node_project/
$COMPOSE run certbot renew && $COMPOSE kill -s SIGHUP webserver
$DOCKER system prune -af
あなたのcronジョブは、Let’s Encryptの証明書の有効期限が切れないように、対象の証明書が更新されることを保証します。また、Logrotateユーティリティを使用してログファイルのローテーションと圧縮も設定することができます。
結論
NodeアプリケーションをNginxリバースプロキシを用いて設定し、実行するためにコンテナを使用しました。また、アプリケーションのドメインに対してSSL証明書を取得し、これらの証明書を必要な場合に更新するためにクロンジョブを設定しました。
「もしLet’s Encryptのプラグインについてもっと学びたいと思われるなら、Nginxプラグインまたはスタンドアロンプラグインの使用に関する当社の記事をご覧ください。」
以下のリソースを使って、Docker Composeについてさらに学ぶこともできます。
- How To Install Docker Compose on Ubuntu 18.04.
- How To Configure a Continuous Integration Testing Environment with Docker and Docker Compose on Ubuntu 16.04.
- How To Set Up Laravel, Nginx, and MySQL with Docker Compose.
Composeのドキュメンテーションは、マルチコンテナアプリケーションについて詳しく学ぶための素晴らしいリソースです。

