「Ubuntu 20.04 上で Ruby on Rails v7 プロジェクトを作成し、React フロントエンドをセットアップする方法」
筆者は、Write for Donationsプログラムの一環として、寄付金を受け取る団体としてElectronic Frontier Foundationを選びました。
イントロダクション
Ruby on Railsは人気のあるサーバーサイドのウェブアプリケーションフレームワークです。GitHub、Basecamp、SoundCloud、Airbnb、Twitchなど、現在ウェブ上で存在する多くの人気アプリケーションに使われています。プログラマーの経験に重点を置き、それを取り巻く情熱的なコミュニティによって、Ruby on Railsは現代のウェブアプリケーションを構築・維持するために必要なツールを提供します。
Reactは、フロントエンドのユーザーインターフェースを作成するために使用されるJavaScriptライブラリです。Facebookの支援を受けており、現在のウェブ上で最も人気のあるフロントエンドライブラリの一つです。Reactは、仮想DOM、コンポーネントアーキテクチャ、状態管理などの機能を提供しており、フロントエンド開発のプロセスをより組織化された効率的なものにします。
Webのフロントエンドは、サーバーサイドのコードとは別のフレームワークに移行しています。RailsのエレガンスとReactの効率を組み合わせることで、最新のトレンドに基づいたパワフルで現代的なアプリケーションを構築することができます。Railsのテンプレートエンジンではなく、Reactを使用してRailsビュー内からコンポーネントをレンダリングすることで、最新のJavaScriptとフロントエンド開発の進歩を活用しながら、Ruby on Railsの表現力を生かしたアプリケーションを作成することができます。
このチュートリアルでは、Ruby on Railsのアプリケーションを作成し、お気に入りのレシピを保存し、それをReactフロントエンドで表示することができます。終了すると、BootstrapでスタイリングされたReactインターフェースを使用して、レシピを作成、表示、削除することができます。
前提条件
このチュートリアルに従うためには、次のものが必要です:
- Node.js and npm installed on your development machine. This tutorial uses Node.js version 16.14.0 and npm version 8.3.1. Node.js is a JavaScript run-time environment that allows you to run your code outside the browser. It comes with a pre-installed Package Manager called npm, which lets you install and update packages. To install these on Ubuntu 20.04 or macOS, follow the “Installing Using a PPA” section of How To Install Node.js on Ubuntu 20.04 or the steps in How to Install Node.js and Create a Local Development Environment on macOS.
- The Yarn package manager installed on your development machine, which will allow you to download the React framework. This tutorial was tested on version 1.22.10; to install this dependency, follow the official Yarn installation guide.
- Ruby on Rails installed. To get this, follow our guide on How to Install Ruby on Rails with rbenv on Ubuntu 20.04. If you would like to develop this application on macOS, you can use How To Install Ruby on Rails with rbenv on macOS. This tutorial was tested on version 3.1.2 of Ruby and version 7.0.4 of Rails, so make sure to specify these versions during the installation process.
Note
- PostgreSQL installed, as described in Steps 1 and 2 How To Use PostgreSQL with Your Ruby on Rails Application on Ubuntu 20.04 or How To Use PostgreSQL with Your Ruby on Rails Application on macOS. To follow this tutorial, you can use PostgreSQL version 12 or higher. If you want to develop this application on a different distribution of Linux or another OS, see the official PostgreSQL downloads page. For more information on how to use PostgreSQL, see How To Install and Use PostgreSQL.
ステップ1 – 新しいRailsアプリケーションの作成
このステップでは、Railsアプリケーションフレームワーク上にレシピアプリケーションを構築します。まず最初に、Reactと連携するように設定された新しいRailsアプリケーションを作成します。
Railsは、現代のウェブアプリケーションを構築するために必要なすべてを作成するためのいくつかのスクリプトジェネレータを提供しています。これらのコマンドの完全なリストとそれらの役割を確認するには、ターミナルで次のコマンドを実行してください。
- rails -h
このコマンドは、アプリケーションのパラメータを設定するためのオプションの包括的なリストを表示します。リストには、新しいRailsアプリケーションを作成するための「new」コマンドも含まれています。
今、新しいジェネレータを使用して新しいRailsアプリケーションを作成します。ターミナルで次のコマンドを実行してください。
- rails new rails_react_recipe -d postgresql -j esbuild -c bootstrap -T
前のコマンドは、ディレクトリ名がrails_react_recipeである新しいRailsアプリケーションを作成し、必要なRubyおよびJavaScriptの依存関係をインストールし、Webpackを設定します。この新しいジェネレータコマンドに関連するフラグには以下が含まれています。
- The -d flag specifies the preferred database engine, which in this case is PostgreSQL.
- The -j flag specifies the application’s JavaScript approach. Rails offers a few different ways to handle Javascript code in Rails applications. The esbuild option passed to the -j flag instructs Rails to preconfigure esbuild as the preferred JavaScript bundler.
- The -c flag specifies the application’s CSS processor. Bootstrap is the preferred option in this case.
- The -T flag instructs Rails to skip the generation of test files since you won’t be writing tests for this tutorial. This command is also suggested if you want to use a Ruby testing tool different from the one Rails provides.
コマンドが完了したら、アプリのルートディレクトリであるrails_react_recipeディレクトリに移動してください。
- cd rails_react_recipe
次に、ディレクトリの内容をリストにしてください。
- ls
以下のような形式で内容を印刷します。
Gemfile README.md bin db node_modules storage yarn.lock Gemfile.lock Rakefile config lib package.json tmp Procfile.dev app config.ru log public vendor
このルートディレクトリには、自動生成されたファイルとフォルダがいくつかあります。これらはRailsアプリケーションの構造を構成するものであり、Reactアプリケーションの依存関係が含まれるpackage.jsonファイルも含まれています。
新しいRailsアプリケーションを成功裏に作成したので、次のステップではデータベースに接続します。
ステップ2 — データベースの設定
新しいRailsアプリケーションを実行する前に、まずデータベースに接続する必要があります。このステップでは、新しく作成したRailsアプリケーションをPostgreSQLデータベースに接続して、レシピデータを必要に応じて保存および取得します。
config/database.ymlにあるdatabase.ymlファイルには、さまざまな開発環境ごとのデータベース名などのデータベースの詳細が含まれています。Railsは環境名の後にアンダースコア(_)を付けて、さまざまな開発環境に対してデータベース名を指定します。このチュートリアルでは、デフォルトのデータベース設定値を使用しますが、必要に応じて設定値を変更することもできます。
Note
Railsは、データベースの作成、削除、リセットなど、ウェブアプリケーションの開発を容易にする多くのコマンドを提供しています。アプリケーションのためにデータベースを作成するには、ターミナルで以下のコマンドを実行してください。
- rails db:create
このコマンドは開発およびテスト用データベースを作成し、以下の出力を生成します。
Created database ‘rails_react_recipe_development’ Created database ‘rails_react_recipe_test’
次のコマンドを実行して、アプリケーションをデータベースに接続して起動してください。
- bin/dev
Railsは、Foreman gemを使用してアプリケーションのルートディレクトリにあるProcfile.devファイルのコマンドを実行することで、Railsアプリケーションを起動する代替のbin/devスクリプトを提供します。
このコマンドを実行すると、コマンドプロンプトが消え、その代わりに以下の出力が表示されます。
started with pid 70099 started with pid 70100 started with pid 70101 yarn run v1.22.10 yarn run v1.22.10 $ esbuild app/javascript/*.* –bundle –sourcemap –outdir=app/assets/builds –public-path=assets –watch $ sass ./app/assets/stylesheets/application.bootstrap.scss:./app/assets/builds/application.css –no-source-map –load-path=node_modules –watch => Booting Puma => Rails 7.0.4 application starting in development => Run `bin/rails server –help` for more startup options [watch] build finished, watching for changes… Puma starting in single mode… * Puma version: 5.6.5 (ruby 3.1.2-p20) (“Birdie’s Version”) * Min threads: 5 * Max threads: 5 * Environment: development * PID: 70099 * Listening on http://127.0.0.1:3000 * Listening on http://[::1]:3000 Use Ctrl-C to stop Sass is watching for changes. Press Ctrl-C to stop.
あなたのアプリケーションにアクセスするには、ブラウザウィンドウを開き、http://localhost:3000 に移動してください。Railsのデフォルトのウェルカムページが表示されるはずです。これは、あなたがRailsアプリケーションを正しくセットアップできていることを意味します。
ウェブサーバーを停止するには、サーバーが動作しているターミナルでCTRL+Cを押してください。Pumaから別れのメッセージが表示されます。
^C SIGINT received, starting shutdown – Gracefully stopping, waiting for requests to finish === puma shutdown: 2019-07-31 14:21:24 -0400 === – Goodbye! Exiting sending SIGTERM to all processes terminated by SIGINT terminated by SIGINT exited with code 0
その後、ターミナルのプロンプトが再表示されます。
あなたは、料理のレシピアプリにデータベースを正常に設定しました。次のステップでは、Reactフロントエンドを組み立てるために必要なJavaScriptの依存関係をインストールします。
ステップ3:フロントエンドの依存関係をインストールする
このステップでは、食事レシピアプリケーションのフロントエンドに必要なJavaScriptの依存関係をインストールします。これには以下が含まれます。
- React for building user interfaces.
- React DOM to enable React to interact with the browser DOM.
- React Router for handling navigation in a React application.
次のコマンドを実行して、Yarnパッケージマネージャーでこれらのパッケージをインストールしてください。
- yarn add react react-dom react-router-dom
このコマンドは、指定したパッケージをYarnを使用してインストールし、それらをpackage.jsonファイルに追加します。これを確認するために、プロジェクトのルートディレクトリにあるpackage.jsonファイルを開いてください。
- nano package.json
インストールされたパッケージは、依存関係キーの下にリストされます。
{
  "name": "app",
  "private": "true",
  "dependencies": {
    "@hotwired/stimulus": "^3.1.0",
    "@hotwired/turbo-rails": "^7.1.3",
    "@popperjs/core": "^2.11.6",
    "bootstrap": "^5.2.1",
    "bootstrap-icons": "^1.9.1",
    "esbuild": "^0.15.7",
    "react": "^18.2.0",
    "react-dom": "^18.2.0",
    "react-router-dom": "^6.3.0",
    "sass": "^1.54.9"
  },
  "scripts": {
    "build": "esbuild app/javascript/*.* --bundle --sourcemap --outdir=app/assets/builds --public-path=assets",
    "build:css": "sass ./app/assets/stylesheets/application.bootstrap.scss:./app/assets/builds/application.css --no-source-map --load-path=node_modules"
  }
}
CTRL+Xを押してファイルを閉じてください。
あなたはアプリケーションのフロントエンド依存関係をいくつかインストールしました。次に、食事レシピのアプリケーションのホームページを設定します。
ステップ4 — ホームページの設定
必要な依存関係をインストールした後、ユーザーがアプリケーションに初めて訪れたときに、ランディングページとして機能するアプリケーションのホームページを作成します。
Railsは、アプリケーションに対してModel-View-Controllerのアーキテクチャパターンを採用しています。MVCパターンでは、コントローラの目的は特定のリクエストを受け取り、適切なモデルやビューに渡すことです。現在、アプリケーションはルートURLがブラウザでロードされるとRailsのウェルカムページを表示します。これを変更するために、ホームページのためのコントローラとビューを作成し、ルートにマッチさせます。
Railsには、コントローラを作成するためのコントローラ生成機能があります。コントローラ生成機能は、コントローラ名と対応するアクションを受け取ります。詳細については、Railsのドキュメンテーションを確認してください。
このチュートリアルでは、コントローラーをホームページと呼ぶことにします。次のコマンドを実行して、インデックスアクションを持つホームページコントローラーを作成してください。
- rails g controller Homepage index
Note
Linuxでは、エラーFATAL: Listenエラー:ディレクトリの変更を監視することができませんでした。は、マシンが変更を監視できるファイルの数に関するシステム制限の結果である可能性があります。以下のコマンドを実行して修正してください:
echo fs.inotify.max_user_watches=524288 | sudo tee -a /etc/sysctl.conf && sudo sysctl -p
このコマンドは、Listenで監視できるディレクトリの数を永久に524288に増やします。同じコマンドを実行して524288を希望の数値に置き換えることで、再度変更することができます。
コントローラーコマンドを実行すると、次のファイルが生成されます。
- A homepage_controller.rb file for receiving all homepage-related requests. This file contains the index action you specified in the command.
- A homepage_helper.rb file for adding helper methods related to the Homepage controller.
- An index.html.erb file as the view page for rendering anything related to the homepage.
Railsコマンドを実行して作成される新しいページ以外にも、Railsはconfig/routes.rbにあるルートファイルを更新します。これにより、ホームページ用のGETルートが追加され、これをルートルートとして編集します。
Railsのルートルートは、ユーザーがアプリケーションのルートURLを訪れたときに表示される内容を指定します。この場合、ユーザーにはホームページが表示されるようにしたいです。お気に入りのエディタでconfig/routes.rbにあるルートファイルを開いてください。
- nano config/routes.rb
このファイルでは、’homepage/index’を’homepage#index’に置き換えて、ファイルが以下のように一致するようにしてください。
~/rails_react_recipe/config/routes.rbの内容を日本語で表現すると:
「~/rails_react_recipe/config/routes.rb」の設定ファイルです。
Rails.application.routes.draw do
  root 'homepage#index'
  # For details on the DSL available within this file, see http://guides.rubyonrails.org/routing.html
end
この修正は、Railsに対してルートへのリクエストをHomepageコントローラーのindexアクションにマッピングするよう指示し、その結果、ブラウザにはapp/views/homepage/index.html.erbにあるindex.html.erbファイルの内容が表示されるようになります。
ファイルを保存して閉じる。
この動作が正常に行われているかを確認するために、アプリケーションを起動してください。
- bin/dev
ブラウザでアプリケーションを開いたり更新したりする場合、新しい初期画面がアプリケーションに読み込まれます。

アプリケーションが正常に動作していることを確認した後、サーバーを停止するためにCTRL+Cを押してください。
次に、~/rails_react_recipe/app/views/homepage/index.html.erb ファイルを開いてください。
- nano ~/rails_react_recipe/app/views/homepage/index.html.erb
ファイル内のコードを削除し、空のファイルとして保存してください。これにより、index.html.erbの内容がフロントエンドのReactレンダリングに干渉しないようにします。
あなたがアプリケーションのホームページを設定したら、Reactを使用してアプリケーションのフロントエンドを構成する次のセクションに移動できます。
ステップ5 – リアルタイムでのReactの設定をRailsフロントエンドとして行います。
このステップでは、Railsの設定を変更して、アプリケーションのフロントエンドにReactを使用するようにします。この新しい設定により、Reactを使ってより魅力的なホームページを作成することができます。
Railsアプリケーションを生成する際に指定されたesbuildオプションの助けを借りて、JavaScriptがRailsとシームレスに連携するために必要なほとんどのセットアップがすでに完了しています。残る作業は、ReactアプリのエントリーポイントをesbuildのJavaScriptファイルのエントリーポイントに読み込むことです。これを行うために、app/javascriptディレクトリにcomponentsディレクトリを作成してください。
- mkdir ~/rails_react_recipe/app/javascript/components
コンポーネントディレクトリには、ホームページのコンポーネントと、Reactアプリケーション内の他のReactコンポーネントが含まれます。また、Reactアプリケーションへのエントリーファイルも含まれています。
次に、app/javascript/application.jsという場所にあるapplication.jsファイルを開いてください。
- nano ~/rails_react_recipe/app/javascript/application.js
ファイルにハイライトされた行のコードを追加してください。
// Entry point for the build script in your package.json
import "@hotwired/turbo-rails"
import "./controllers"
import * as bootstrap from "bootstrap"
import "./components"
application.jsファイルに追加されるコード行は、entry index.jsxファイルのコードをインポートし、esbuildでバンドルするために利用可能にします。RailsアプリのJavaScriptのエントリーポイントに/componentsディレクトリがインポートされることで、ホームページ用のReactコンポーネントを作成することができます。ホームページにはテキストとレシピをすべて表示するためのアクションボタンが含まれます。
保存してファイルを閉じてください。
それでは、componentsディレクトリにHome.jsxファイルを作成してください。
- nano ~/rails_react_recipe/app/javascript/components/Home.jsx
ファイルに以下のコードを追加してください。
~/rails_react_recipe/app/javascript/components/Home.jsx
import React from "react";
import { Link } from "react-router-dom";

export default () => (
  <div className="vw-100 vh-100 primary-color d-flex align-items-center justify-content-center">
    <div className="jumbotron jumbotron-fluid bg-transparent">
      <div className="container secondary-color">
        <h1 className="display-4">Food Recipes</h1>
        <p className="lead">
          A curated list of recipes for the best homemade meal and delicacies.
        </p>
        <hr className="my-4" />
        <Link
          to="/recipes"
          className="btn btn-lg custom-button"
          role="button"
        >
          View Recipes
        </Link>
      </div>
    </div>
  </div>
);
このコードでは、ReactとReact RouterからLinkコンポーネントをインポートします。Linkコンポーネントは、ページ間を移動するためのハイパーリンクを作成します。次に、Bootstrapのクラスでスタイル化されたホームページのマークアップ言語を含む機能コンポーネントを作成し、エクスポートします。
ファイルを保存して閉じてください。
ホームコンポーネントが設定されたら、React Routerを使用してルーティングを設定します。app/javascriptディレクトリにroutesディレクトリを作成してください。
- mkdir ~/rails_react_recipe/app/javascript/routes
ルートディレクトリには、いくつかのルートとそれに対応するコンポーネントが含まれます。指定されたルートが読み込まれるたびに、対応するコンポーネントがブラウザに表示されます。
ルートディレクトリに、index.jsxというファイルを作成してください。
- nano ~/rails_react_recipe/app/javascript/routes/index.jsx
それに次のコードを追加してください。
import React from "react";
import { BrowserRouter as Router, Routes, Route } from "react-router-dom";
import Home from "../components/Home";

export default (
  <Router>
    <Routes>
      <Route path="/" element={<Home />} />
    </Routes>
  </Router>
);
このindex.jsxルートファイルでは、次のモジュールをインポートしています:Reactを使用するためのReactモジュール、およびReact RouterからのBrowserRouter、Routes、およびRouteモジュール。これらのモジュールは共にルートから別のルートに移動するのに役立ちます。最後に、ルート(/)と一致するリクエストがある場合にレンダリングされるHomeコンポーネントをインポートします。アプリケーションに追加のページを追加したい場合は、このファイルでルートを宣言し、そのページのためにレンダリングするコンポーネントに一致させることができます。
ファイルを保存して終了してください。
React Routerを使用してルーティングを設定しました。Reactが利用可能なルートを認識し、それらを使用するためには、アプリケーションのエントリーポイントでルートが利用可能である必要があります。これを実現するために、Reactがエントリーファイルでレンダリングするコンポーネント内でルートをレンダリングします。
「app/javascript/components」ディレクトリに「App.jsx」というファイルを作成してください。
- nano ~/rails_react_recipe/app/javascript/components/App.jsx
App.jsxファイルに以下のコードを追加してください。
~/rails_react_recipe/app/javascript/components/App.jsx
import React from "react";
import Routes from "../routes";

export default props => <>{Routes}</>;
App.jsx ファイルでは、Reactと先ほど作成したルートファイルをインポートします。そして、フラグメント内でルートを描画するためのコンポーネントをエクスポートします。このコンポーネントはアプリケーションのエントリーポイントで描画され、アプリケーションが読み込まれるときに常にルートが利用可能になります。
ファイルを保存し、閉じる。
App.jsxを設定したので、エントリーファイルでそれをレンダリングすることができます。componentsディレクトリにindex.jsxファイルを作成してください。
- nano ~/rails_react_recipe/app/javascript/components/index.jsx
index.jsファイルに、以下のコードを追加してください。
~/rails_react_recipe/app/javascript/components/index.jsxを日本語で言い換えると、
「~/rails_react_recipe/app/javascript/components/index.jsxファイル」
import React from "react";
import { createRoot } from "react-dom/client";
import App from "./App";

document.addEventListener("turbo:load", () => {
  const root = createRoot(
    document.body.appendChild(document.createElement("div"))
  );
  root.render(<App />);
});
importの行では、ReactライブラリとReactDOMからcreateRoot関数、およびAppコンポーネントをインポートします。ReactDOMのcreateRoot関数を使用して、ルート要素をページに追加されたdiv要素として作成し、その中にAppコンポーネントをレンダリングします。アプリケーションが読み込まれると、ReactはAppコンポーネントの内容をページ上のdiv要素にレンダリングします。
ファイルを保存して終了してください。
最後に、ホームページにいくつかのCSSスタイルを追加します。
~/rails_react_recipe/app/assets/stylesheets/application.bootstrap.scssディレクトリ内のapplication.bootstrap.scssファイルを開いてください。
- nano ~/rails_react_recipe/app/assets/stylesheets/application.bootstrap.scss
次に、application.bootstrap.scssファイルの内容を次のコードで置き換えてください。
「~/rails_react_recipe/app/assets/stylesheets/application.bootstrap.scss」
@import 'bootstrap/scss/bootstrap';
@import 'bootstrap-icons/font/bootstrap-icons';

.bg_primary-color {
  background-color: #FFFFFF;
}
.primary-color {
  background-color: #FFFFFF;
}
.bg_secondary-color {
  background-color: #293241;
}
.secondary-color {
  color: #293241;
}
.custom-button.btn {
  background-color: #293241;
  color: #FFF;
  border: none;
}
.hero {
  width: 100vw;
  height: 50vh;
}
.hero img {
  object-fit: cover;
  object-position: top;
  height: 100%;
  width: 100%;
}
.overlay {
  height: 100%;
  width: 100%;
  opacity: 0.4;
}
以下の通り、日本語でのパラフレーズ提供いたします(一つのオプションのみ):
ページにカスタム色を設定します。.heroセクションは、後で追加するウェブサイトのフロントページに表示されるヒーローイメージまたは大きなバナーを作成します。さらに、custom-button.btnは、ユーザーがアプリケーションに入るために使用するボタンにスタイルを適用します。
あなたのCSSスタイルが設定されている状態で、ファイルを保存して閉じてください。
次に、アプリケーションのウェブサーバーを再起動してください。
- bin/dev
その後、ブラウザでアプリケーションを再読み込みしてください。全く新しいホームページが表示されます。
「CTRL+Cでウェブサーバーを停止してください。」
このステップでは、Reactをフロントエンドとして使用するためにアプリケーションを設定しました。次のステップでは、レシピを作成、読み取り、更新、削除するためのモデルとコントローラを作成します。
ステップ6 – レシピのコントローラーとモデルの作成
Reactフロントエンドがアプリケーションに設定されたため、レシピのモデルとコントローラーを作成します。レシピモデルは、ユーザーのレシピに関する情報を含むデータベーステーブルを表します。一方、コントローラーはレシピの作成、読み取り、更新、削除のリクエストを受け取り処理します。ユーザーがレシピをリクエストすると、レシピコントローラーがこのリクエストを受け取り、レシピモデルに渡します。モデルはデータベースからリクエストされたデータを取得し、コントローラーにレシピデータとして返します。最後に、この情報がブラウザに表示されます。
以下のコマンドを実行して、Railsが提供するgenerate model subcommandを使用して、レシピモデルを作成します。モデル名とその列とデータ型を指定します。次のコマンドを実行してください。
- rails generate model Recipe name:string ingredients:text instruction:text image:string
前のコマンドは、RailsにRecipeモデルを作成するよう指示し、名前列(string型)、材料と手順の列(text型)、および画像列(string型)を作成するものです。このチュートリアルでは、モデルをRecipeと名付けました。なぜなら、Railsのモデルは単数形の名前を使用し、それに対応するデータベーステーブルは複数形の名前を使用するからです。
モデル生成コマンドの実行により、2つのファイルが作成され、以下の出力が表示されます。
invoke active_record create db/migrate/20221017220817_create_recipes.rb create app/models/recipe.rb
作成された2つのファイルは以下の通りです:
- A recipe.rb file that holds all the model-related logic.
- A 20221017220817_create_recipes.rb file (the number at the beginning of the file may differ depending on the date when you run the command). This migration file contains the instruction for creating the database structure.
次に、レシピモデルファイルを編集して、データベースに保存されるのは有効なデータのみとなるようにします。モデルにデータベースのバリデーションを追加することで、この目標を達成できます。
app/models/recipe.rbにあるレシピモデルを開いてください。
- nano ~/rails_react_recipe/app/models/recipe.rb
下記のコードをファイルに追加してください。
class Recipe < ApplicationRecord
  validates :name, presence: true
  validates :ingredients, presence: true
  validates :instruction, presence: true
end
このコードでは、モデルのバリデーションを追加しています。名前、材料、手順のフィールドの存在をチェックします。これらの三つのフィールドがない場合、レシピは無効であり、データベースに保存されません。
ファイルを保存して閉じる。
データベースにレシピテーブルを作成するために、Railsではマイグレーションを実行する必要があります。マイグレーションはデータベースに対してプログラム的に変更を加える方法です。セットアップしたデータベースでマイグレーションが正常に動作するよう、20221017220817_create_recipes.rbファイルに変更を加える必要があります。
あなたのエディタでこのファイルを開いてください。
- nano ~/rails_react_recipe/db/migrate/20221017220817_create_recipes.rb
以下のファイルに一致するように、ハイライトされた素材を追加してください。
db/migrate/20221017220817_create_recipes.rbを日本語で自然な表現に言い換えると、以下のようになります。
「db/migrate/20221017220817_create_recipes.rb」
class CreateRecipes < ActiveRecord::Migration[5.2]
  def change
    create_table :recipes do |t|
      t.string :name, null: false
      t.text :ingredients, null: false
      t.text :instruction, null: false
      t.string :image, default: 'https://raw.githubusercontent.com/do-community/react_rails_recipe/master/app/assets/images/Sammy_Meal.jpg'

      t.timestamps
    end
  end
end
このマイグレーションファイルには、changeメソッドを持つRubyクラスと、recipesという名前のテーブルとその列とデータ型を作成するためのコマンドが含まれています。さらに、name、ingredients、instructionの列にはnull: falseを追加して、これらの列がデータベースを変更する前に値を持つようにします。最後に、image列にデフォルトのイメージURLを追加します。異なるイメージを使用したい場合は、別のURLを指定することもできます。
これらの変更を行った後、ファイルを保存して終了してください。これで移行を実行し、テーブルを作成する準備が整いました。ターミナルで以下のコマンドを実行してください。
- rails db:migrate
データベースマイグレーションの命令を実行するために、データベースマイグレートコマンドを使用します。コマンドが正常に実行されると、以下のような出力が表示されます。
== 20190407161357 CreateRecipes: migrating ==================================== — create_table(:recipes) -> 0.0140s == 20190407161357 CreateRecipes: migrated (0.0141s) ===========================
レシピモデルを用意したら、次にレシピコントローラーを作成して、レシピの作成、読み取り、削除のロジックを追加します。以下のコマンドを実行してください。
- rails generate controller api/v1/Recipes index create show destroy –skip-template-engine –no-helper
このコマンドでは、api/v1ディレクトリにRecipesコントローラーを作成します。このコントローラーには、index、create、show、destroyのアクションがあります。indexアクションは全てのレシピを取得する処理を担当し、createアクションは新しいレシピを作成する役割を持ちます。showアクションは単一のレシピを取得し、destroyアクションにはレシピを削除するためのロジックが含まれます。
コントローラーをより軽量にするために、いくつかのフラグを渡すこともできます。
- –skip-template-engine, which instructs Rails to skip generating Rails view files since React handles your front-end needs.
- –no-helper, which instructs Rails to skip generating a helper file for your controller.
コマンドを実行すると、「Recipes」コントローラー内の各アクションに対応するルートが、ルートファイルにも追加されます。
コマンドが実行されると、次のような出力が表示されます。
create app/controllers/api/v1/recipes_controller.rb route namespace :api do namespace :v1 do get ‘recipes/index’ get ‘recipes/create’ get ‘recipes/show’ get ‘recipes/destroy’ end end
これらのルートを使用するために、config/routes.rbファイルを変更します。テキストエディタでroutes.rbファイルを開いてください。
- nano ~/rails_react_recipe/config/routes.rb
以下のコードのようにこのファイルを更新し、ハイライトされた行を変更または追加してください。
Rails.application.routes.draw do
  namespace :api do
    namespace :v1 do
      get 'recipes/index'
      post 'recipes/create'
      get '/show/:id', to: 'recipes#show'
      delete '/destroy/:id', to: 'recipes#destroy'
    end
  end
  root 'homepage#index'
  get '/*path' => 'homepage#index'
  # Define your application routes per the DSL in https://guides.rubyonrails.org/routing.html

  # Defines the root path route ("/")
  # root "articles#index"
end
このルートファイルでは、クリエイトとデストロイのルートのHTTP動詞を変更して、データのポストや削除ができるようにします。また、ショーやデストロイアクション用のルートに:idパラメータを追加して、読み込みや削除したいレシピの識別番号を:idで保持します。
既存のルートにマッチしない他のリクエストをホームページのコントローラーのインデックスアクションにリダイレクトする、get ‘/*path’ のキャッチオールルートを追加します。フロントエンドのルーティングは、レシピの作成、読み取り、削除と関係のないリクエストを処理します。
ファイルを保存して終了してください。 (Fairu o hozon shite shuuryou shite kudasai.)
アプリケーションで利用可能なルートのリストを評価するには、次のコマンドを実行してください。
- rails routes
このコマンドを実行すると、プロジェクトのURIパターン、動詞、そして一致するコントローラーまたはアクションの一覧が表示されます。
次に、一度にすべてのレシピを取得するためのロジックを追加します。RailsはActiveRecordライブラリを使用して、このようなデータベース関連のタスクを処理します。ActiveRecordはクラスをリレーショナルデータベースのテーブルに接続し、それらを扱うための豊富なAPIを提供します。
すべてのレシピを取得するには、ActiveRecordを使用してレシピテーブルをクエリし、データベース内のすべてのレシピを取得します。
次のコマンドを使用して、recipes_controller.rbファイルを開いてください。
- nano ~/rails_react_recipe/app/controllers/api/v1/recipes_controller.rb
レシピコントローラのハイライトされた行を追加してください。
class Api::V1::RecipesController < ApplicationController
  def index
    recipe = Recipe.all.order(created_at: :desc)
    render json: recipe
  end

  def create
  end

  def show
  end

  def destroy
  end
end
インデックスアクションでは、ActiveRecordのallメソッドを使用してデータベース内のすべてのレシピを取得します。orderメソッドを使用して、作成日に基づいて降順に並べて、最新のレシピが先に表示されるようにします。最後に、renderを使用してレシピのリストをJSON形式でレスポンスとして送信します。
次に、新しいレシピを作成するためのロジックを追加します。全てのレシピを取得するのと同様に、提供されたレシピの詳細を検証し保存するためにActiveRecordを利用します。レシピコントローラの以下の強調されたコードを更新してください。
「~/rails_react_recipe/app/controllers/api/v1/recipes_controller.rb」
class Api::V1::RecipesController < ApplicationController
  def index
    recipe = Recipe.all.order(created_at: :desc)
    render json: recipe
  end

  def create
    recipe = Recipe.create!(recipe_params)
    if recipe
      render json: recipe
    else
      render json: recipe.errors
    end
  end

  def show
  end

  def destroy
  end

  private

  def recipe_params
    params.permit(:name, :image, :ingredients, :instruction)
  end
end
create(作成)のアクションでは、ActiveRecordのcreateメソッドを使用して新しいレシピを作成します。createメソッドは、モデルに一度に提供されるすべてのコントローラーパラメータを割り当てることができます。このメソッドはレコードの作成を容易にしますが、悪意のある使用の可能性も開いてしまいます。悪意のある使用を防ぐためには、Railsが提供するstrong parameters機能を使用します。これにより、許可されていない限り、パラメータを割り当てることはできません。コード内では、createメソッドにrecipe_paramsというパラメータを渡します。recipe_paramsは、コントローラーパラメータがデータベースに間違ったコンテンツや悪意のあるコンテンツが入らないように、許可するためのプライベートメソッドです。この場合、名前、画像、材料、手順のパラメータをcreateメソッドの正当な使用のために許可しています。
あなたのレシピコントローラーは、現在レシピを読み取り、作成することができます。残りは単一のレシピを読み取り、削除するためのロジックです。ハイライトされたコードでレシピコントローラーを更新してください。
「~/rails_react_recipe/app/controllers/api/v1/recipes_controller.rb」となります。
class Api::V1::RecipesController < ApplicationController
  before_action :set_recipe, only: %i[show destroy]

  def index
    recipe = Recipe.all.order(created_at: :desc)
    render json: recipe
  end

  def create
    recipe = Recipe.create!(recipe_params)
    if recipe
      render json: recipe
    else
      render json: recipe.errors
    end
  end

  def show
    render json: @recipe
  end

  def destroy
    @recipe&.destroy
    render json: { message: 'Recipe deleted!' }
  end

  private

  def recipe_params
    params.permit(:name, :image, :ingredients, :instruction)
  end

  def set_recipe
    @recipe = Recipe.find(params[:id])
  end
end
新しいコードの中で、リクエストに一致する場合にのみbefore_actionで呼び出されるprivateなset_recipeメソッドを作成します。set_recipeメソッドはActiveRecordのfindメソッドを使用して、paramsで提供されたidと一致するレシピを検索し、インスタンス変数@recipeに割り当てます。showアクションでは、set_recipeメソッドで設定された@recipeオブジェクトをJSONレスポンスとして返します。
削除アクションでは、Rubyの安全なナビゲーション演算子&.を使用して、メソッドを呼び出す際にnilエラーを回避する類似の操作を行いました。この追加により、レシピが存在する場合にのみ削除し、応答としてメッセージを送信することができます。
これらの変更をrecipes_controller.rbに行った後、ファイルを保存して閉じてください。
このステップでは、レシピ用のモデルとコントローラを作成しました。バックエンドでレシピを操作するために必要なすべてのロジックを記述しました。次のセクションでは、レシピを表示するためのコンポーネントを作成します。
ステップ7 ー レシピの閲覧
このセクションでは、レシピを表示するためのコンポーネントを作成します。既存のレシピを表示するためのページと、個々のレシピを表示するための別のページを作成します。
最初に、すべてのレシピを表示するページを作成します。ページを作成する前に、現在データベースが空のため、作業するためのレシピが必要です。Railsには、アプリケーションのシードデータを作成する方法が提供されています。
編集用にseeds.rbというシードファイルを開いてください。
- nano ~/rails_react_recipe/db/seeds.rb
以下のコードでシードファイルの最初の内容を置き換えてください。
~/rails_react_recipe/db/seeds.rb → 「~/rails_react_recipe/db/seeds.rb」
9.times do |i|
  Recipe.create(
    name: "Recipe #{i + 1}",
    ingredients: '227g tub clotted cream, 25g butter, 1 tsp cornflour,100g parmesan, grated nutmeg, 250g fresh fettuccine or tagliatelle, snipped chives or chopped parsley to serve (optional)',
    instruction: 'In a medium saucepan, stir the clotted cream, butter, and cornflour over a low-ish heat and bring to a low simmer. Turn off the heat and keep warm.'
  )
end
このコードでは、ループを使用してRailsに9つのレシピを作成し、名前、材料、手順のセクションがあります。ファイルを保存して終了します。
このデータをデータベースに投入するために、ターミナルで以下のコマンドを実行してください。
- rails db:seed
このコマンドを実行すると、データベースに9つのレシピが追加されます。これで、それらを取得し、フロントエンドで表示することができます。
全てのレシピを表示するコンポーネントは、RecipesControllerのindexアクションにHTTPリクエストを送信し、全てのレシピのリストを取得します。これらのレシピは、ページ上のカードに表示されます。
app/javascript/componentsディレクトリにRecipes.jsxファイルを作成してください。
- nano ~/rails_react_recipe/app/javascript/components/Recipes.jsx
ファイルを開いたら、次の行を追加してReact、useState、useEffect、Link、useNavigateモジュールをインポートしてください。
import React, { useState, useEffect } from "react";
import { Link, useNavigate } from "react-router-dom";
次に、ハイライトされた行を追加して、関数型のReactコンポーネントである「Recipes」を作成してエクスポートします。
~/rails_react_recipe/app/javascript/components/レシピ.jsx
import React, { useState, useEffect } from "react";
import { Link, useNavigate } from "react-router-dom";

const Recipes = () => {
  const navigate = useNavigate();
  const [recipes, setRecipes] = useState([]);
};

export default Recipes;
レシピコンポーネント内では、React RouterのナビゲーションAPIがuseNavigateフックを呼び出します。ReactのuseStateフックは、レシピの状態を初期化し、それは空の配列([])であり、レシピの状態を更新するためのsetRecipes関数も提供します。
次に、useEffectフックで、すべてのレシピをフェッチするためのHTTPリクエストを行います。これをするためには、ハイライトされた行を追加してください。
import React, { useState, useEffect } from "react";
import { Link, useNavigate } from "react-router-dom";

const Recipes = () => {
  const navigate = useNavigate();
  const [recipes, setRecipes] = useState([]);

  useEffect(() => {
    const url = "/api/v1/recipes/index";
    fetch(url)
      .then((res) => {
        if (res.ok) {
          return res.json();
        }
        throw new Error("Network response was not ok.");
      })
      .then((res) => setRecipes(res))
      .catch(() => navigate("/"));
  }, []);
};

export default Recipes;
あなたのuseEffectフックでは、Fetch APIを使用してすべてのレシピを取得するためにHTTPリクエストを行います。レスポンスが成功した場合、アプリケーションはレシピの配列をrecipesステートに保存します。エラーが発生した場合、ユーザーはホームページにリダイレクトされます。
最後に、コンポーネントがレンダリングされる時にブラウザページに評価および表示される要素のマークアップを返します。この場合、コンポーネントはレシピのカードをレシピの状態からレンダリングします。Recipes.jsxにハイライトされた行を追加してください。
~/rails_react_recipe/app/javascript/components/レシピ.jsx
import React, { useState, useEffect } from "react";
import { Link, useNavigate } from "react-router-dom";
const Recipes = () => {
const navigate = useNavigate();
const [recipes, setRecipes] = useState([]);
useEffect(() => {
const url = "/api/v1/recipes/index";
fetch(url)
.then((res) => {
if (res.ok) {
return res.json();
}
throw new Error("Network response was not ok.");
})
.then((res) => setRecipes(res))
.catch(() => navigate("/"));
}, []);
const allRecipes = recipes.map((recipe, index) => (
<div key={index} className="col-md-6 col-lg-4">
<div className="card mb-4">
<img
src={recipe.image}
className="card-img-top"
alt={`${recipe.name} image`}
/>
<div className="card-body">
<h5 className="card-title">{recipe.name}</h5>
<Link to={`/recipe/${recipe.id}`} className="btn custom-button">
View Recipe
</Link>
</div>
</div>
</div>
));
const noRecipe = (
<div className="vw-100 vh-50 d-flex align-items-center justify-content-center">
<h4>
No recipes yet. Why not <Link to="/new_recipe">create one</Link>
</h4>
</div>
);
return (
<>
<section className="jumbotron jumbotron-fluid text-center">
<div className="container py-5">
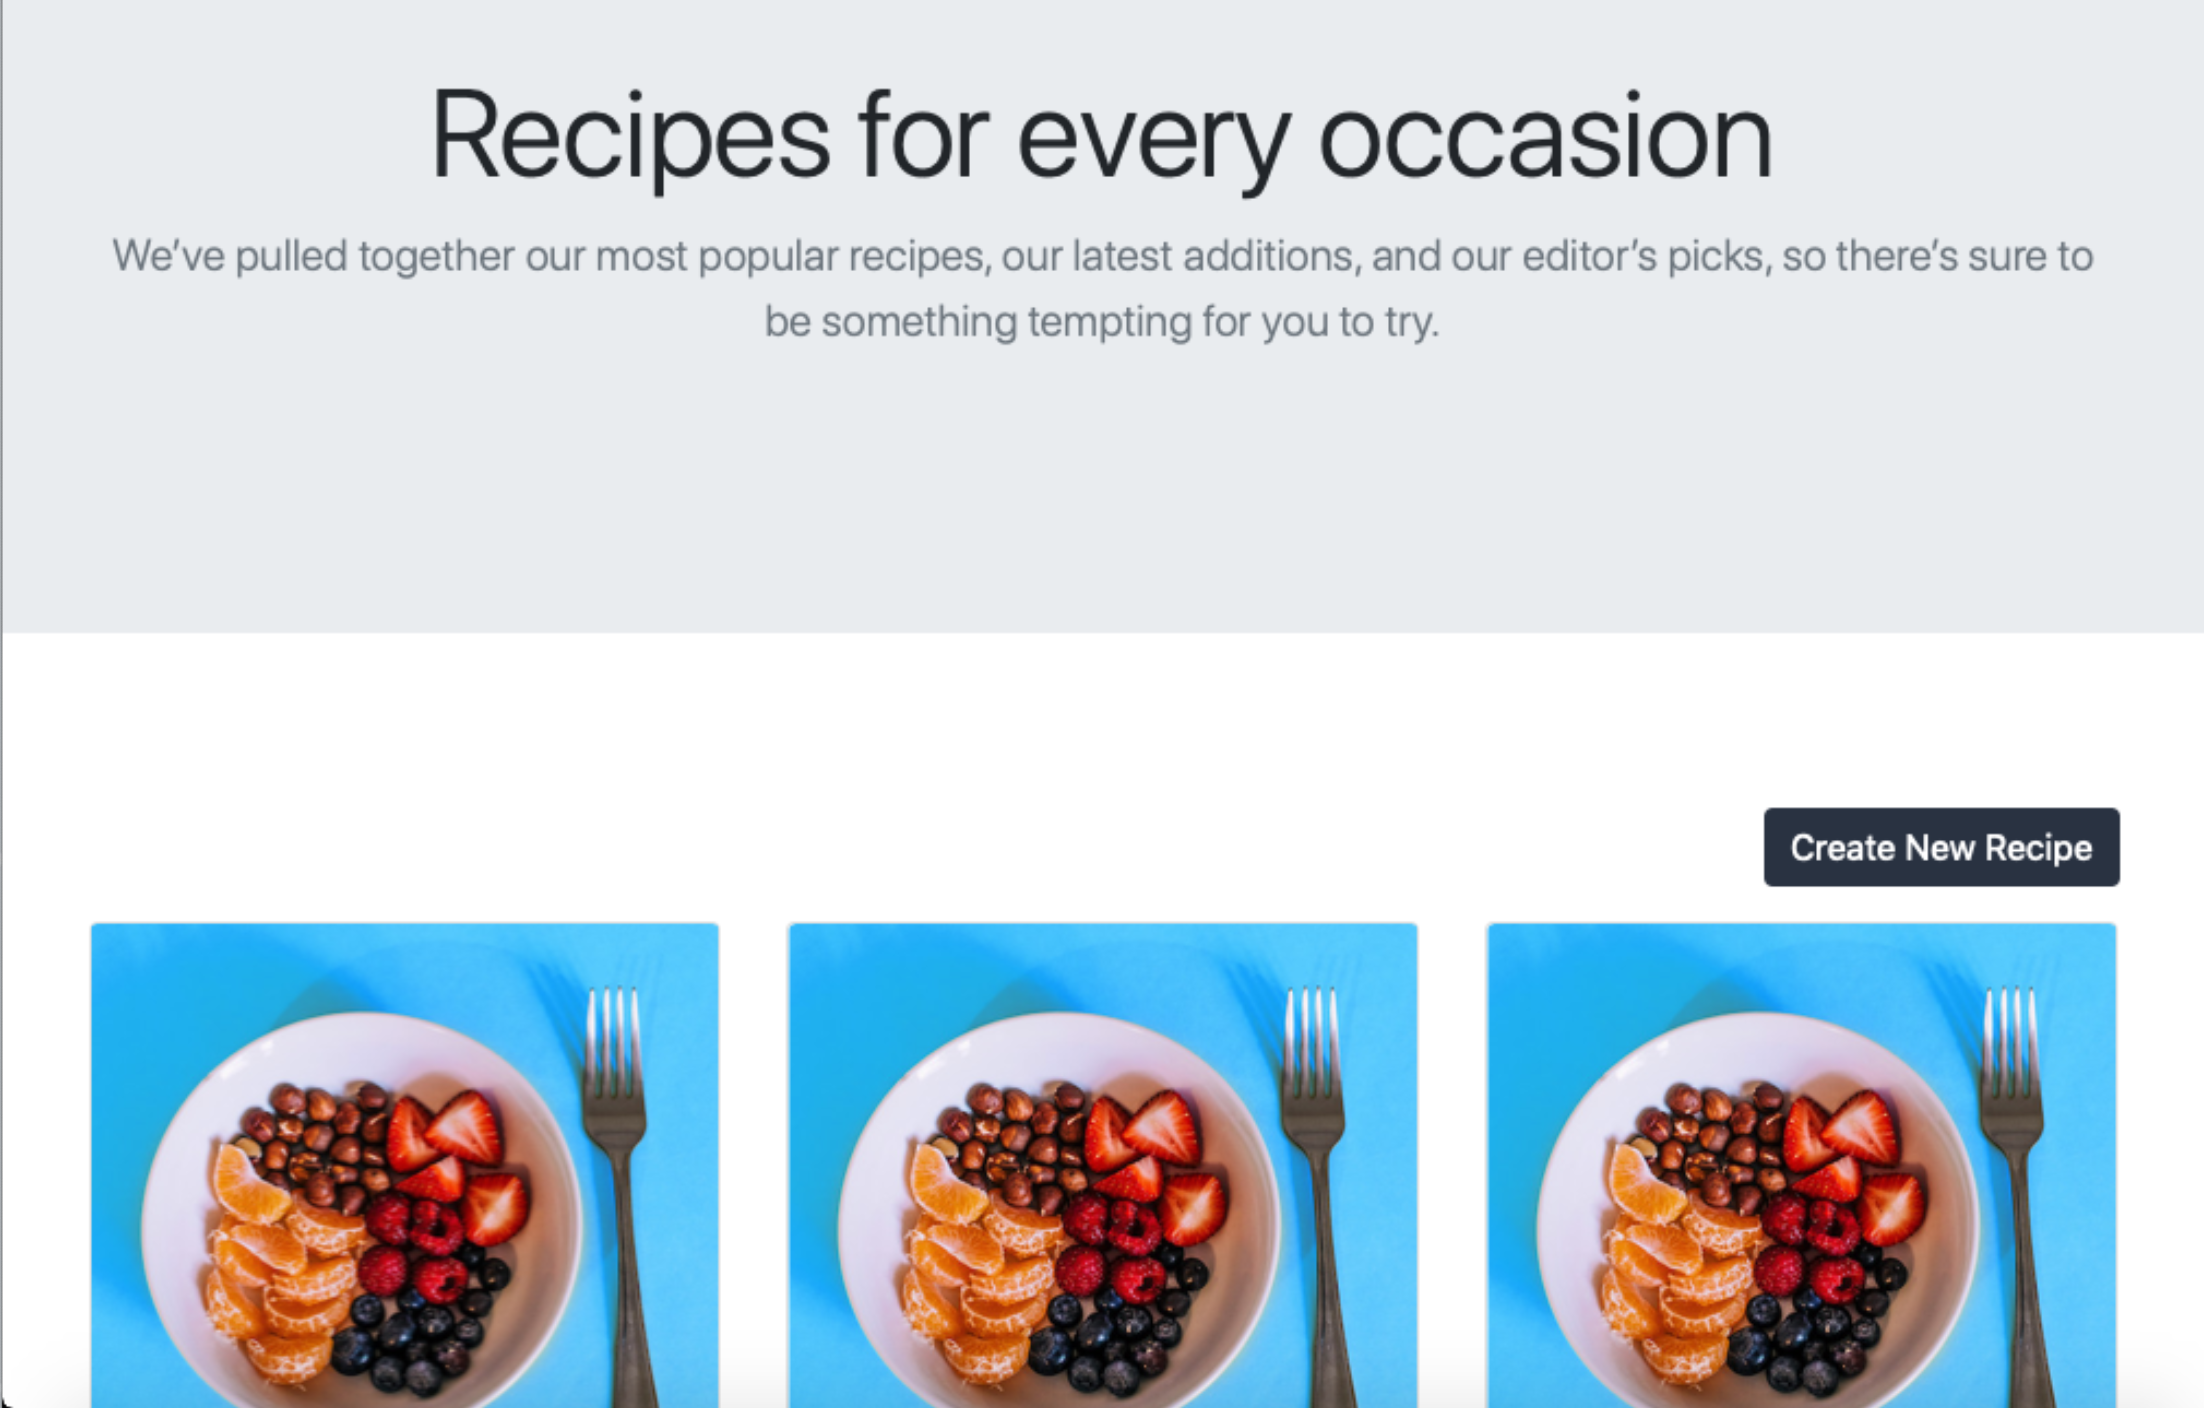
<h1 className="display-4">Recipes for every occasion</h1>
<p className="lead text-muted">
We’ve pulled together our most popular recipes, our latest
additions, and our editor’s picks, so there’s sure to be something
tempting for you to try.
</p>
</div>
</section>
<div className="py-5">
<main className="container">
<div className="text-end mb-3">
<Link to="/recipe" className="btn custom-button">
Create New Recipe
</Link>
</div>
<div className="row">
{recipes.length > 0 ? allRecipes : noRecipe}
</div>
<Link to="/" className="btn btn-link">
Home
</Link>
</main>
</div>
</>
);
};
export default Recipes;
「Recipes.jsxを保存して終了してください。」
レシピを表示するためのコンポーネントを作成したので、それに対するルートを作成します。フロントエンドのルートファイルであるapp/javascript/routes/index.jsxを開きます。
- nano app/javascript/routes/index.jsx
ファイルにハイライトされた行を追加してください。
~/rails_react_recipe/app/javascript/routes/index.jsx
import React from "react";
import { BrowserRouter as Router, Routes, Route } from "react-router-dom";
import Home from "../components/Home";
import Recipes from "../components/Recipes";

export default (
  <Router>
    <Routes>
      <Route path="/" exact component={Home} />
      <Route path="/recipes" element={<Recipes />} />
    </Routes>
  </Router>
);
ファイルを保存して終了してください。
現時点で、コードが予想どおりに動作していることを確認するのは良いアイデアです。以前と同様に、以下のコマンドを使用してサーバーを起動してください。
- bin/dev
次に、ブラウザでアプリを開いてください。ホームページで「レシピを表示」ボタンを押して、シードレシピの表示ページにアクセスしてください。

サーバーを停止し、プロンプトに戻るにはターミナルでCTRL+Cを使用してください。
アプリケーションで全てのレシピを表示できるようになったので、個々のレシピを表示するためのセカンドコンポーネントを作成しましょう。app/javascript/componentsディレクトリにRecipe.jsxというファイルを作成してください。
- nano app/javascript/components/Recipe.jsx
レシピのコンポーネントと同様に、以下の行を追加してReact、useState、useEffect、Link、useNavigate、useParamのモジュールをインポートします。
「~/rails_react_recipe/app/javascript/components/Recipe.jsx」
import React, { useState, useEffect } from "react";
import { Link, useNavigate, useParams } from "react-router-dom";
次に、ハイライトされた行を追加して、Recipeという機能的なReactコンポーネントを作成し、エクスポートしてください。
~/rails_react_recipe/app/javascript/components/Recipe.jsx
import React, { useState, useEffect } from "react";
import { Link, useNavigate, useParams } from "react-router-dom";

const Recipe = () => {
  const params = useParams();
  const navigate = useNavigate();
  const [recipe, setRecipe] = useState({ ingredients: "" });
};

export default Recipe;
レシピコンポーネントのように、useNavigateフックを使ってReact Routerのナビゲーションを初期化します。useStateフックでレシピの状態とsetRecipe関数を使って状態を更新します。さらに、useParamsフックを呼び出してURLパラメータのキーと値のペアを返します。
特定のレシピを探すために、アプリケーションはそのレシピのIDを知る必要があります。つまり、レシピのIDパラメータをURLで期待することが、レシピのコンポーネントの役割です。useParamsフックの返り値を保持するparamsオブジェクトを介してこれにアクセスすることができます。
次に、paramsオブジェクトからidパラメータにアクセスするuseEffectフックを宣言します。レシピのidパラメータを取得すると、レシピを取得するためのHTTPリクエストを行います。ファイルに以下の行を追加してください。
~/rails_react_recipe/app/javascript/components/Recipe.jsx
import React, { useState, useEffect } from "react";
import { Link, useNavigate, useParams } from "react-router-dom";

const Recipe = () => {
  const params = useParams();
  const navigate = useNavigate();
  const [recipe, setRecipe] = useState({ ingredients: "" });

  useEffect(() => {
    const url = `/api/v1/show/${params.id}`;
    fetch(url)
      .then((response) => {
        if (response.ok) {
          return response.json();
        }
        throw new Error("Network response was not ok.");
      })
      .then((response) => setRecipe(response))
      .catch(() => navigate("/recipes"));
  }, [params.id]);
};

export default Recipe;
useEffectフックでは、params.idの値を使用してGET HTTPリクエストを行い、idを所有するレシピを取得し、setRecipe関数を使用してコンポーネントの状態に保存します。レシピが存在しない場合、アプリはユーザーをレシピページにリダイレクトします。
次に、addHtmlEntities関数を追加します。この関数は、コンポーネント内の文字エンティティをHTMLエンティティで置き換えるために使用されます。addHtmlEntities関数は、文字列を受け取り、エスケープされた開きかっこと閉じかっこをHTMLエンティティで置き換えます。この関数は、保存されたレシピの指示にエスケープされた文字があれば、それを変換するのに役立ちます。ハイライトされた行を追加してください。
~/rails_react_recipe/app/javascript/components/Recipe.jsxを日本語で言い換えると、以下のようになります。
~/rails_react_recipe/app/javascript/components/Recipe.jsx
import React, { useState, useEffect } from "react";
import { Link, useNavigate, useParams } from "react-router-dom";
const Recipe = () => {
const params = useParams();
const navigate = useNavigate();
const [recipe, setRecipe] = useState({ ingredients: "" });
useEffect(() => {
const url = `/api/v1/show/${params.id}`;
fetch(url)
.then((response) => {
if (response.ok) {
return response.json();
}
throw new Error("Network response was not ok.");
})
.then((response) => setRecipe(response))
.catch(() => navigate("/recipes"));
}, [params.id]);
const addHtmlEntities = (str) => {
return String(str).replace(/</g, "<").replace(/>/g, ">");
};
};
export default Recipe;
最後に、ハイライトされた行を追加することで、レシピをコンポーネントの状態にレンダリングするためのマークアップをページに戻します。
〜/rails_react_recipe/app/javascript/components/Recipe.jsx
import React, { useState, useEffect } from "react";
import { Link, useNavigate, useParams } from "react-router-dom";
const Recipe = () => {
const params = useParams();
const navigate = useNavigate();
const [recipe, setRecipe] = useState({ ingredients: "" });
useEffect(() => {
const url = `/api/v1/show/${params.id}`;
fetch(url)
.then((response) => {
if (response.ok) {
return response.json();
}
throw new Error("Network response was not ok.");
})
.then((response) => setRecipe(response))
.catch(() => navigate("/recipes"));
}, [params.id]);
const addHtmlEntities = (str) => {
return String(str).replace(/</g, "<").replace(/>/g, ">");
};
const ingredientList = () => {
let ingredientList = "No ingredients available";
if (recipe.ingredients.length > 0) {
ingredientList = recipe.ingredients
.split(",")
.map((ingredient, index) => (
<li key={index} className="list-group-item">
{ingredient}
</li>
));
}
return ingredientList;
};
const recipeInstruction = addHtmlEntities(recipe.instruction);
return (
<div className="">
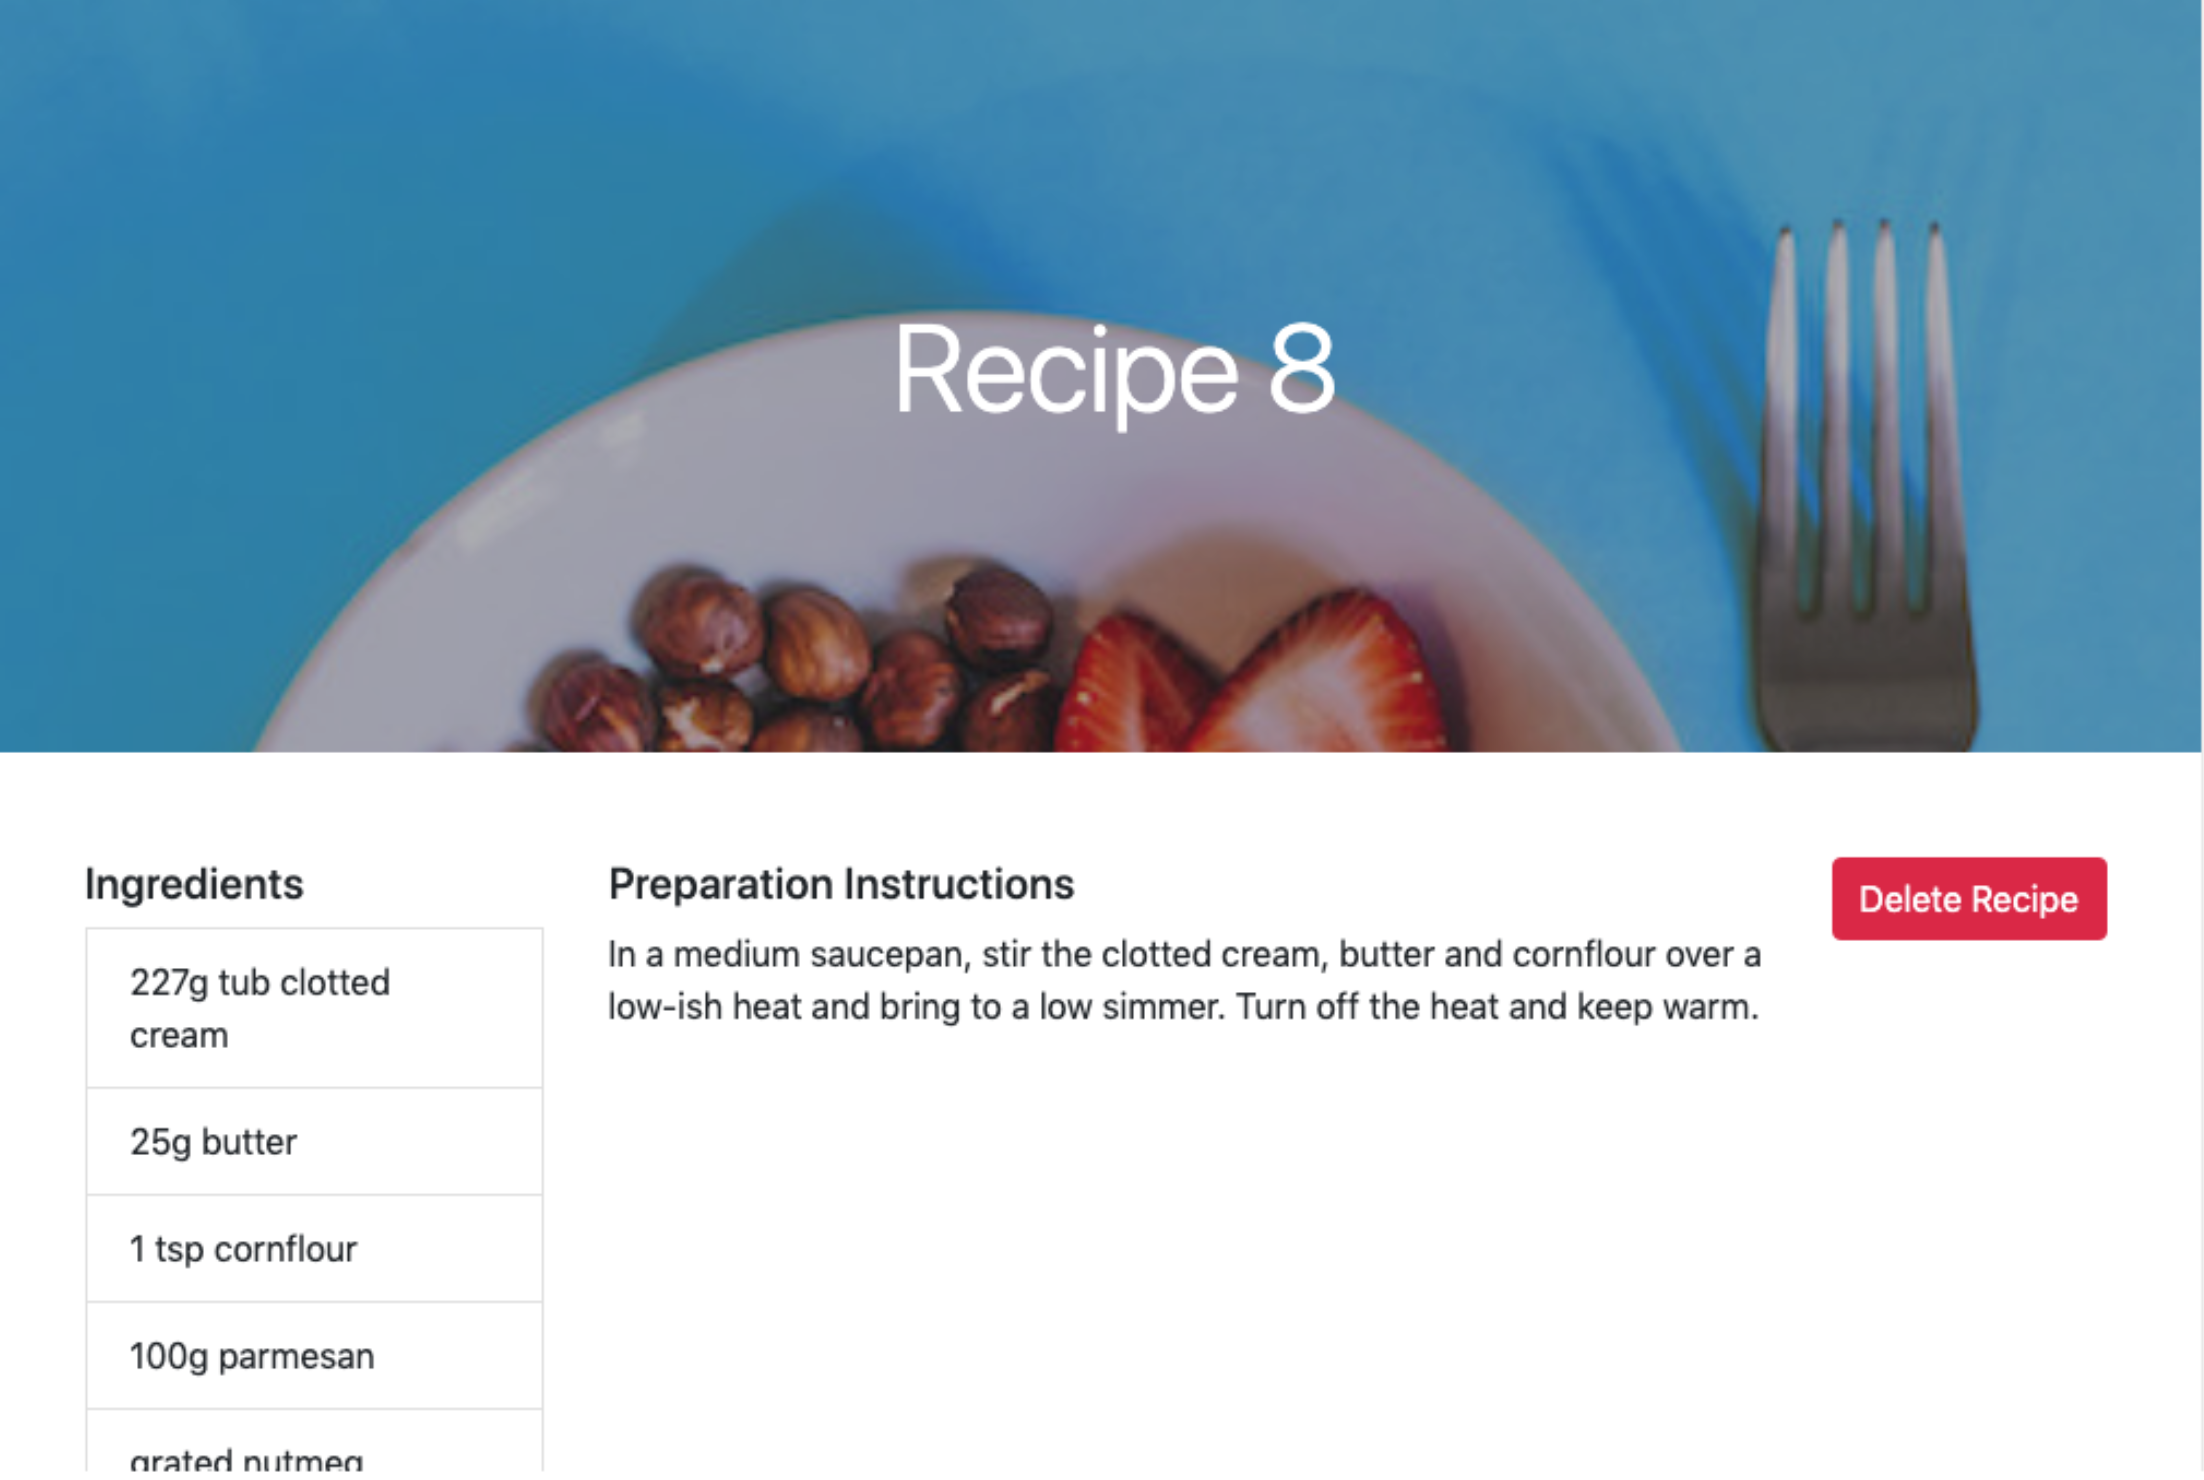
<div className="hero position-relative d-flex align-items-center justify-content-center">
<img
src={recipe.image}
alt={`${recipe.name} image`}
className="img-fluid position-absolute"
/>
<div className="overlay bg-dark position-absolute" />
<h1 className="display-4 position-relative text-white">
{recipe.name}
</h1>
</div>
<div className="container py-5">
<div className="row">
<div className="col-sm-12 col-lg-3">
<ul className="list-group">
<h5 className="mb-2">Ingredients</h5>
{ingredientList()}
</ul>
</div>
<div className="col-sm-12 col-lg-7">
<h5 className="mb-2">Preparation Instructions</h5>
<div
dangerouslySetInnerHTML={{
__html: `${recipeInstruction}`,
}}
/>
</div>
<div className="col-sm-12 col-lg-2">
<button
type="button"
className="btn btn-danger"
>
Delete Recipe
</button>
</div>
</div>
<Link to="/recipes" className="btn btn-link">
Back to recipes
</Link>
</div>
</div>
);
};
export default Recipe;
ingredientList関数を使用して、レシピの食材をコンマで区切って配列に分割し、その配列をマップして食材のリストを作成します。もし食材がない場合、アプリは「食材はありません」というメッセージを表示します。また、レシピの指示にある全ての開きカッコと閉じカッコをaddHtmlEntities関数を通して置き換えます。最後に、コードはレシピ画像をヒーローイメージとして表示し、レシピの指示の横には削除ボタンを追加し、レシピページに戻るためのボタンも追加します。
Note
ファイルを保存して終了してください。
ページ上のレシピコンポーネントを表示するには、ルートファイルに追加します。編集するために、ルートファイルを開いてください。
- nano app/javascript/routes/index.jsx
指示された部分をファイルに追加してください。
import React from "react";
import { BrowserRouter as Router, Routes, Route } from "react-router-dom";
import Home from "../components/Home";
import Recipes from "../components/Recipes";
import Recipe from "../components/Recipe";

export default (
  <Router>
    <Routes>
      <Route path="/" exact component={Home} />
      <Route path="/recipes" exact component={Recipes} />
      <Route path="/recipe/:id" element={<Recipe />} />
    </Routes>
  </Router>
);
このルートファイルでは、Recipe コンポーネントをインポートしてルートを追加します。このルートには、レシピを表示したい:idパラメータが含まれています。このパラメータは、表示したいレシピのidで置き換えられます。
ファイルを保存して閉じてください。
サーバーを再起動するために、bin/devスクリプトを使用し、その後ブラウザでhttp://localhost:3000にアクセスしてください。レシピページに移動するためにView Recipesボタンをクリックしてください。レシピページでは、詳細を見るボタンをクリックしていずれかのレシピにアクセスしてください。データベースからの情報が詰まったページで迎えられます。
CTRL+Cでサーバーを停止できます。
このステップでは、データベースに9つのレシピを追加し、これらのレシピを個別におよびまとめて表示するコンポーネントを作成しました。次のステップでは、レシピを作成するためのコンポーネントを追加します。
ステップ8 — レシピの作成
使える食レシピアプリを作るための次のステップは、新しいレシピを作成する機能を追加することです。このステップでは、この機能のためのコンポーネントを作成します。このコンポーネントには、ユーザーから必要なレシピの詳細情報を収集するためのフォームが含まれ、その後、Recipeコントローラーの作成アクションにレシピデータを保存するためのリクエストを行います。
app/javascript/componentsディレクトリにNewRecipe.jsxファイルを作成してください。
- nano app/javascript/components/NewRecipe.jsx
他のコンポーネントで使用したReact、useState、Link、およびuseNavigateモジュールを新しいファイルにインポートしてください。
~/rails_react_recipe/app/javascript/components/NewRecipe.jsx
import React, { useState } from "react";
import { Link, useNavigate } from "react-router-dom";
次に、ハイライトされた行を追加して、機能的なNewRecipeコンポーネントを作成してエクスポートしてください。
~/rails_react_recipe/app/javascript/components/NewRecipe.jsxを日本語で表現すると:
~/rails_react_recipe/app/javascript/components/NewRecipe.jsx
import React, { useState } from "react";
import { Link, useNavigate } from "react-router-dom";

const NewRecipe = () => {
  const navigate = useNavigate();
  const [name, setName] = useState("");
  const [ingredients, setIngredients] = useState("");
  const [instruction, setInstruction] = useState("");
};

export default NewRecipe;
以前のコンポーネントと同様に、useNavigateフックを使用してReactルーターのナビゲーションを初期化し、useStateフックを使用して名前、材料、手順の状態を初期化します。各状態にはそれぞれ対応する更新関数があります。これらは有効なレシピを作成するために必要なフィールドです。
次に、特殊文字(<など)をそれぞれエスケープ/エンコードされた値(<など)に変換するstripHtmlEntities関数を作成します。これを行うために、NewRecipeコンポーネントに以下の強調された行を追加してください。
「~/rails_react_recipe/app/javascript/components/NewRecipe.jsx」を日本語で自然な表現で言い換えると、以下のようになります:
「~/rails_react_recipe/app/javascript/components/NewRecipe.jsx」
import React, { useState } from "react";
import { Link, useNavigate } from "react-router-dom";
const NewRecipe = () => {
const navigate = useNavigate();
const [name, setName] = useState("");
const [ingredients, setIngredients] = useState("");
const [instruction, setInstruction] = useState("");
const stripHtmlEntities = (str) => {
return String(str)
.replace(/\n/g, "<br> <br>")
.replace(/</g, "<")
.replace(/>/g, ">");
};
};
export default NewRecipe;
stripHtmlEntitiesという関数では、<と>の文字をエスケープした値で置き換えます。これにより、データベースに生のHTMLを保存しないようにしています。
次に、NewRecipeコンポーネントにonChangeとonSubmitの機能を追加し、フォームの編集と送信を処理するために、ハイライトされた行を追加してください。
以下の文を日本語で言い換える:
~/rails_react_recipe/app/javascript/components/NewRecipe.jsx
import React, { useState } from "react";
import { Link, useNavigate } from "react-router-dom";
const NewRecipe = () => {
const navigate = useNavigate();
const [name, setName] = useState("");
const [ingredients, setIngredients] = useState("");
const [instruction, setInstruction] = useState("");
const stripHtmlEntities = (str) => {
return String(str)
.replace(/\n/g, "<br> <br>")
.replace(/</g, "<")
.replace(/>/g, ">");
};
const onChange = (event, setFunction) => {
setFunction(event.target.value);
};
const onSubmit = (event) => {
event.preventDefault();
const url = "/api/v1/recipes/create";
if (name.length == 0 || ingredients.length == 0 || instruction.length == 0)
return;
const body = {
name,
ingredients,
instruction: stripHtmlEntities(instruction),
};
const token = document.querySelector('meta[name="csrf-token"]').content;
fetch(url, {
method: "POST",
headers: {
"X-CSRF-Token": token,
"Content-Type": "application/json",
},
body: JSON.stringify(body),
})
.then((response) => {
if (response.ok) {
return response.json();
}
throw new Error("Network response was not ok.");
})
.then((response) => navigate(`/recipe/${response.id}`))
.catch((error) => console.log(error.message));
};
};
export default NewRecipe;
onChange関数は、ユーザーの入力イベントと状態の設定関数を受け取り、ユーザーの入力値で状態を更新します。onSubmit関数では、必須の入力項目が空でないかを確認します。その後、新しいレシピを作成するために必要なパラメータを含むオブジェクトを作成します。stripHtmlEntities関数を使用して、レシピの指示に含まれる<と>の文字をエスケープされた値に置き換え、改行文字を改行タグに置き換えることで、ユーザーが入力したテキストの形式を保持します。最後に、新しいレシピを作成するためのPOST HTTPリクエストを行い、成功した場合にはそのレシピのページにリダイレクトします。
Railsは、Cross-Site Request Forgery(CSRF)攻撃からの保護のために、HTMLドキュメントにCSRFセキュリティトークンを付加します。このトークンは、非GETリクエストが行われるたびに必要です。前述のコードでトークンが定数として設定されている場合、アプリケーションはサーバー上でトークンを検証し、セキュリティトークンが予想通りでない場合は例外をスローします。onSubmit関数では、アプリケーションはRailsが埋め込んだHTMLドキュメント内のCSRFトークンを取得し、JSON文字列でHTTPリクエストを行います。レシピが正常に作成されると、アプリケーションはユーザーをレシピページにリダイレクトし、新しく作成されたレシピを表示できるようにします。
最後に、ユーザーが作成したいレシピの詳細を入力するためのフォームを表示するマークアップを返します。ハイライトされた行を追加してください。
import React, { useState } from "react";
import { Link, useNavigate } from "react-router-dom";
const NewRecipe = () => {
const navigate = useNavigate();
const [name, setName] = useState("");
const [ingredients, setIngredients] = useState("");
const [instruction, setInstruction] = useState("");
const stripHtmlEntities = (str) => {
return String(str)
.replace(/\n/g, "<br> <br>")
.replace(/</g, "<")
.replace(/>/g, ">");
};
const onChange = (event, setFunction) => {
setFunction(event.target.value);
};
const onSubmit = (event) => {
event.preventDefault();
const url = "/api/v1/recipes/create";
if (name.length == 0 || ingredients.length == 0 || instruction.length == 0)
return;
const body = {
name,
ingredients,
instruction: stripHtmlEntities(instruction),
};
const token = document.querySelector('meta[name="csrf-token"]').content;
fetch(url, {
method: "POST",
headers: {
"X-CSRF-Token": token,
"Content-Type": "application/json",
},
body: JSON.stringify(body),
})
.then((response) => {
if (response.ok) {
return response.json();
}
throw new Error("Network response was not ok.");
})
.then((response) => navigate(`/recipe/${response.id}`))
.catch((error) => console.log(error.message));
};
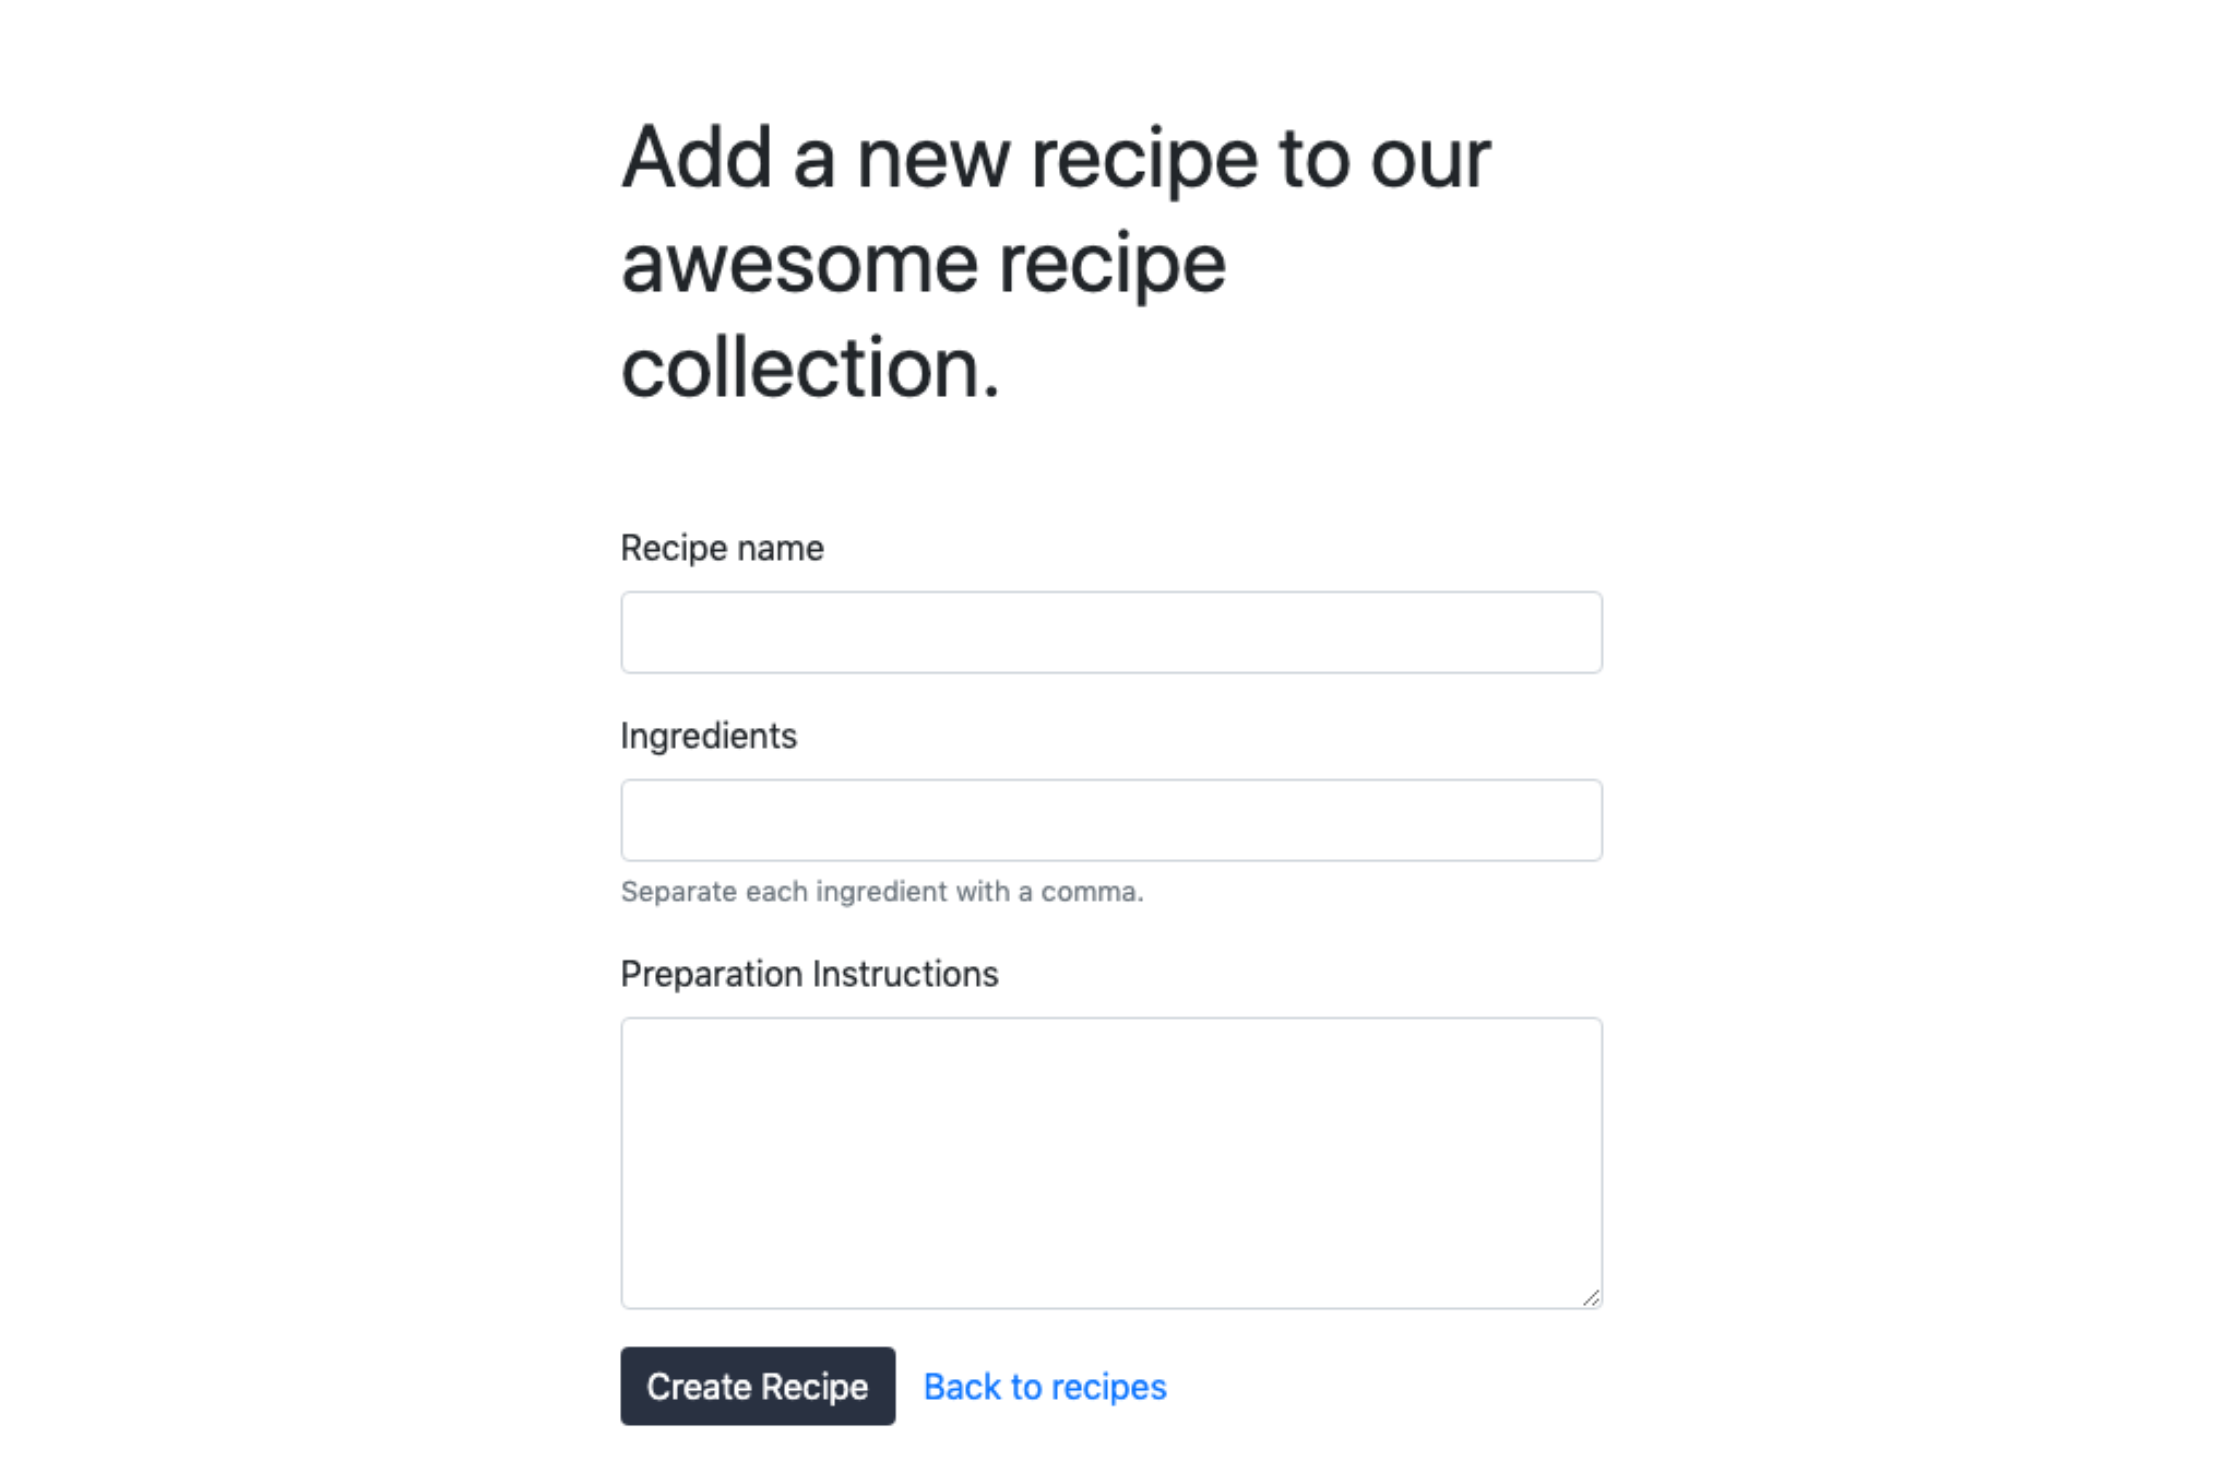
return (
<div className="container mt-5">
<div className="row">
<div className="col-sm-12 col-lg-6 offset-lg-3">
<h1 className="font-weight-normal mb-5">
Add a new recipe to our awesome recipe collection.
</h1>
<form onSubmit={onSubmit}>
<div className="form-group">
<label htmlFor="recipeName">Recipe name</label>
<input
type="text"
name="name"
id="recipeName"
className="form-control"
required
onChange={(event) => onChange(event, setName)}
/>
</div>
<div className="form-group">
<label htmlFor="recipeIngredients">Ingredients</label>
<input
type="text"
name="ingredients"
id="recipeIngredients"
className="form-control"
required
onChange={(event) => onChange(event, setIngredients)}
/>
<small id="ingredientsHelp" className="form-text text-muted">
Separate each ingredient with a comma.
</small>
</div>
<label htmlFor="instruction">Preparation Instructions</label>
<textarea
className="form-control"
id="instruction"
name="instruction"
rows="5"
required
onChange={(event) => onChange(event, setInstruction)}
/>
<button type="submit" className="btn custom-button mt-3">
Create Recipe
</button>
<Link to="/recipes" className="btn btn-link mt-3">
Back to recipes
</Link>
</form>
</div>
</div>
</div>
);
};
export default NewRecipe;
返されるマークアップには、3つの入力フィールド(recipeName、recipeIngredients、instructionそれぞれに1つずつ)を含んだフォームが含まれています。各入力フィールドには、onChangeイベントハンドラがあり、それはonChange関数を呼び出します。また、submitボタンにはonSubmitイベントハンドラが付いており、フォームデータを送信するonSubmit関数を呼び出します。
ファイルを保存して終了してください。
ブラウザでこのコンポーネントにアクセスするには、ルートファイルを更新してそのルートを追加してください。
- nano app/javascript/routes/index.jsx
下線部分を含めて、自分のルートファイルを更新してください。
「~/rails_react_recipe/app/javascript/routes/index.jsx」
import React from "react";
import { BrowserRouter as Router, Routes, Route } from "react-router-dom";
import Home from "../components/Home";
import Recipes from "../components/Recipes";
import Recipe from "../components/Recipe";
import NewRecipe from "../components/NewRecipe";

export default (
  <Router>
    <Routes>
      <Route path="/" exact component={Home} />
      <Route path="/recipes" exact component={Recipes} />
      <Route path="/recipe/:id" exact component={Recipe} />
      <Route path="/recipe" element={<NewRecipe />} />
    </Routes>
  </Router>
);
ルートが確定したら、ファイルを保存して終了してください。
開発サーバーを再起動し、ブラウザでhttp://localhost:3000にアクセスしてください。レシピページに移動し、新しいレシピボタンをクリックしてください。データベースにレシピを追加するためのフォームが表示されます。
必要なレシピの詳細を入力して、「レシピを作成」ボタンをクリックしてください。すると、新しく作成されたレシピがページに表示されます。準備ができたら、サーバーを閉じてください。
このステップでは、食事レシピアプリにレシピを作成する機能を追加しました。次のステップでは、レシピを削除する機能を追加します。
ステップ9 — レシピを削除する
このセクションでは、レシピコンポーネントを変更して、レシピを削除するオプションを追加します。レシピページで削除ボタンをクリックすると、アプリケーションはデータベースからレシピを削除するためのリクエストを送信します。
最初に、編集のためにRecipe.jsxファイルを開いてください。
- nano app/javascript/components/Recipe.jsx
「レシピ」コンポーネントに、以下のハイライトされた行を含む「deleteRecipe」関数を追加してください。
~/rails_react_recipe/app/javascript/components/Recipe.jsx
import React, { useState, useEffect } from "react";
import { Link, useNavigate, useParams } from "react-router-dom";
const Recipe = () => {
const params = useParams();
const navigate = useNavigate();
const [recipe, setRecipe] = useState({ ingredients: "" });
useEffect(() => {
const url = `/api/v1/show/${params.id}`;
fetch(url)
.then((response) => {
if (response.ok) {
return response.json();
}
throw new Error("Network response was not ok.");
})
.then((response) => setRecipe(response))
.catch(() => navigate("/recipes"));
}, [params.id]);
const addHtmlEntities = (str) => {
return String(str).replace(/</g, "<").replace(/>/g, ">");
};
const deleteRecipe = () => {
const url = `/api/v1/destroy/${params.id}`;
const token = document.querySelector('meta[name="csrf-token"]').content;
fetch(url, {
method: "DELETE",
headers: {
"X-CSRF-Token": token,
"Content-Type": "application/json",
},
})
.then((response) => {
if (response.ok) {
return response.json();
}
throw new Error("Network response was not ok.");
})
.then(() => navigate("/recipes"))
.catch((error) => console.log(error.message));
};
const ingredientList = () => {
let ingredientList = "No ingredients available";
if (recipe.ingredients.length > 0) {
ingredientList = recipe.ingredients
.split(",")
.map((ingredient, index) => (
<li key={index} className="list-group-item">
{ingredient}
</li>
));
}
return ingredientList;
};
const recipeInstruction = addHtmlEntities(recipe.instruction);
return (
<div className="">
...
deleteRecipe関数では、削除するレシピのIDを取得し、URLを構築してCSRFトークンを取得します。次に、RecipesコントローラーにDELETEリクエストを行い、レシピを削除します。もしレシピの削除が成功した場合、アプリケーションはユーザーをレシピ一覧ページにリダイレクトします。
deleteボタンがクリックされたときにdeleteRecipe関数のコードを実行するために、ボタンにクリックイベントハンドラとして渡してください。コンポーネントのdeleteボタン要素にonClickイベントを追加してください。
...
return (
    <div className="">
      <div className="hero position-relative d-flex align-items-center justify-content-center">
        <img
          src={recipe.image}
          alt={`${recipe.name} image`}
          className="img-fluid position-absolute"
        />
        <div className="overlay bg-dark position-absolute" />
        <h1 className="display-4 position-relative text-white">
          {recipe.name}
        </h1>
      </div>
      <div className="container py-5">
        <div className="row">
          <div className="col-sm-12 col-lg-3">
            <ul className="list-group">
              <h5 className="mb-2">Ingredients</h5>
              {ingredientList()}
            </ul>
          </div>
          <div className="col-sm-12 col-lg-7">
            <h5 className="mb-2">Preparation Instructions</h5>
            <div
              dangerouslySetInnerHTML={{
                __html: `${recipeInstruction}`,
              }}
            />
          </div>
          <div className="col-sm-12 col-lg-2">
            <button
              type="button"
              className="btn btn-danger"
              onClick={deleteRecipe}
            >
              Delete Recipe
            </button>
          </div>
        </div>
        <Link to="/recipes" className="btn btn-link">
          Back to recipes
        </Link>
      </div>
    </div>
  );
...
このチュートリアルのこの時点で、完全なRecipe.jsxファイルはこのファイルと一致している必要があります。
~/rails_react_recipe/app/javascript/components/レシピ.jsx
import React, { useState, useEffect } from "react";
import { Link, useNavigate, useParams } from "react-router-dom";
const Recipe = () => {
const params = useParams();
const navigate = useNavigate();
const [recipe, setRecipe] = useState({ ingredients: "" });
useEffect(() => {
const url = `/api/v1/show/${params.id}`;
fetch(url)
.then((response) => {
if (response.ok) {
return response.json();
}
throw new Error("Network response was not ok.");
})
.then((response) => setRecipe(response))
.catch(() => navigate("/recipes"));
}, [params.id]);
const addHtmlEntities = (str) => {
return String(str).replace(/</g, "<").replace(/>/g, ">");
};
const deleteRecipe = () => {
const url = `/api/v1/destroy/${params.id}`;
const token = document.querySelector('meta[name="csrf-token"]').content;
fetch(url, {
method: "DELETE",
headers: {
"X-CSRF-Token": token,
"Content-Type": "application/json",
},
})
.then((response) => {
if (response.ok) {
return response.json();
}
throw new Error("Network response was not ok.");
})
.then(() => navigate("/recipes"))
.catch((error) => console.log(error.message));
};
const ingredientList = () => {
let ingredientList = "No ingredients available";
if (recipe.ingredients.length > 0) {
ingredientList = recipe.ingredients
.split(",")
.map((ingredient, index) => (
<li key={index} className="list-group-item">
{ingredient}
</li>
));
}
return ingredientList;
};
const recipeInstruction = addHtmlEntities(recipe.instruction);
return (
<div className="">
<div className="hero position-relative d-flex align-items-center justify-content-center">
<img
src={recipe.image}
alt={`${recipe.name} image`}
className="img-fluid position-absolute"
/>
<div className="overlay bg-dark position-absolute" />
<h1 className="display-4 position-relative text-white">
{recipe.name}
</h1>
</div>
<div className="container py-5">
<div className="row">
<div className="col-sm-12 col-lg-3">
<ul className="list-group">
<h5 className="mb-2">Ingredients</h5>
{ingredientList()}
</ul>
</div>
<div className="col-sm-12 col-lg-7">
<h5 className="mb-2">Preparation Instructions</h5>
<div
dangerouslySetInnerHTML={{
__html: `${recipeInstruction}`,
}}
/>
</div>
<div className="col-sm-12 col-lg-2">
<button
type="button"
className="btn btn-danger"
onClick={deleteRecipe}
>
Delete Recipe
</button>
</div>
</div>
<Link to="/recipes" className="btn btn-link">
Back to recipes
</Link>
</div>
</div>
);
};
export default Recipe;
ファイルを保存し、終了してください。
アプリケーションサーバーを再起動し、ホームページに移動してください。すべての既存のレシピにアクセスするために「レシピを表示」ボタンをクリックし、その後、任意のレシピを開いて「レシピを削除」ボタンをクリックして記事を削除してください。削除したレシピは存在しなくなり、レシピページにリダイレクトされます。
削除ボタンが機能するようになりましたので、完全に機能するレシピアプリを手に入れました!
結論
このチュートリアルでは、Ruby on RailsとReactフロントエンドを使用して、食品レシピアプリケーションを作成しました。データベースにはPostgreSQLを使用し、スタイリングにはBootstrapを使用しました。もしRuby on Railsでの開発を続けたい場合は、SSHトンネルを使用した三層Railsアプリケーションのセキュリティ通信のチュートリアルを参考にするか、Rubyのスキルをリフレッシュするために当社のRubyコーディングシリーズをご覧ください。Reactについてさらに深く学びたい場合は、Silicon Cloud APIを使用してデータを表示する方法を解説するReactチュートリアルを試してみてください。

