How can I utilize PhotoRec to retrieve erased files?
Did you delete files or photos by mistake? In this guide, we will discover how to retrieve deleted files in Linux by employing PhotoRec. In a previous tutorial, we covered the process of recovering deleted files with TestDisk, and PhotoRec is a tool developed by the same company. Now, let us explore how to utilize PhotoRec for file recovery.
Could you provide a native paraphrase?
A company called CGSecurity developed TestDisk for the purpose of recovering erased partitions, while PhotoRec was specifically designed for restoring media files that were deleted from SD cards and similar portable storage devices. Hence, the name “PhotoRec” stands for “Photo Recovery”. However, it is worth mentioning that PhotoRec is not limited to just media files and can be utilized for recovering other types of files as well.
How can files be restored in Linux using PhotoRec?
To start, we must install PhotoRec on our Linux system. The software is bundled together with the testdisk utility, rather than being available as an independent package.
1. The process of setting up PhotoRec on a Linux operating system.
To perform the installation of PhotoRec, execute the command provided below:
sudo apt -y install testdisk
After finishing the installation, you can initiate the download and execution of the Photorec utility by utilizing the provided command.
sudo photorec
Start the scanning process for deleted files by running PhotoRec.
I have generated a random image file for this demonstration and then deleted it. Now, we will proceed to restore the deleted file.

To begin, launch PhotoRec in our terminal. For simplicity, go to the specific directory in which you intend to recover files before executing the command.
sudo photorec
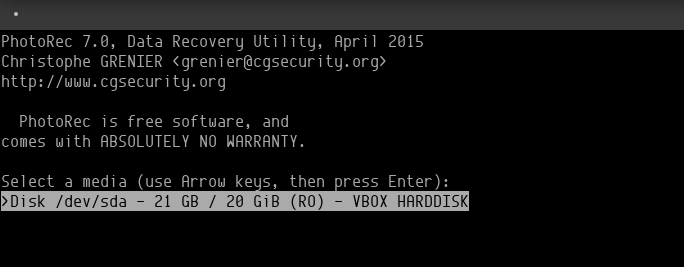
After launching PhotoRec, choose the desired hard drive to initiate the restore process by pressing the enter key.
You will be prompted to choose the partition on which you wish to initiate the recovery procedure.

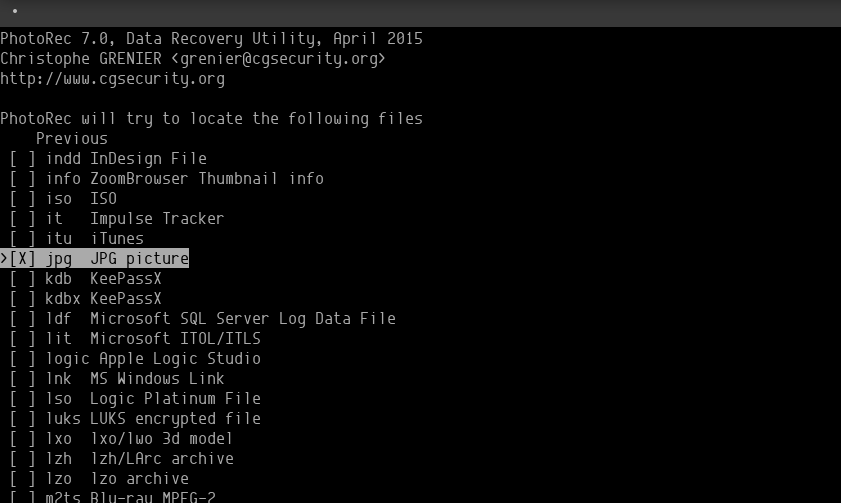
Before continuing, ensure that you choose the file format from the file options menu available on the partition selection screen.
Since we are aware that we only need our JPG file, I have chosen that specific format. Anything else is redundant and will only result in additional time consumption. Please select the desired file type and continue.
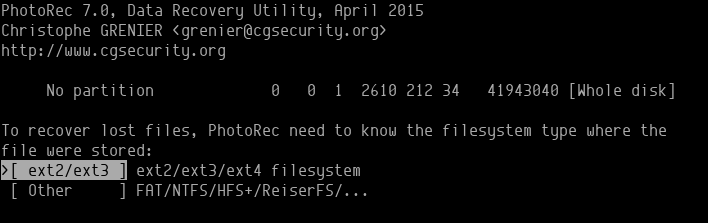
We now need to choose the partition type, which we will select as ext4.
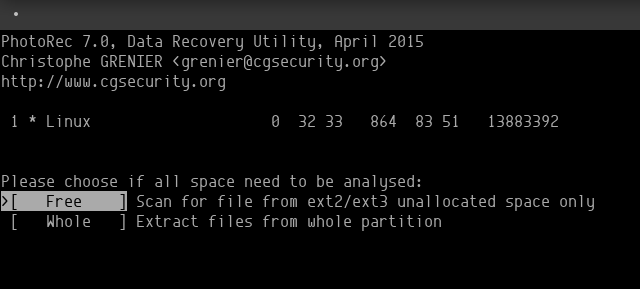
Choose whether you want the utility to only consider free sectors or the entire drive.
You may have observed that I was in the ~/Desktop directory when I executed the command.
By default, the command will begin searching here unless you go to a particular directory on the next screen.

After selecting the desired folder, press the letter C to initiate the program’s file searching process.
3. Recovered files being restored.
Awesome! Everything is ready for us to use PhotoRec to recover deleted files. The duration of the process will vary depending on the number of file types you have chosen.
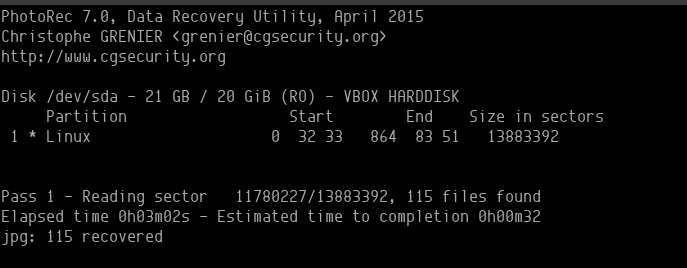
During the recovery process, a folder called “recup_dir” will be created to restore all the retrieved files. It is possible to access the files in this folder while the recovery is still ongoing.
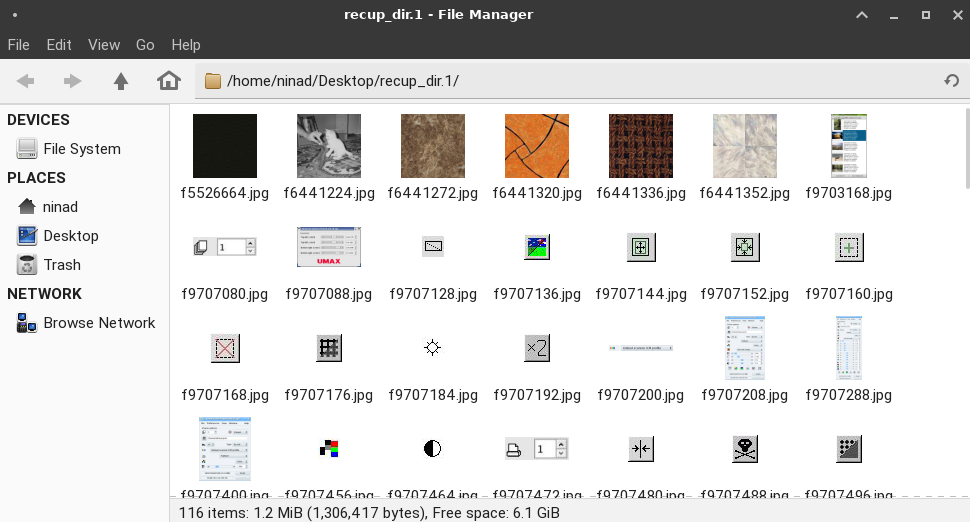
Excellent, we now have a comprehensive list of the files we previously eliminated. In this collection, you can search for the specific file you desire as PhotoRec does not restore the original filenames.
What is the reason behind the functionality of data recovery?
Have you ever observed the difference in duration when saving a file on the hard disk compared to deleting one? Let’s delve into understanding that concept initially.
When you save information on your hard drive, it gets stored in blocks where each block holds a portion of the data. Normally, the initial block holds the file’s metadata. Each data block is written sequentially at the speed of the hard drive.
However, when we delete a file, only the initial block containing the file’s metadata is removed. As a result, the operating system is unable to locate the file as its metadata is gone, and therefore treats the blocks as available for storing new information.
Recovery tools play a crucial role in situations like these as they aim to restore the accessible metadata to be read by the operating system.
The hard drive sectors are read individually and sequentially, and the recovery tools identify related blocks. Once all the related blocks are identified, the metadata is reconstructed by the recovery utilities.
This is how you can restore a file that has been deleted.
The functioning process of PhotoRec
Similar to other software for recovering deleted files, PhotoRec examines sectors of data on the hard drive in order to determine the size of the data. After identifying the data size and confirming that the hard drive and data itself are still intact (not fragmented or overwritten), PhotoRec commences the recovery procedure by searching for neighboring data blocks and reconstructing their metadata.
The utility will save all files that are found in a folder since it cannot search for a specific file. Afterward, you can go through the files and recover the one you need.
Once the process is complete, you will have the opportunity to restore all the files that remained on your hard drive.
In summary
I trust you have successfully utilized PhotoRec for file recovery on your Linux system. In case PhotoRec was ineffective for you, there are numerous alternative utilities you can explore.
Here is a compilation of the best 20 data recovery tools for Linux. I am confident that you will discover the perfect option to meet your specific requirements!
More Tutorials
A native guide to the atop command in Linux(Opens in a new browser tab)
Learn how to automate repetitive tasks using Makefiles.(Opens in a new browser tab)
multithreading in Java that you need to know(Opens in a new browser tab)
Tutorial on web services using AXIS2(Opens in a new browser tab)
Step-by-step Guide: Installing Rust on Ubuntu 20.04(Opens in a new browser tab)

