Creating an Android button using both Kotlin and XML.
In this lesson, we will explore the process of constructing a Button in Android applications using Kotlin programming.
Overview of Android Buttons
The Android Button class is an extension of TextView and serves as a user interface element. It is employed to collect click interactions from the user in order to initiate an action within the application. Both the XML layout and the Kotlin Activity class in the Android Studio Project can be utilized to create a button.
Designing a button in an XML layout.
<Button
android:id="@+id/button"
android:layout_width="wrap_content"
android:layout_height="wrap_content"
android:text="Androidly Button"/>
- android:id is used to set the unique identifier on the Button.
- The android:text is used to set the text inside the button. By default text is displayed in capital letters.
- android:onClick is used to define the Kotlin function to be invoked in the activity when the button is clicked. It is a click listener.
- The android:background is used to set the background color/drawable on the Button.
Tip: Use the attribute android:textAllCaps=”false” to avoid displaying all letters in capital letters.
To find more information on modifying your Buttons within XML Layout, check out the Android Buttons Tutorial.
Listeners for button clicks.
We also have the option to programmatically set button listeners. There are two main listeners available:
-
- setOnClickListener is activated when a button is tapped.
- setOnLongClickListener is activated when a button is held down for a prolonged period.
The button in the code snippets has the setOnClickListener assigned to it.
button.setOnClickListener(object : View.OnClickListener {
            override fun onClick(v: View?) {
                //your implementation goes here
            }
        })
The code provided above can be transformed into a lambda expression to reduce its length.
button.setOnClickListener {
      textView.text = "Androidly Buttons"
    }
In the same way, we can define a setOnLongClickListener as follows.
button.setOnLongClickListener {
        textView.text = "Androidly Button Long click"
        true
    }

//or
button.setOnLongClickListener {
        textView.text = "Androidly Button Long click"
        false
    }
The return statement is the last statement in each of the expressions in the provided code.
- If the setOnLongClickListener returns true, it means that the setOnClickListener won’t be triggered.
- If the setOnLongClickListener returns false, it means that the setOnClickListener will be triggered.
This is referred to as event consumption. The initial scenario involves consuming the event.
Creating an Android button by utilizing Kotlin.
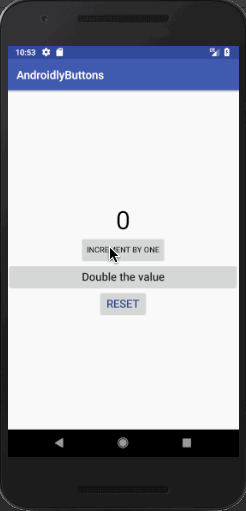
We will create an application in Kotlin that increases the counter of the TextView whenever the Button is clicked. Additionally, we will explore various methods for handling Button clicks.
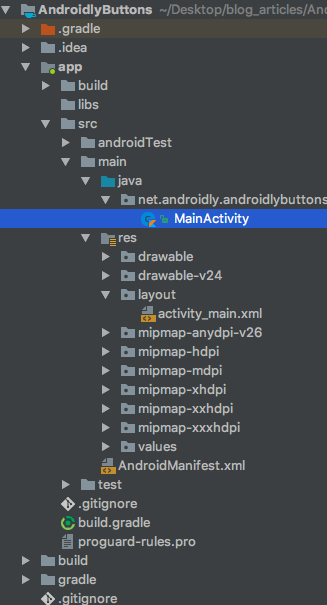
1. Structure of the project
2. Code for a Button in Kotlin
The code for the activity_main.layout file appears as follows.
<?xml version="1.0" encoding="utf-8"?>
<LinearLayout xmlns:android="http://schemas.android.com/apk/res/android"
android:id="@+id/linearLayout"
android:layout_width="match_parent"
android:layout_height="match_parent"
android:gravity="center"
android:orientation="vertical">
<TextView
android:id="@+id/txtCounter"
android:layout_width="wrap_content"
android:layout_height="wrap_content"
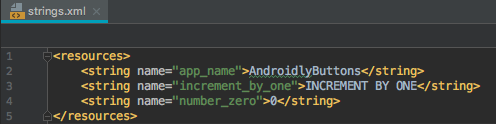
android:text="@string/number_zero"
android:textAppearance="@style/TextAppearance.AppCompat.Display2"
android:textColor="#000" />
<Button
android:id="@+id/btnIncrementByOne"
android:layout_width="wrap_content"
android:layout_height="wrap_content"
android:onClick="addOne"
android:text="@string/increment_by_one" />
</LinearLayout>
package net.androidly.androidlybuttons

import android.support.v7.app.AppCompatActivity
import android.os.Bundle
import android.support.v4.content.ContextCompat
import android.view.View
import android.view.ViewGroup
import android.widget.Button
import android.widget.LinearLayout
import kotlinx.android.synthetic.main.activity_main.*

class MainActivity : AppCompatActivity(), View.OnClickListener {

    override fun onCreate(savedInstanceState: Bundle?) {
        super.onCreate(savedInstanceState)
        setContentView(R.layout.activity_main)

        var androidlyButton = Button(this)
        androidlyButton.apply {
            layoutParams = LinearLayout.LayoutParams(LinearLayout.LayoutParams.MATCH_PARENT, ViewGroup.LayoutParams.WRAP_CONTENT)
            text = "Double the value"
            setAllCaps(false)
            textSize = 20f
            id = R.id.btnDouble
        }

        androidlyButton.setOnClickListener(this)
        linearLayout.addView(androidlyButton)

        androidlyButton = Button(this)
        androidlyButton.apply {
            layoutParams = LinearLayout.LayoutParams(LinearLayout.LayoutParams.WRAP_CONTENT, ViewGroup.LayoutParams.WRAP_CONTENT)
            text = "RESET"
            textSize = 20f
            setTextColor(ContextCompat.getColor(this@MainActivity, R.color.colorPrimaryDark))
            id = R.id.btnReset
            setOnLongClickListener {
                txtCounter.text = 0.toString()
                true
            }
        }
        androidlyButton.setOnClickListener(this)
        linearLayout.addView(androidlyButton)

    }

    override fun onClick(v: View?) {
        when (v?.id) {
            R.id.btnDouble -> {
                txtCounter.text = (txtCounter.text.toString().toInt() * 2).toString()
            }
            R.id.btnReset -> {
                txtCounter.text = (-100).toString()
            }
            else -> {
            }
        }
    }

    fun addOne(view: View) {
        txtCounter.text = (txtCounter.text.toString().toInt() + 1).toString()
    }
}
Key points:
-
- The import statement kotlinx.android.synthetic.main.activity_main.* automatically retrieves the view IDs from the xml in our class, eliminating the need for findViewById.
The function addOne(view: View) is activated when the btnIncrementByOne is clicked. The parameter (view: View) must be declared in the function.
To create a Button programmatically and place it in the parent view (in this case, LinearLayout), you can use the following code:
var androidlyButton = Button(this)
linearLayout.addView(androidlyButton)
Instead of using member functions on the Button class, we can utilize the apply{} lambda expression.
The layoutParams is utilized to specify the width and height of the button. MATCH_PARENT sets the width/height to be equal to the linear layout, while WRAP_CONTENT adjusts the view size based on the content.
You can programmatically set the id under res | values | ids.xml.
We have defined the View.OnClickListener interface in our MainActivity.kt class, so we need to override its onClick() function.
Inside the onClick function, we use the Kotlin when statement, which serves as an equivalent to switch in other languages.
To trigger the onClick function, you need to register the setOnClickListener over the button with the interface using the context(this).
Get the AndroidlyButtons project downloaded.
More tutorials
Toggle button in Android(Opens in a new browser tab)
Interview Questions and Answers specifically about Android(Opens in a new browser tab)
Progress Bar iOS also known as Progress View(Opens in a new browser tab)
Creating an Android Spinner by utilizing Kotlin.(Opens in a new browser tab)
Using Kotlin Android SharedPreferences(Opens in a new browser tab)

