1-Click Install feature on Silicon Cloud when utilizing the Docker
The beginning part of something
Docker is a platform that was designed to assist developers in creating, expanding, and running their applications consistently by separating their application from its infrastructure and requirements. Primarily, Docker is a software that handles application processes in container abstractions, utilizing virtualization at the operating system level to provide software in complete, standalone images. Docker is extensively employed for both application development and deployment purposes.
This tutorial is most suitable for individuals who desire to utilize Docker and have multiple containers on a single vServer.
This guide will walk you through the process of setting up a Silicon Cloud vServer with pre-installed Docker and Docker Compose. You can achieve this by using the Silicon Cloud Docker 1-Click App. Once your vServer is created, we will lead you through various use cases and frequently used Docker commands. Since this 1-Click vServer is built on a standard Ubuntu 20.04 vServer, you can explore any of our Docker tutorials on your newly created vServer once you complete this guide.
Included software
By the conclusion of this tutorial, you will possess a Ubuntu 20.04 vServer that includes the mentioned enhancements achieved via the Docker 1-Click feature.
- Docker CE (version 20.10.7): Docker CE or Docker Community Edition is one of the fastest ways to get started with Docker and is ideal for developers and small-to-medium businesses who want to experiment with container-based applications.
- Docker Compose (version 1.27.0): Docker Compose is a tool to help developers define and share multi-container applications. With Compose, you can use a YAML file to define the services you need and spin these up (or tear them down) with a single command.
Aside from installing the package, this 1-Click option also manages:
- Configuration of Docker following the official Docker recommendations
- Configuration of Docker Compose followingthe official Docker Compose recommendations
At the time of writing, this 1-Click method will install Docker Compose v1, which employs docker-compose. However, Docker has shifted to using the compose CLI plugin command with Docker Compose v2, as mentioned in our latest Ubuntu 22.04 version of this guide. This change has led to a departure from the familiar docker-compose. Despite the installation discrepancy, the actual usage simply requires removing the hyphen from docker-compose calls to become docker compose. For complete compatibility information, refer to the official Docker documentation regarding command compatibility between the new compose and the old docker-compose.
First step—Generating a Docker vServer.
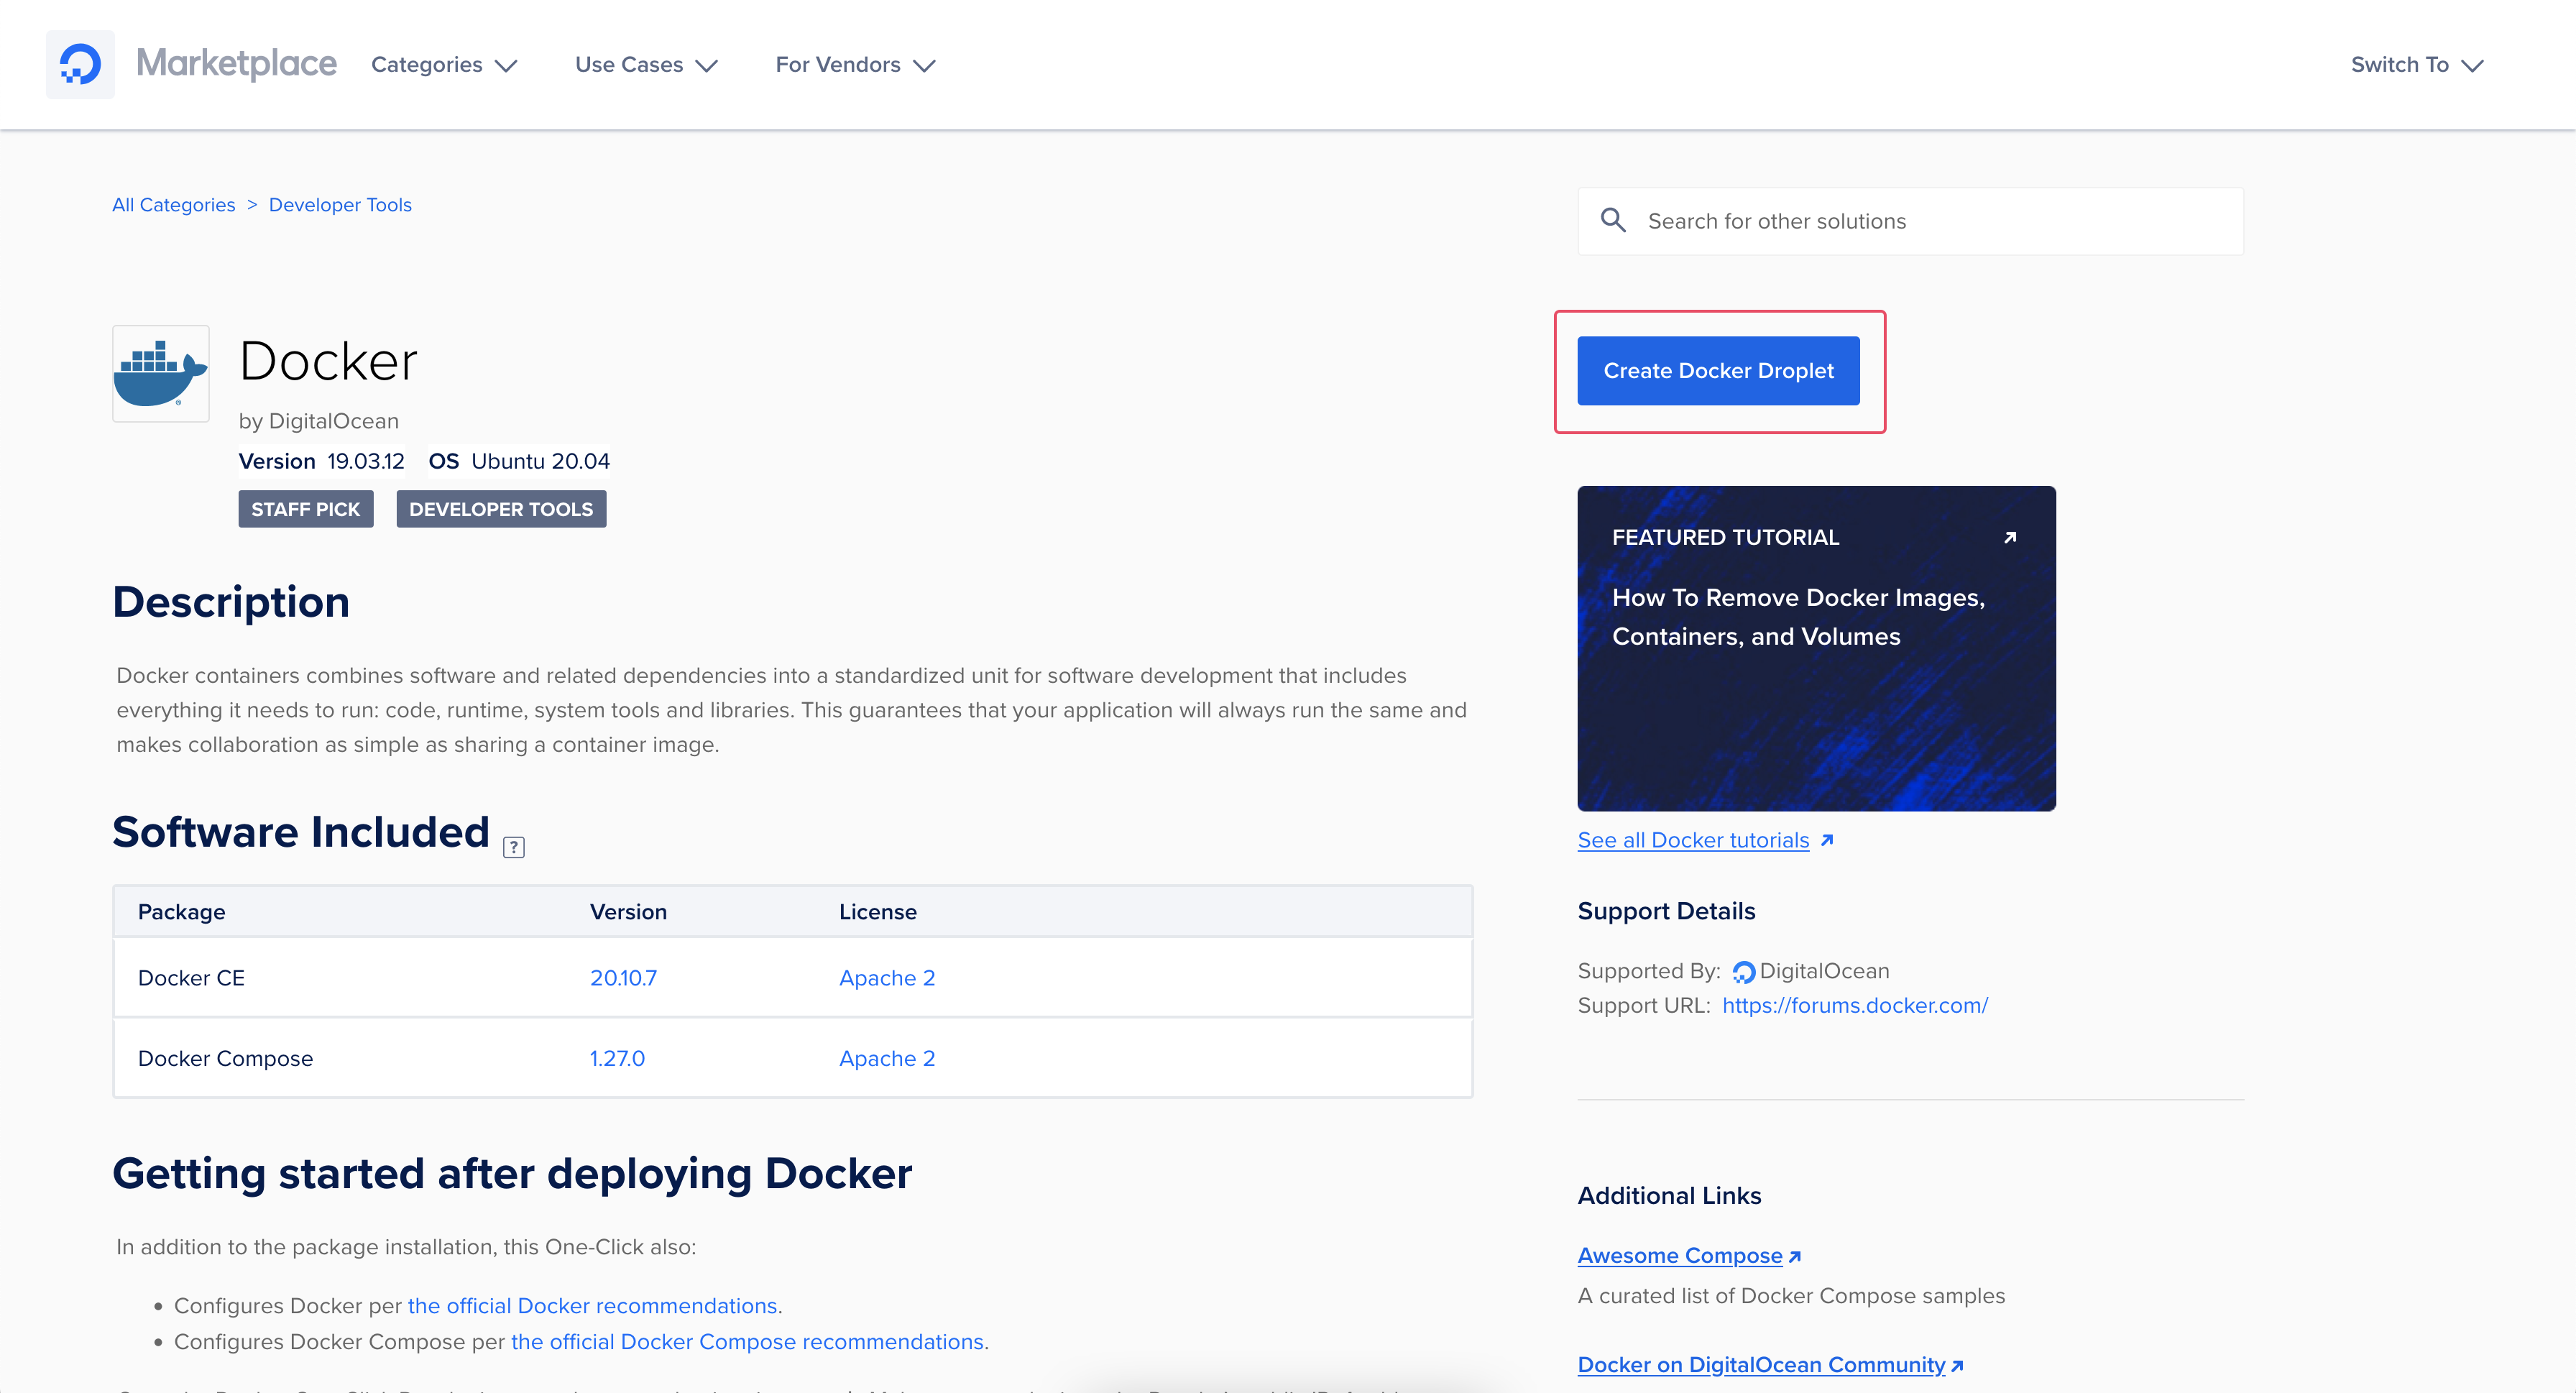
To begin, you can create a Docker vServer using the Docker 1-Click feature on our Marketplace. This will direct you to the Silicon Cloud control panel. Alternatively, you have the option to create the Docker vServer using the Silicon Cloud API, but that aspect won’t be extensively discussed in this tutorial.
Simply click the button labeled “Create Docker vServer” to generate a Docker vServer using the Docker 1-Click App.
If you are not logged in to your Silicon Cloud account, you will be required to log in to continue from this point. If you do not have an account, you will be asked to create one.
After this, you will be directed to the page for creating vServers. On this page, you have the option to personalize your server settings before making your Docker vServer. The process of creating your initial vServer is described in detail in the guide “How to Create your First vServer,” but highlighted below are the crucial settings you should take into account.
Picking a picture:
If your image is not already set to the Marketplace tab with Docker selected, please switch to the Marketplace tab and search for Docker in the search keyword box. Once properly set, your control panel will resemble the provided example.
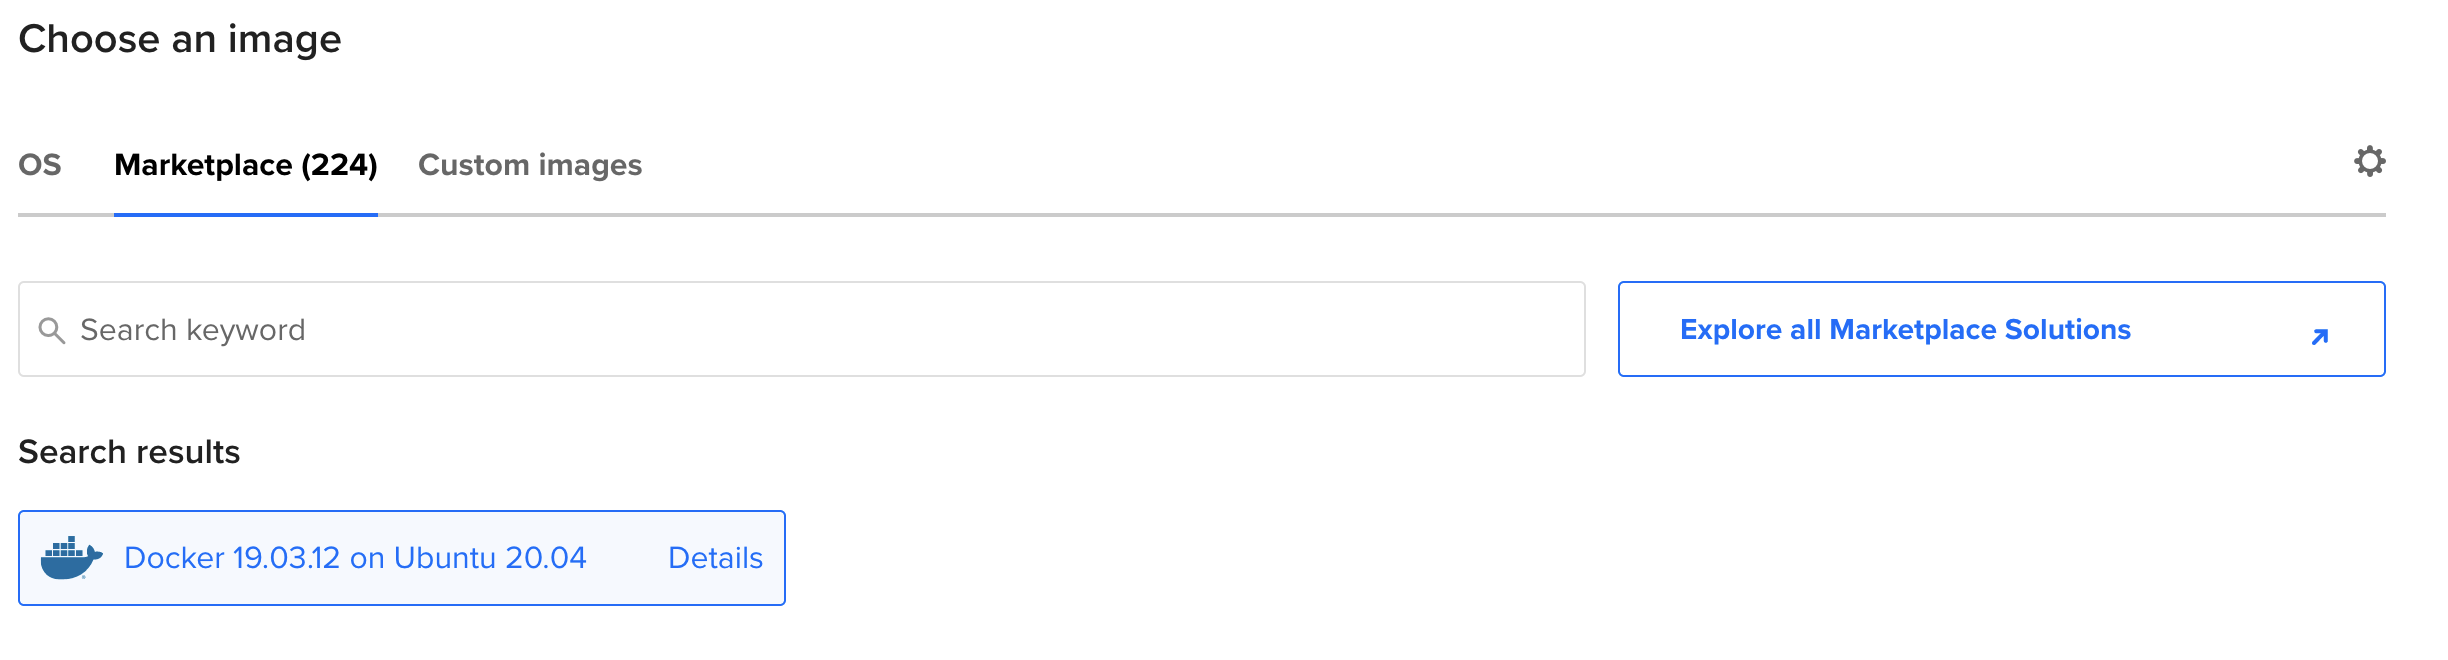
If Docker version 19.03.12 is not chosen on Ubuntu 20.04, simply utilize the search box to locate Docker.
After selecting the correct Docker image, you have the option to keep the defaults or modify the settings based on your specific needs. Generally, we suggest the following adjustments:
Deciding on a region for the datacenter.
To reduce any possible delays, it is advisable to choose a datacenter region that is nearest to your users. In certain regions, we have multiple datacenters, but there is no distinction between them within the same region. For example, SFO3 and SFO2 are identical in terms of their capabilities.
Deciding on a strategy.
It is advisable to have a minimum of 1GB of RAM for running a vServer with Docker.
Deciding on an Authentication Approach.
Using SSH Keys for authentication is typically more secure and recommended, instead of using a password for your vServer.
Choosing extra selections.
Enabling enhanced metrics monitoring and alerting on your droplet allows you to track the usage of your vServer resources over a period. You should also contemplate activating automated backups. Moreover, if you have already created vServers, you can return later to activate the backup feature.
Deciding on a hostname:
You have the option to assign a distinctive name to your vServer for better recollection, for example, “Docker vServer 1” or naming it according to the application it will be utilized for.
Once all your selections have been made, simply click on the “Create vServer” option located at the bottom of the Control Panel screen. Once the vServer has been created, its IP address will be shown.

This IP address is crucial for establishing a connection to your vServer and for any future configurations you may require. By hovering over the IP address, you have the option to conveniently copy it to your clipboard.
By selecting Get started, you can access additional resources that accompany the droplets created via the 1-Click Marketplace.

Once activated, a fresh panel will be displayed allowing you to access extra customized information regarding your selected 1-Click option. This encompasses a summary, detailed instructions for initiating your droplet, and access to related tutorials on our Community site. Additionally, you will find valuable links directing you to support channels and additional Docker resources.
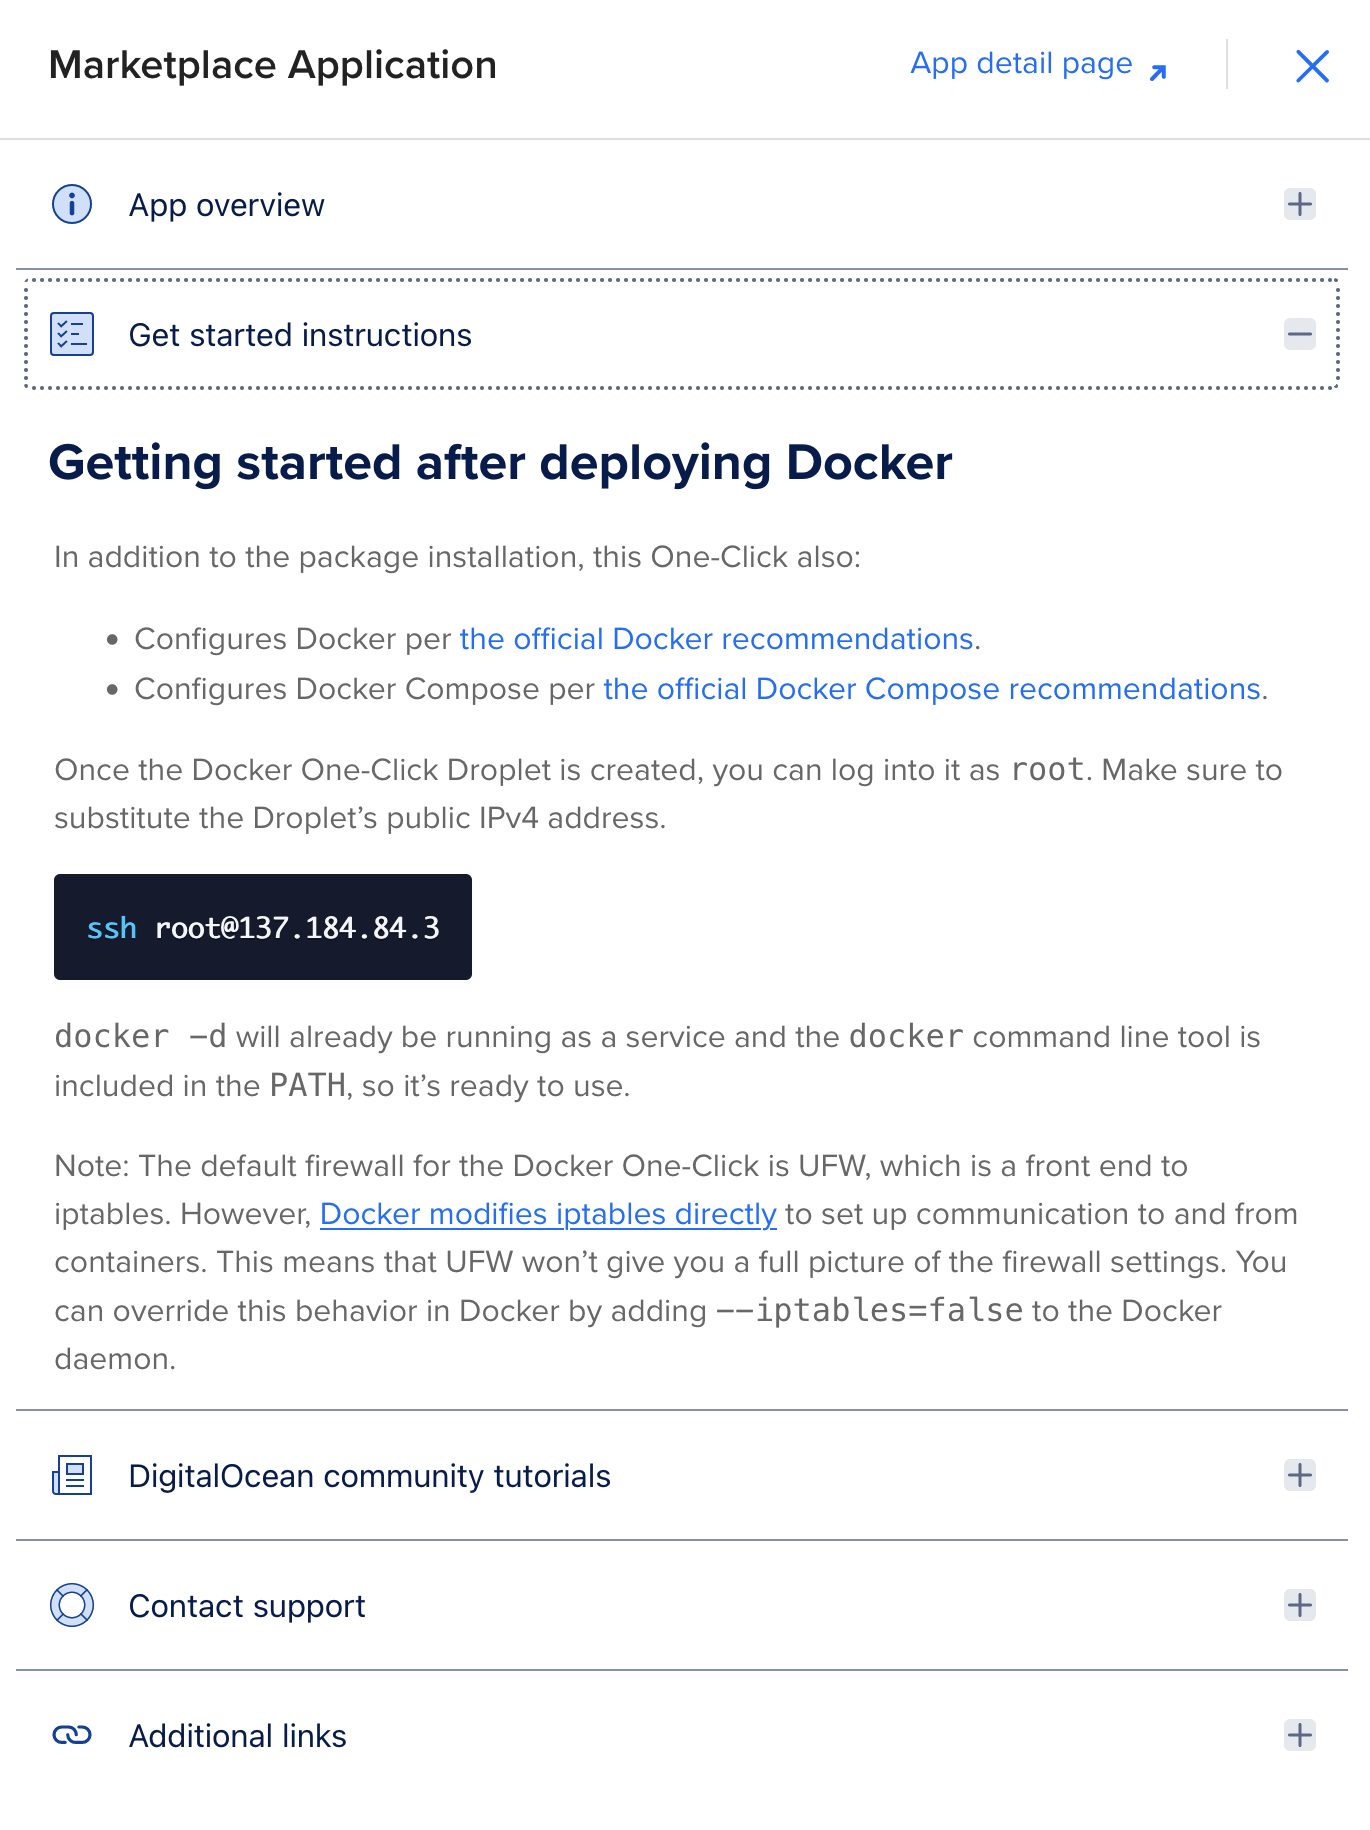
Next, proceed to SSH into the vServer in order to enable configuration.
After setting up your Docker vServer, you will be required to establish a connection to your vServer through SSH. This involves connecting to the server using the command line. If you are unfamiliar with terminal programs such as SSH or PuTTY, you can refer to the guide “How To Connect To Your vServer with SSH”. Once you are prepared, open a terminal on your computer and log into your vServer as the root user via SSH using the provided command, replacing the IP address with the actual IP address of your vServer.
- ssh root@your_server_ip
In Step 3, you will learn how to utilize Docker and generate your initial container.
Once your Docker vServer is operational, you can begin your work with Docker. Use the given command to display a roster of both active and inactive Docker containers.
- docker ps -a
CONTAINER ID IMAGE COMMAND CREATED STATUS PORTS NAMES
Since this vServer and Docker installation are new, your collection of containers will be empty. To initiate your learning process and create your initial container, you may refer to Step 3 of the “How To Install and Use Docker on Ubuntu 20.04” tutorial. This tutorial will assist you in comprehending Docker images and crafting an application container.
If you want more details about utilizing Docker, you can refer to tutorials like How To Delete Docker Images, Containers, and Volumes.
Step 4: If desired, you have the option to create a new user and make necessary adjustments to permissions and firewalls.
Your vServer will have a default root user, but you can choose to create a new user with administrative privileges using sudo. Our tutorial, Initial Server Setup with Ubuntu 20.04, provides further security recommendations including this option. If you prefer using Docker with the new user, we suggest following Step 2 of the How To Install and Use Docker on Ubuntu 20.04 guide for more efficient execution of Docker commands.
This vServer is equipped with UFW firewall, already set up. By default, it allows external access via ports 22 for SSH, as well as ports 2375 and 2376 for Docker. If you do not require external access to the Docker process, you have the option to close these ports in your firewall.
Furthermore, although UFW serves as a user interface for the underlying iptables firewall, Docker directly edits iptables to establish connectivity with containers. Consequently, UFW does not provide a comprehensive overview of the firewall configurations. Nonetheless, you can alter this functionality in Docker by appending –iptables=false to the Docker daemon.
In conclusion,
Now that your Docker 1-Click vServer is active and operational, the true potential of containers is visible when real applications are deployed in them. Below, you will find a selection of tutorials that demonstrate popular use cases. All these tutorials can be easily followed using the Docker and Docker Compose software already installed on your system.
- Docker Compose with Node.js: Node.js is a runtime for the JavaScript programming language, and is useful in the development of many applications.
- Docker Compose with WordPress: WordPress is a popular solution for hosting your own website.
- Docker Compose with Laravel: Laravel is a powerful framework to build websites using the PHP language.
- Docker Compose with Nginx: Nginx is a popular web server and reverse proxy server.
If you want to expand your knowledge on Docker, feel free to explore the numerous tutorials we offer. Additionally, if you’re keen on delving into container technology beyond Docker, container orchestration can be a great area of focus. A tutorial that may interest you is the one on creating optimized containers for Kubernetes, as it frequently utilizes containers in conjunction with Kubernetes.
more tutorials
one-click installation feature of Ruby on Rails on Silicon Cloud.(Opens in a new browser tab)
multithreading in Java that you need to know(Opens in a new browser tab)
sudo for new user with privileges on Rocky Linux 8(Opens in a new browser tab)
Beginners can find a tutorial on Java web applications.(Opens in a new browser tab)
Frequently Asked Questions about Writing for Donations(Opens in a new browser tab)

